You may not know this about us yet, but when we were house shopping, we were actually looking for a home half the size of this one.
We had just moved from New Zealand back to the U.S. One reason we were looking for a smaller house was simply because we got used to living in smaller spaces (and we liked it). Another reason was because we knew housing was (and is) expensive in southern California, and we figured we could only afford a smaller home.
It’s a crazy story (which I’d love to tell you sometime!), but this house basically sat on the market for months…just waiting for our little family to come give it some love. They had dropped the price over $100k and still…no one wanted it. The only reason it even popped up on our radar was because they kept dropping the price and it finally dropped down into our search range.
All that to say, a master bedroom with an additional seating area (with a fireplace!) was aaaaaaaaaaaaabsolutely not on our list. By any stretch of the imagination.
We’d never had a master sitting area before. Whether it was in our favorite flat in New Zealand or even our first American house after getting married, there’d always been just enough room to fit our bed and two side tables. Period.
OUR NEW MASTER BEDROOM
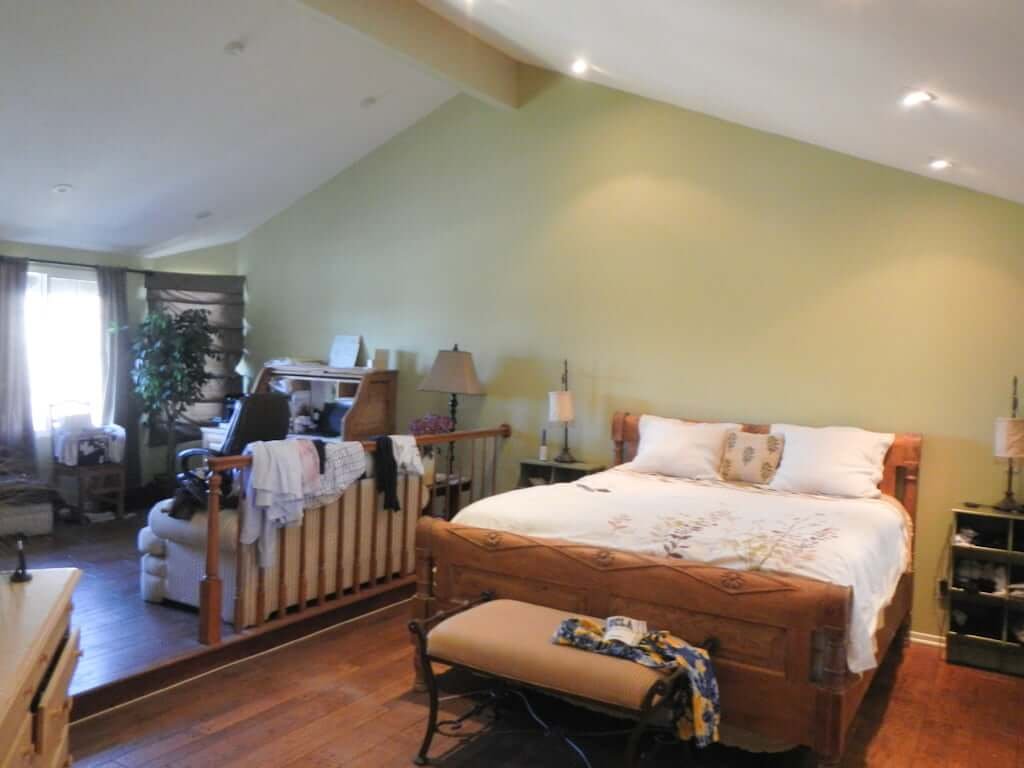
But upon my first viewing of this California house, I walked in to see this:
Matt had actually already been through the house once, with our realtor but without me. I’d recently given birth to our first child and was perfectly content in our little one-bedroom apartment. I’d basically told him, “I’m done looking for houses. If you want to look, knock yourself out! Just don’t call me unless it’s a must-see. Thank you and goodbye.” (Well, I didn’t say goodbye to him, but I did say goodbye to the RMLS.)
Long story shortened, we became the owners of this house…
…and THIS was the railing my eyes zeroed in on with my missile lock-on system. (Yep, my eyes have a missile locking system for various design targets. Really, the government should use me as a superpower. Unfortunately they can’t afford me.)
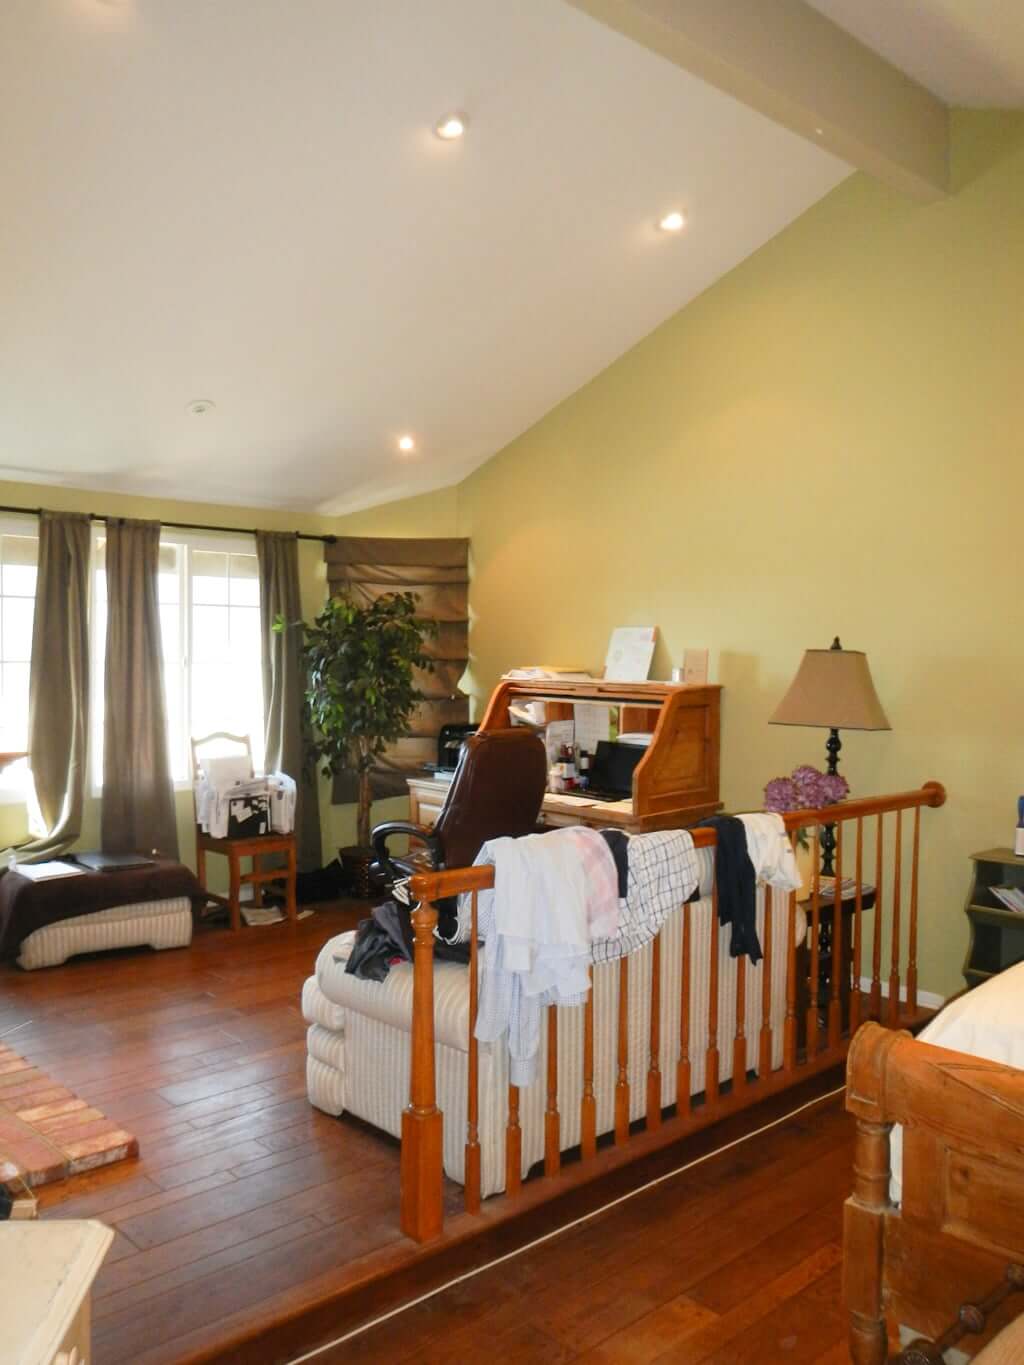
Can’t you just imagine how much more it would open up the room to remove that railing?
Aren’t you just yearning to get it out of that picture?
Don’t you feel the urge to rip it out?
Us too, my friend. Us too.
WHY I WANTED TO REMOVE THE RAILING
As you can see, the bedroom is divided into two sections:
1. Area for bed and side tables.
2. Sitting area with fireplace.
Now, I realize it may not be considered “a sitting area” for everyone. (The prior owners had a desk up there and so I suppose, for some people, it could be an office. Us? We like to keep work separate from where we sleep.) However, because the original architects drew up these house plans with a fireplace there, it seems logical that they intended it to be used as a sitting area, just as they designed the downstairs fireplace room to be a sitting area.
While I can see how one might want to construct a railing there in that spot to clearly delineate between the two aforementioned bedroom areas, I wasn’t convinced we wanted it to stay there. (Some of the other homes in our area actually have a full half-wall constructed there instead of the railing.) I appreciate this desire to visually separate the spaces, but I also appreciate flexibility.
Without the railing there, we would have
1. More flexibility in both the bedroom layout and the sitting area layout.
With the railing there, you’re forced to have just one entry and exit to the master sitting area from the bedroom. That would affect both our bedroom furniture placement options as well as our sitting area layout options.
Without the railing, our possibilities would expand at least trifold. (PS: I’m always extra excited when I get to use the word trifold. TRY it sometime. Heh heh. Matt’s usually the pun master, but sometimes they slip out of me too. Is this what happens when you’ve been together for decades? Goodness.)
2. Less visual clutter.
I’ve written before about my heightened awareness of visual clutter. This railing definitely ranks on the “busy” scale with its details and number of vertical lines happening.
3. Easy access between the sitting room and the bedroom.
Without the railing, there’d be a much more open flow to the room. We’d be able to walk openly between the sitting area and the bedroom area. There’d be no extra barriers. The pros far outweighed any cons from our perspective.
Some might want a clear delineation between where they sleep and where they sit (or work, as these prior homeowners used it). However, I cannot hear these people talking and telling me all their reasons it’s there or why it should be left there…
…because all I can see and hear is a vision of classical music playing over the utter and complete demolition of said railing.
REMOVING THE WOOD RAILING.
So what could Matt and I do to remove this railing? What was involved?
Well, it just so happened that before we moved in, we were having a lot of work done to the house first. Before it was ready for us to move in, it needed some major work done, including (but not limited to) reroofing the house, replacing the HVAC system, painting the interior, and—drumroll—refinishing all the upstairs hardwood floors! (Which was in the three upstairs bedrooms. The fourth bedroom is downstairs.)
Thankfully, that meant we were in the perfect position (and at the perfect time) to be discussing this wood railing removal! We simply needed to remove the wood railing and then have the floor refinishers fix any holes or damage left after its removal.
(While we discussed it professionally, really my brain was thinking, “I don’t care how it’s taken out. I don’t care if you cut it out carefully with a saw or whether you rip it out with your bare hands. It just needs to disappear into the night!”)
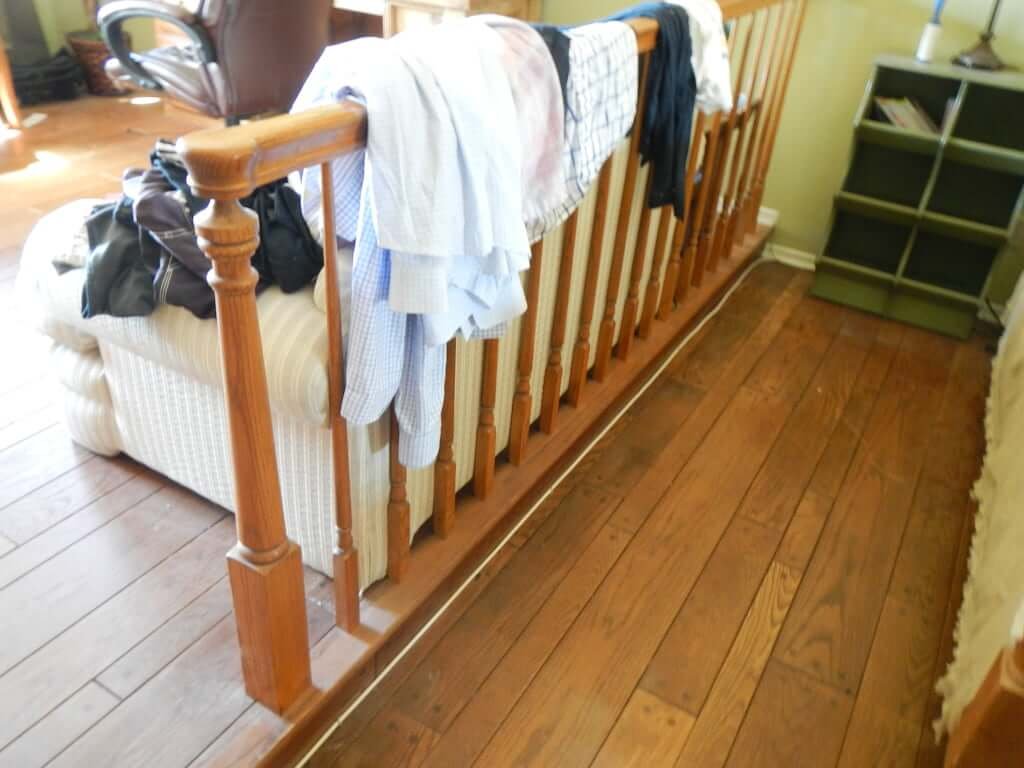
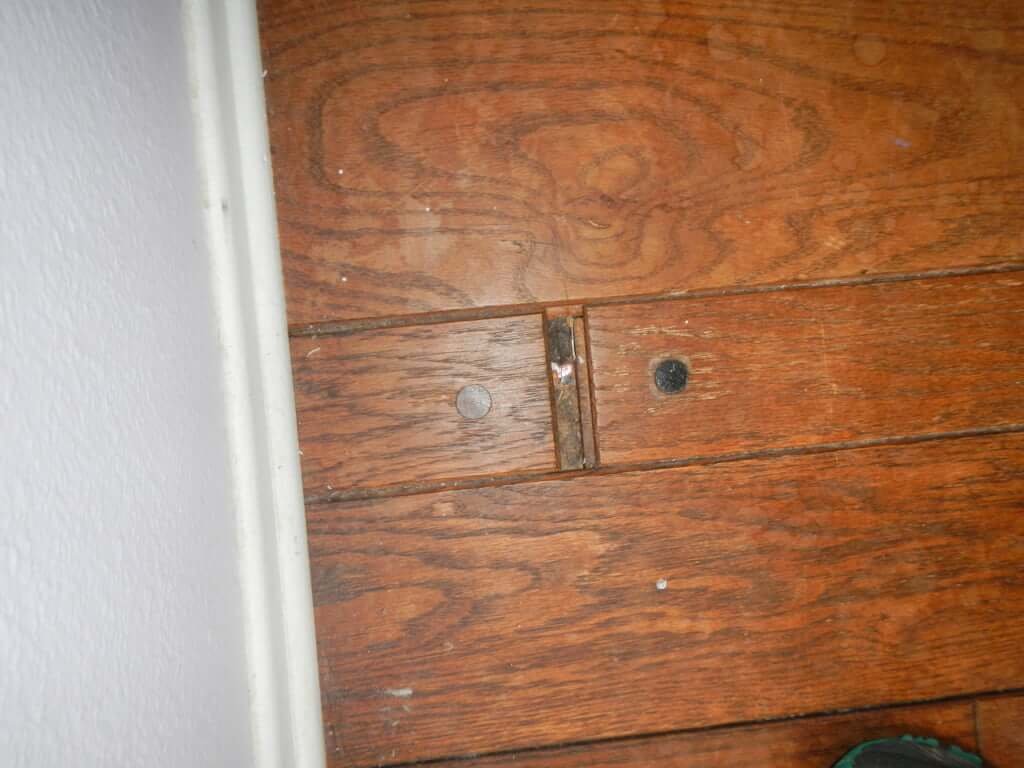
As you can see, the floor refinishers already had some spots that would need their attention. Lots of fixes to work in; why not throw in a railing removal?
WHY WE WANTED A DARK STAIN ON THESE FLOORS.
One of the reasons we decided to go with a dark stain had to do with the unique design of these original hardwood floors.
While we didn’t love the round circular detail (or “pegs”) you can see at the end of each and every board…
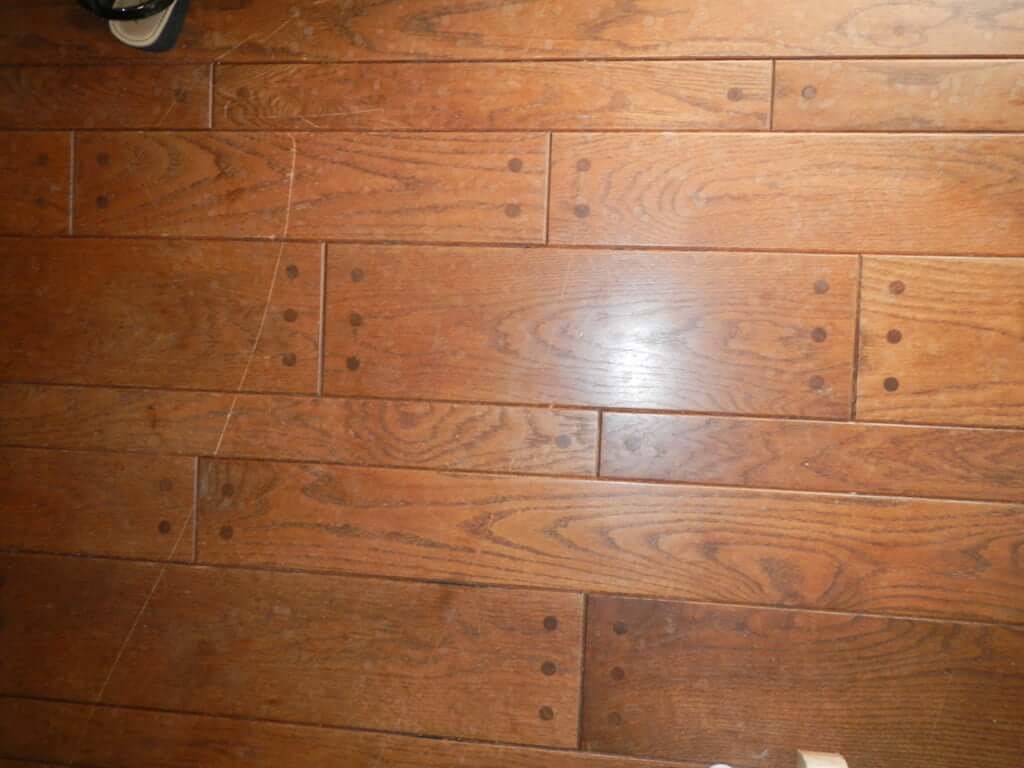
…we didn’t want to throw out the original hardwood floors either!
So, we decided to go with a dark wood stain when refinishing them because
1. we love the beauty of dark hardwood floors
and
2. the dark stain would hide all the pegs!
That way, the floors in all three upstairs bedrooms would look cohesive and as seamless as possible (with 30-year-old hardwood floors).
VIEW FROM SITTING AREA
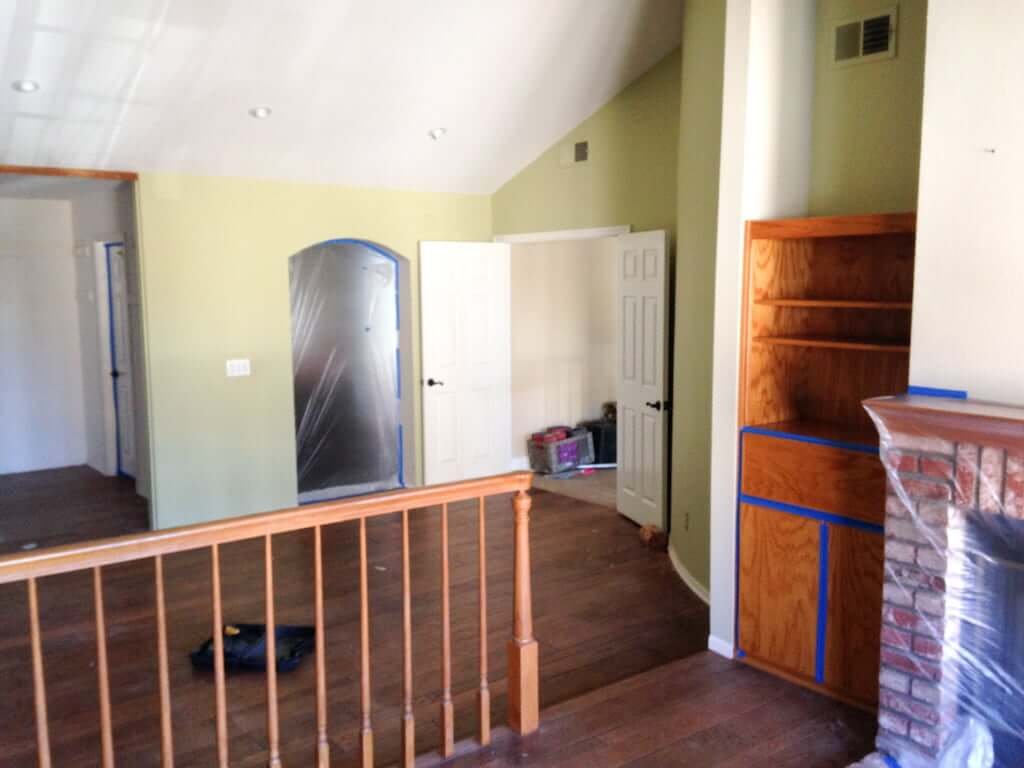
Here’s a view back to the bedroom from the sitting area. You can see the railing—it’s just there under all those clothes from the prior owners.
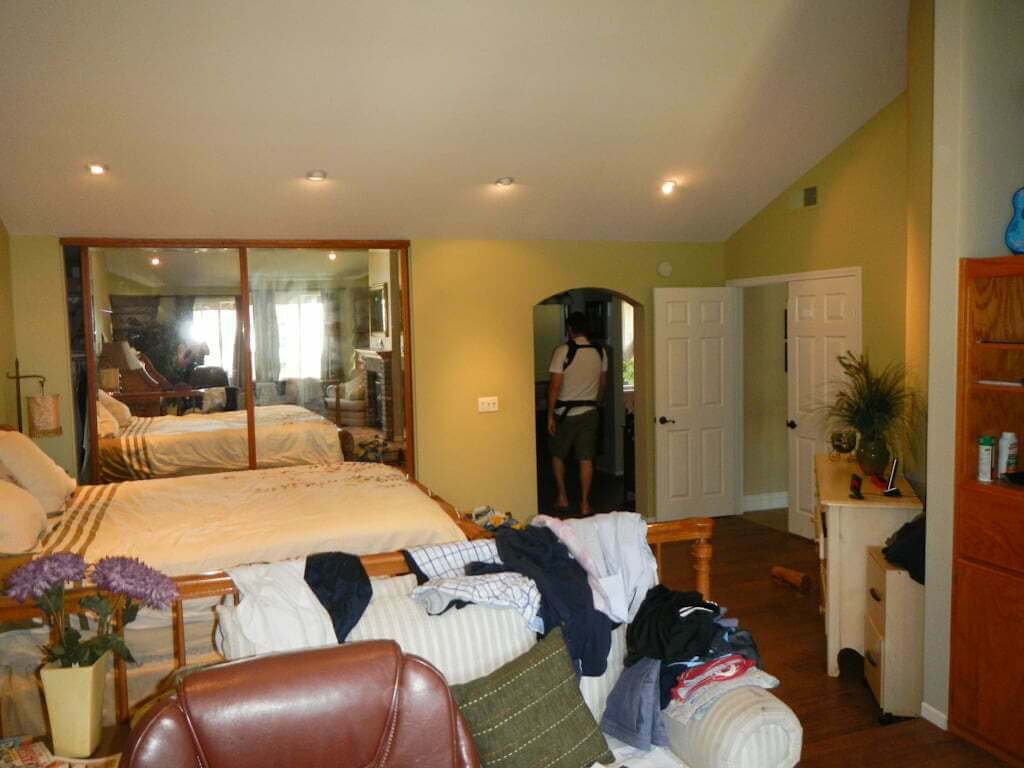
Next, here’s an updated view after we took possession of the house. You can see we’d already removed the sliding doors into one section of our walk in closet. (Read more about that here to understand why we’re so excited about that change!)
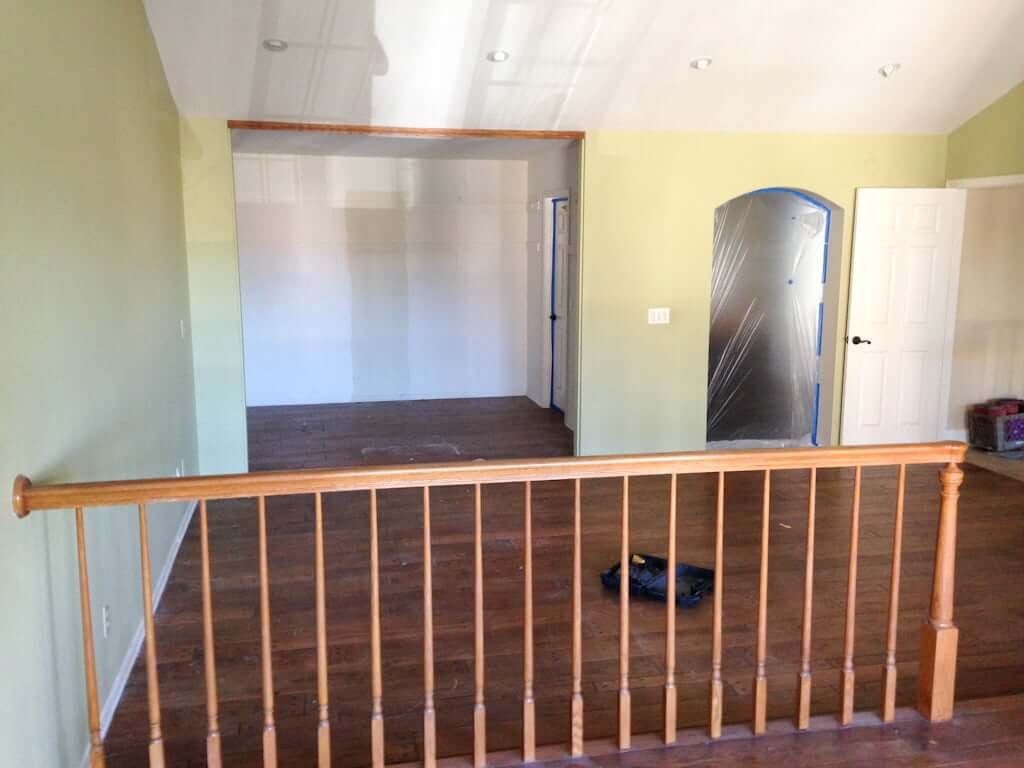
You can see how the painters have taped off several of the areas. We were preparing to have this whole area painted.
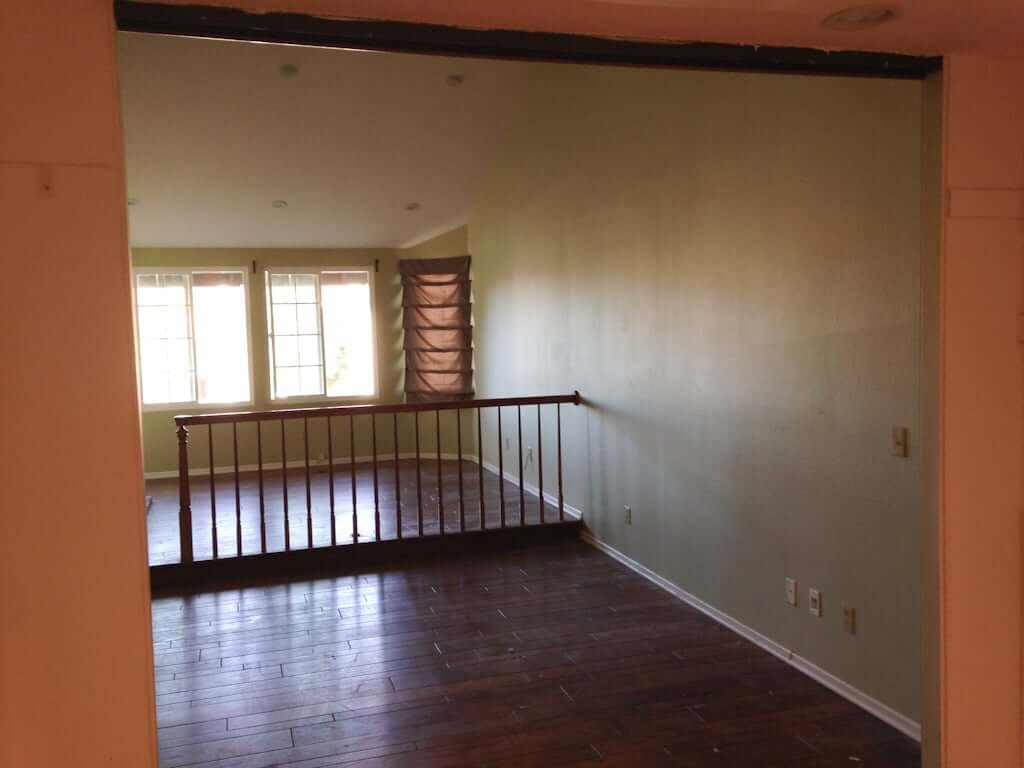
VIEW FROM OLD CLOSET OPENING
While our walk-in closet isn’t going to have this gaping hole for long, here’s a view back to the master sitting area from the inside of our walk-in closet.
The painting hasn’t even commenced yet, but here’s a sneak peek at how things look
1. without the railing
and
2. with the newly refinished hardwood floors in the bedroom.
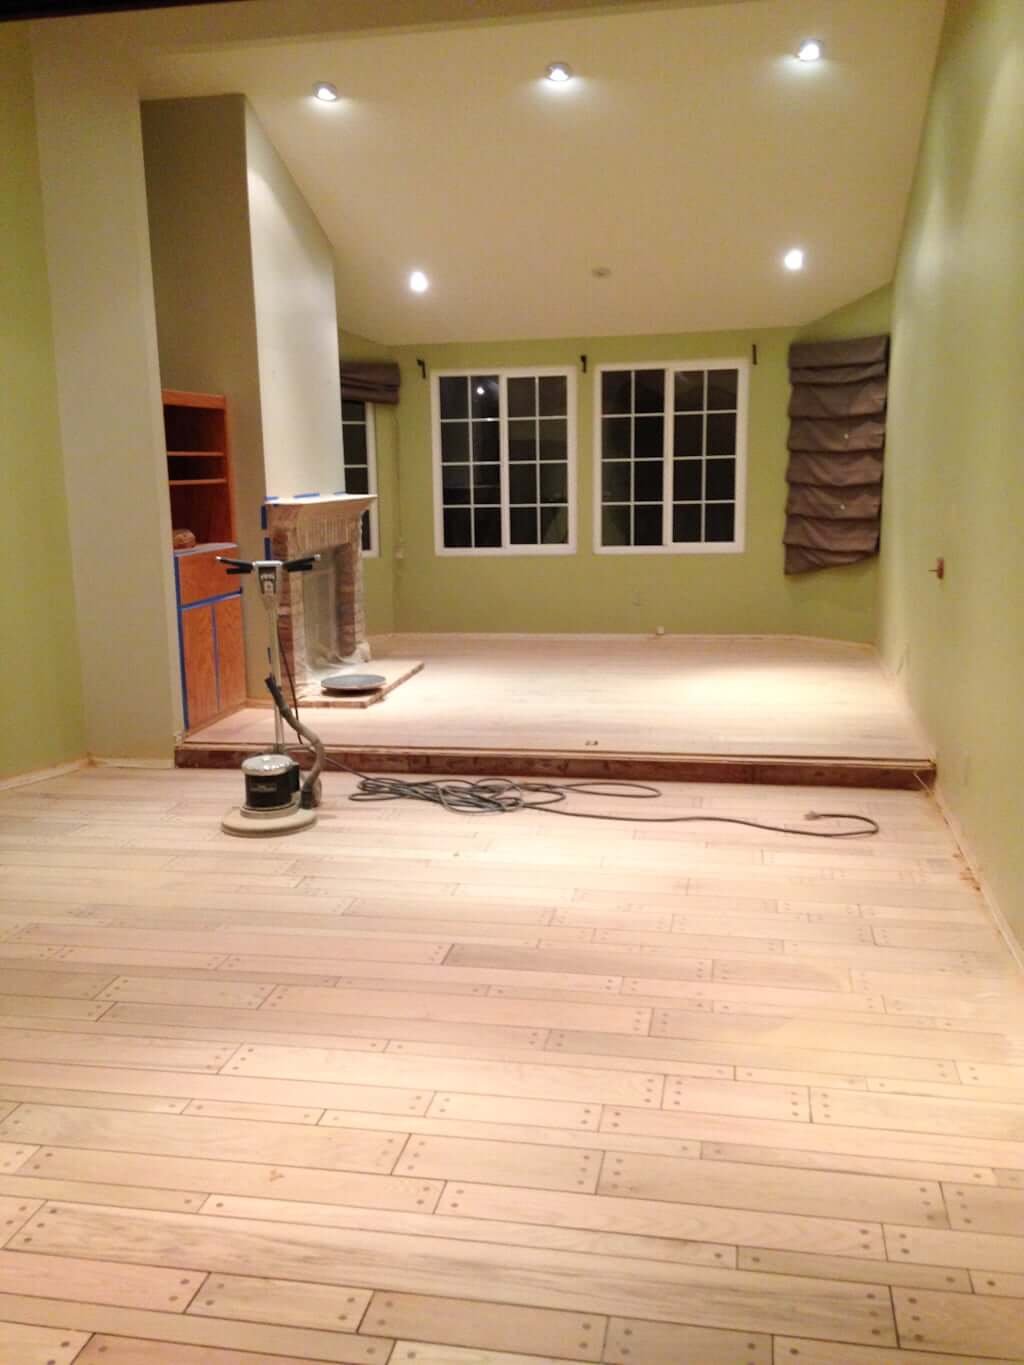
We love light floors as well as dark, but you can see how going light would have “shown off” all those little pegs everywhere. Not our style. We definitely didn’t want that. It was just so busy-looking! So we had to go with a deep, luscious color in all the upstairs bedrooms with these original hardwoods.
And we’re not at all sorry about that. See how it’s looking below!
Before:

After:
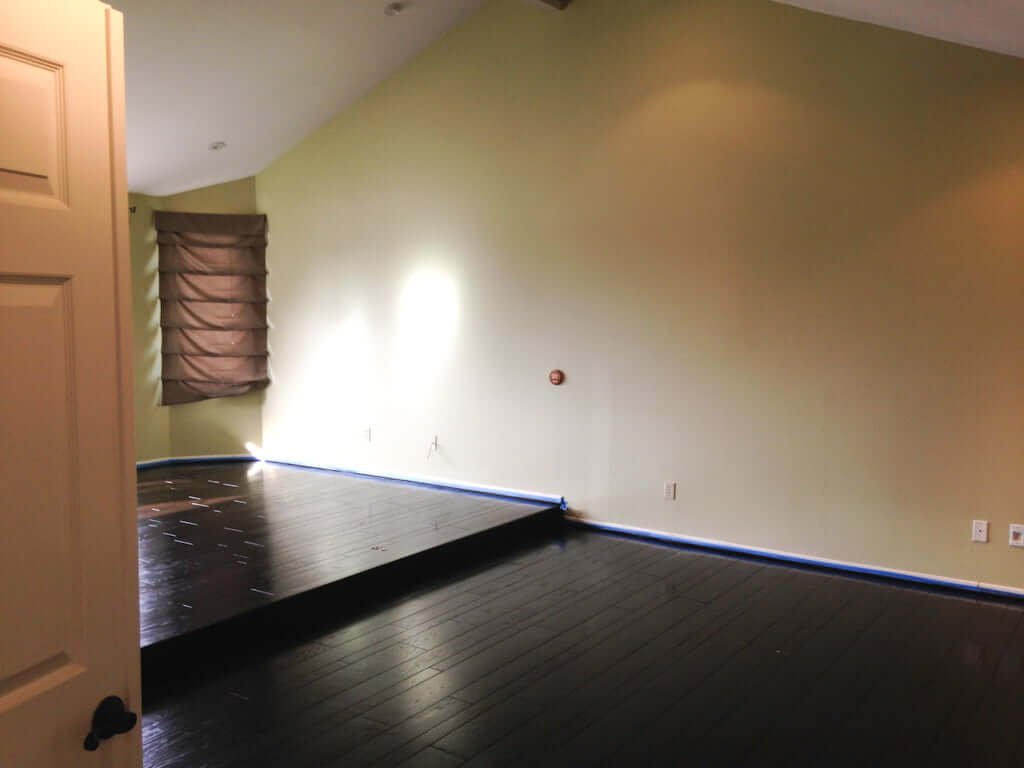
Quite a difference, huh? You can’t even SEE those odd round knobs all over the floor.
And there’s more to come!
See how we’re adding an extra 33 square feet of space to our closet, or why you should instantly paint before moving into a new space!
In the meantime, we’ve given the fireplace in this bedroom a new look and even made our own stunning new bed!
Update: See how this area looks now!


