Note: Originally completed in 2006, this project is now 20 years old and so are the photos! 🤣 Enjoy this blast from the past which still includes some timeless ideas and methods!
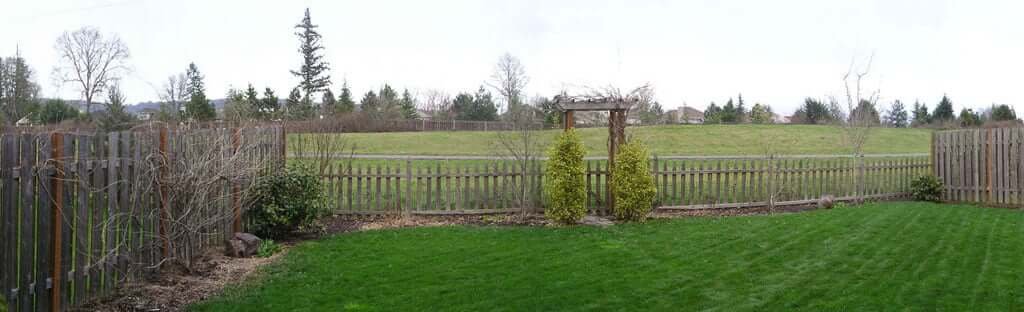
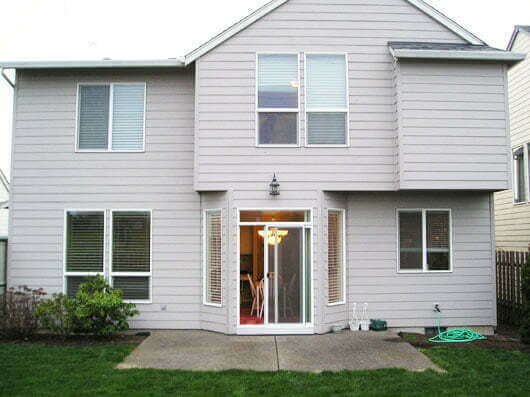
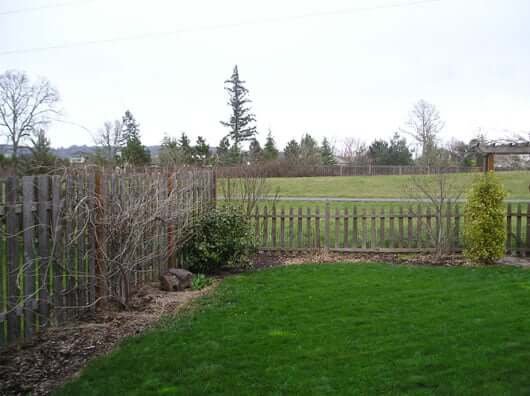
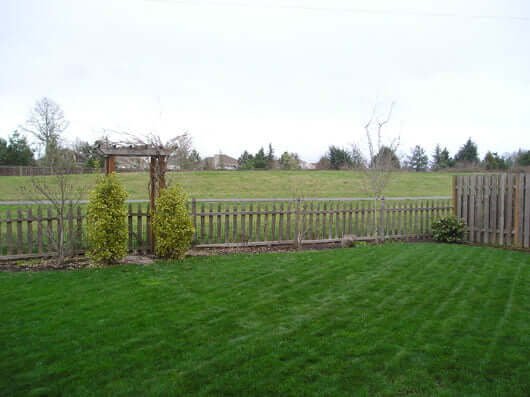
Even though it was nearly a blank slate, this backyard was one of the top two reasons we decided to buy this house.
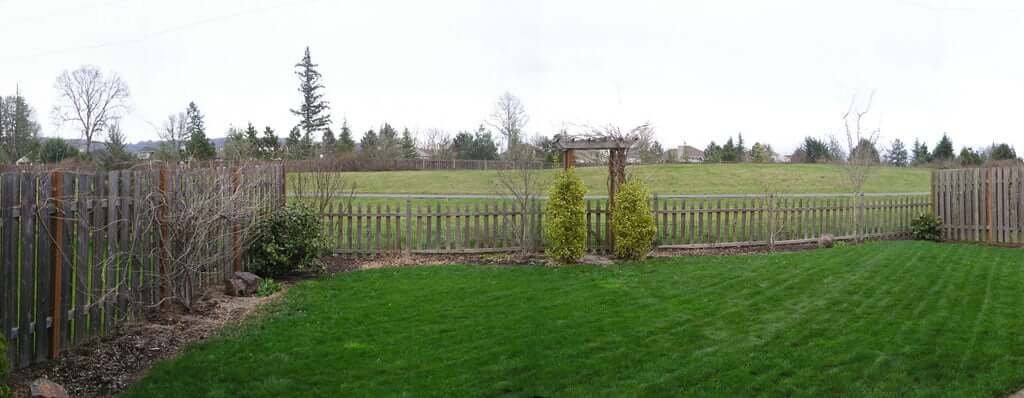
We loved that it opened up to this green space (with a golf course beyond it) and walking trails, and that we would have no neighbors behind us.
However, it was clear no one was gardening in it, making it pretty—or apparently even using this lovely little backyard.
The spring after we moved in, we made plans to
- Enlarge the size of the existing patio.
- Build an arbor over the new patio.
- Create another seating area with a firepit.
- Find a way to create more privacy from each of the two homes on either side of us.
We had 2 TONS of flagstone delivered to our house (yep, I had to double check that was accurate with Matt but it really was all 4,000 lbs of it that we moved and set ourselves).
It was time to make it happen.
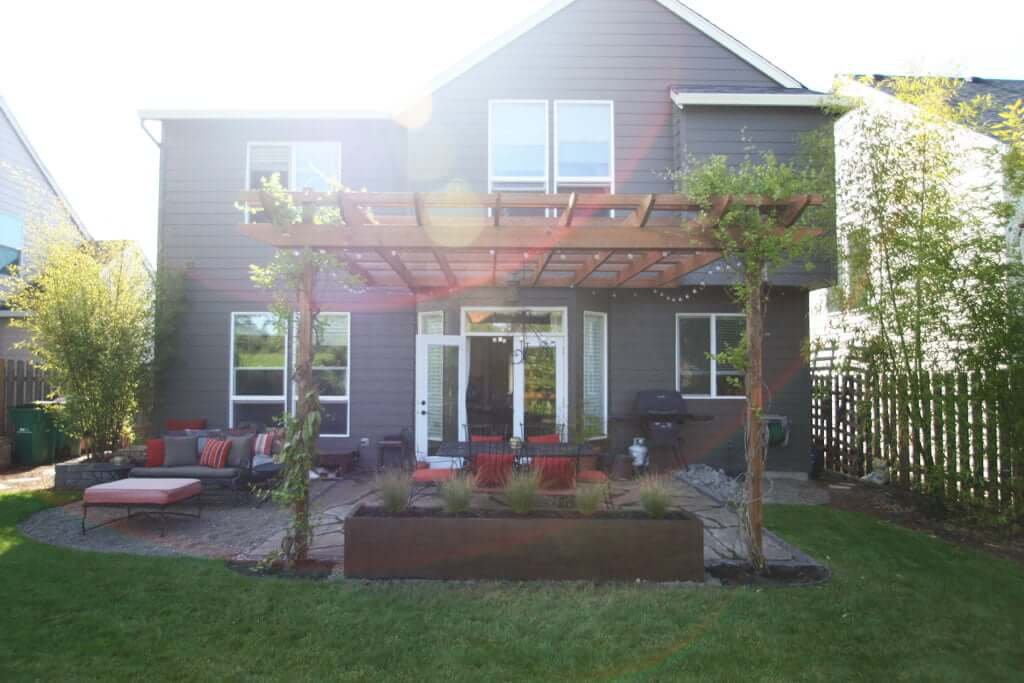
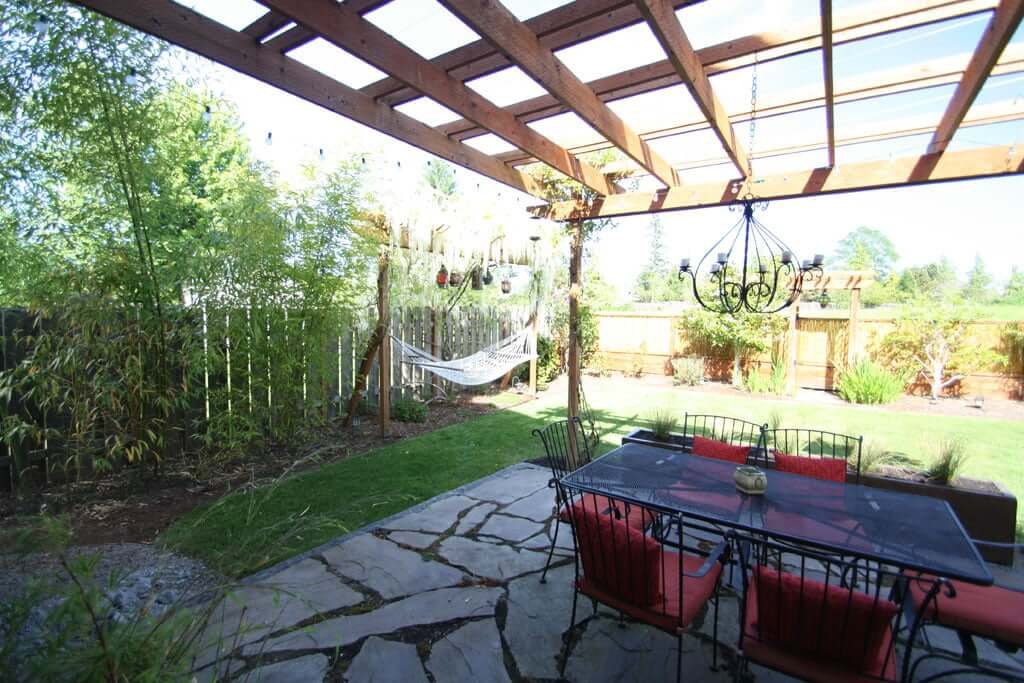
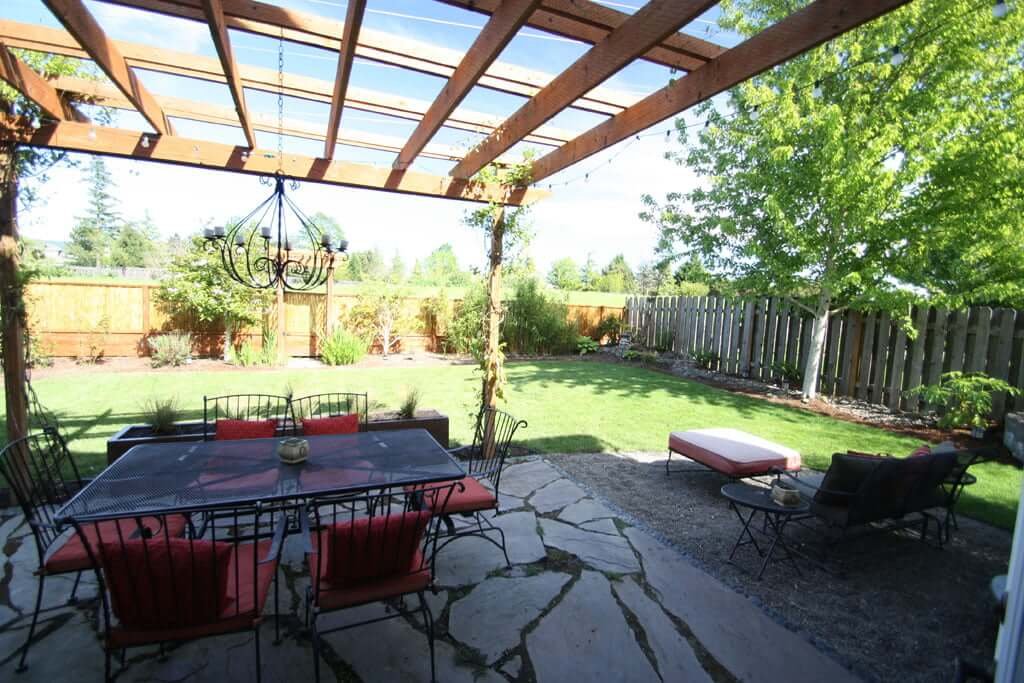
BACKYARD RENOVATION
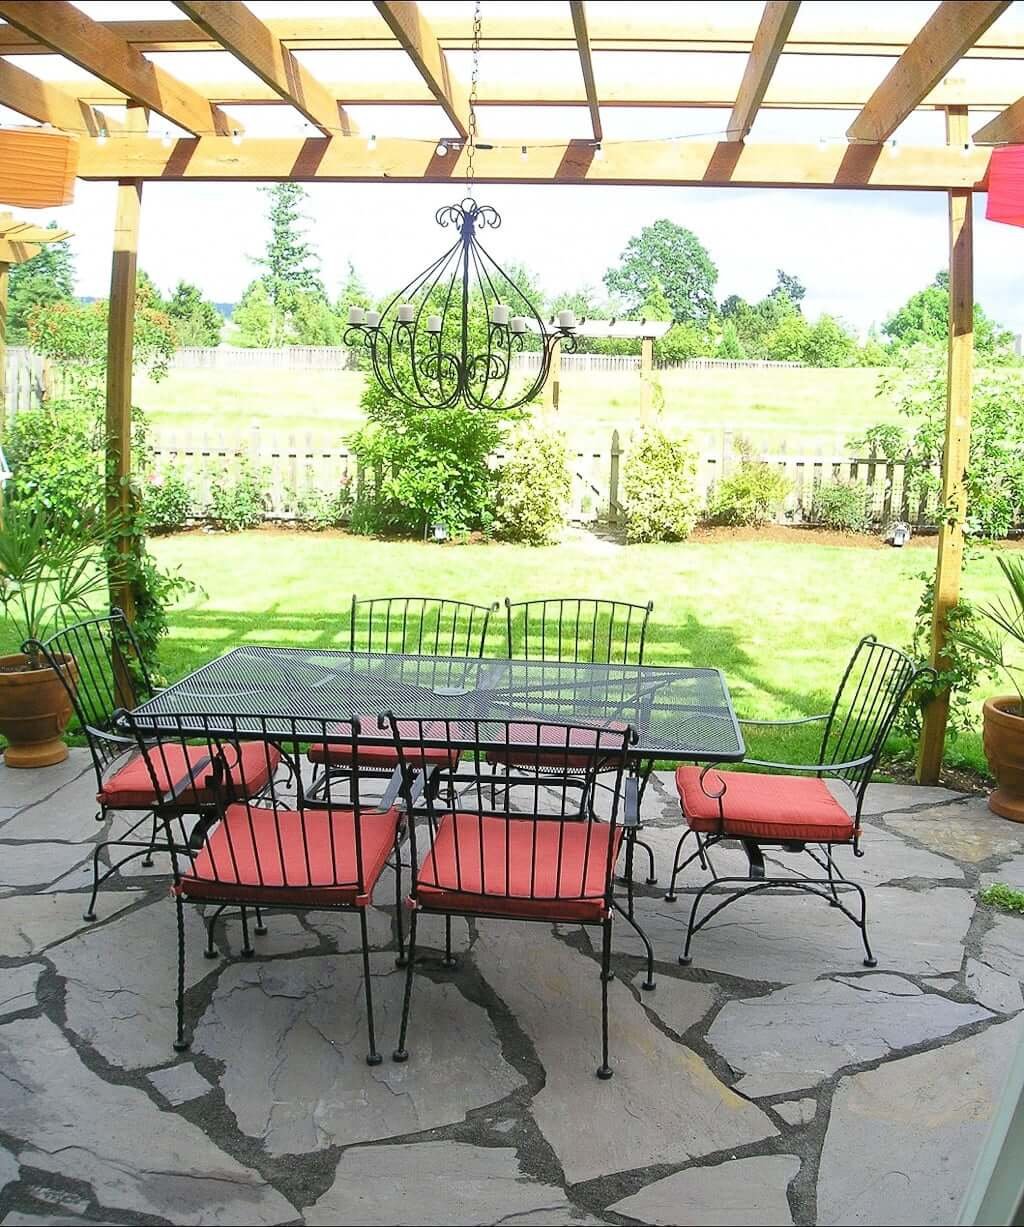
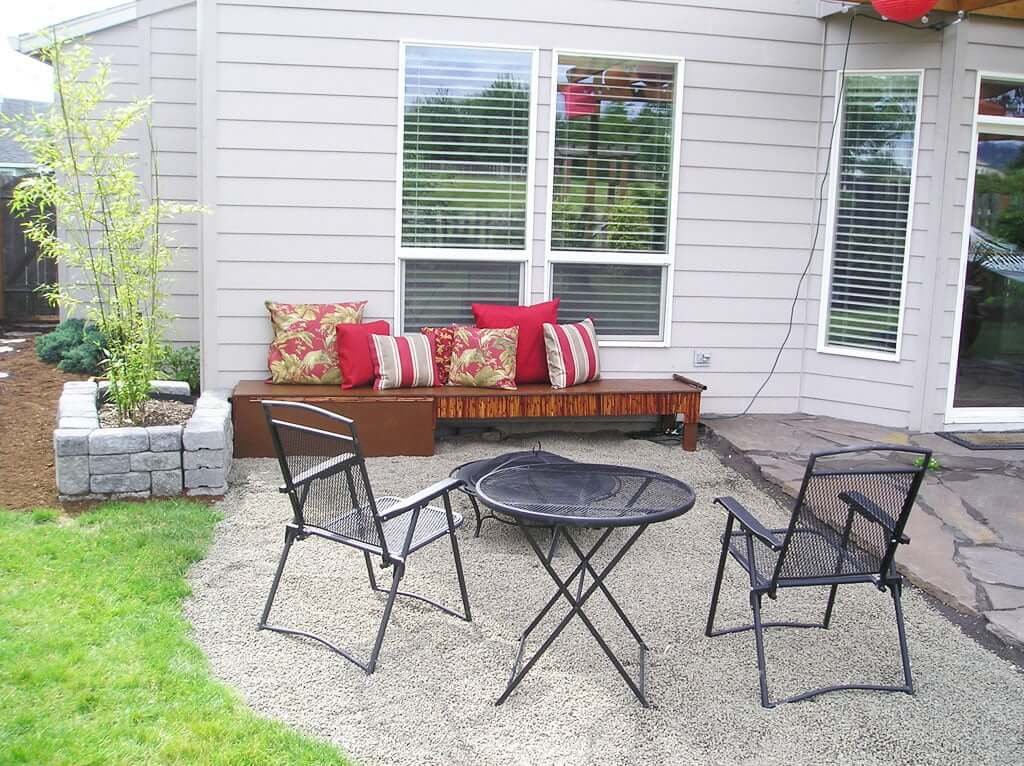
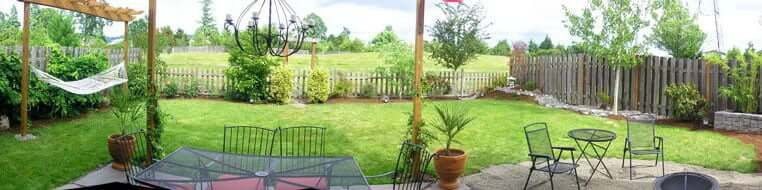
PHASE 1: Patio & Pergola
Here we
- Added a larger flagstone patio (on top of the existing concrete patio which was a much smaller space
- Built a large pergola over the patio
- Hung a cool iron chandelier I’d bought while driving through the middle of nowhere in Texas
- Started training vines to grow up the pergola
- Bought a new iron dining table and chairs
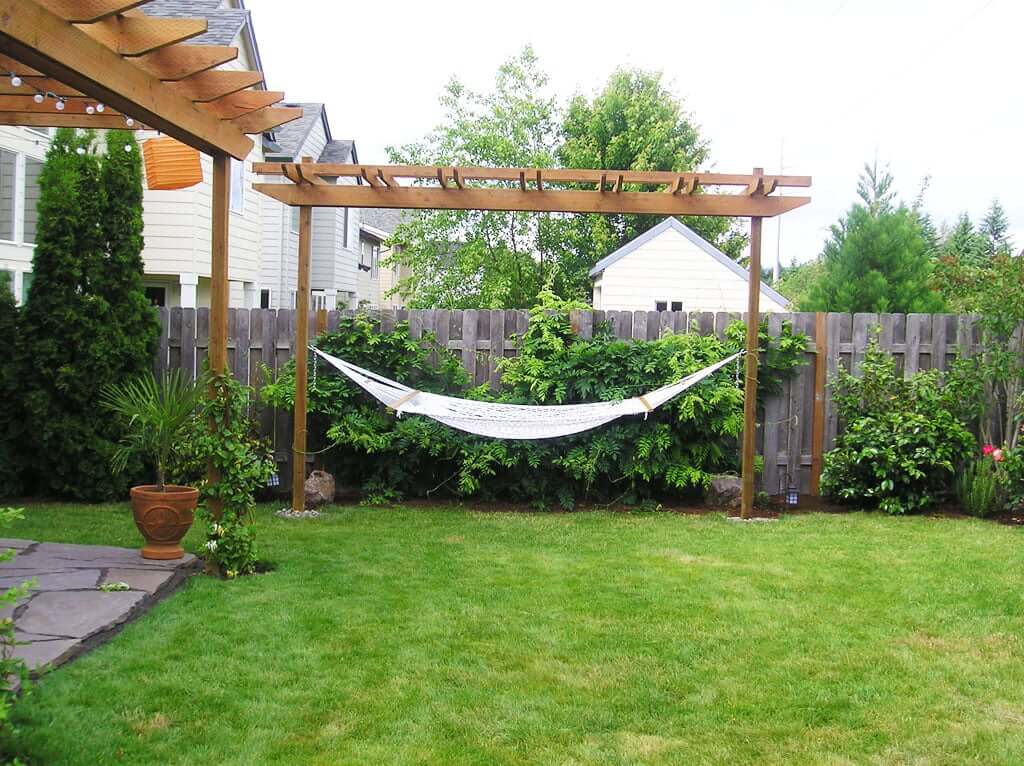
BACKYARD RENOVATION
PHASE 2: The Hammock Arbor
Matt also built an arbor for our wisteria to grow up, and we hung a hammock between the posts. (He sunk those into concrete in the ground, so good luck to the new owners trying to move those outta there any time soon. That is, if they’re crazies who don’t like hammocks!)
Over the years, I trained the wisteria to grow over the arbor…
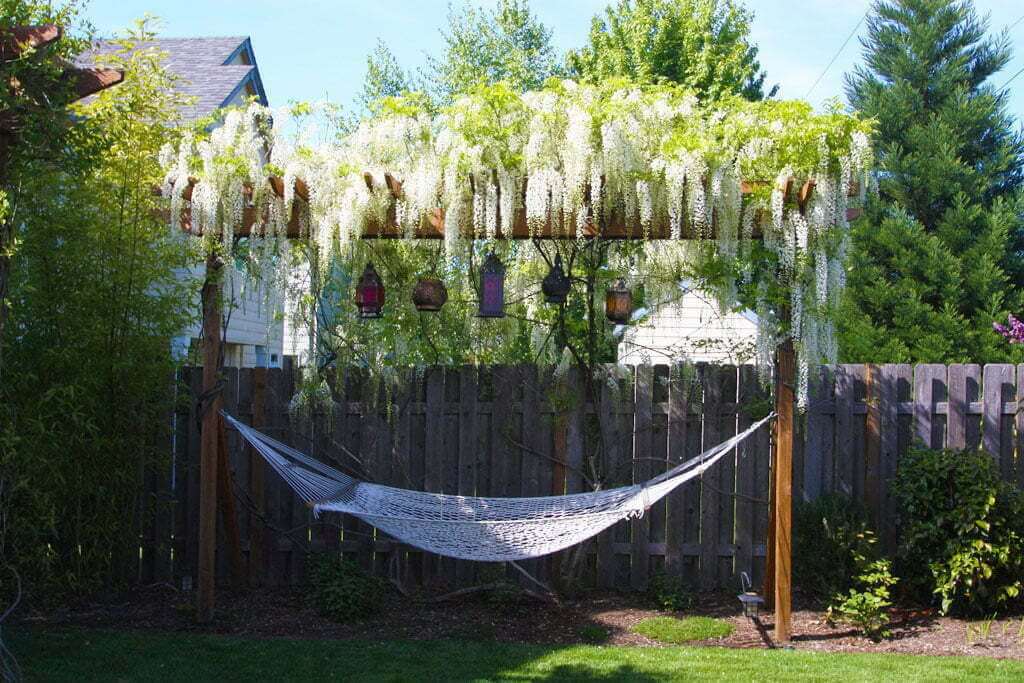
…and hung some Moroccan lanterns (similar ones are here, here, and here). We could light candles in them during the evening, and it was lovely to sit together in the hammock and talk with our glasses of wine after work.
We used this hammock a lot more than I thought we would, and when we were entertaining in our backyard, there always seemed to be one or two people in it.
Can you smell the wisteria? SO GOOD!
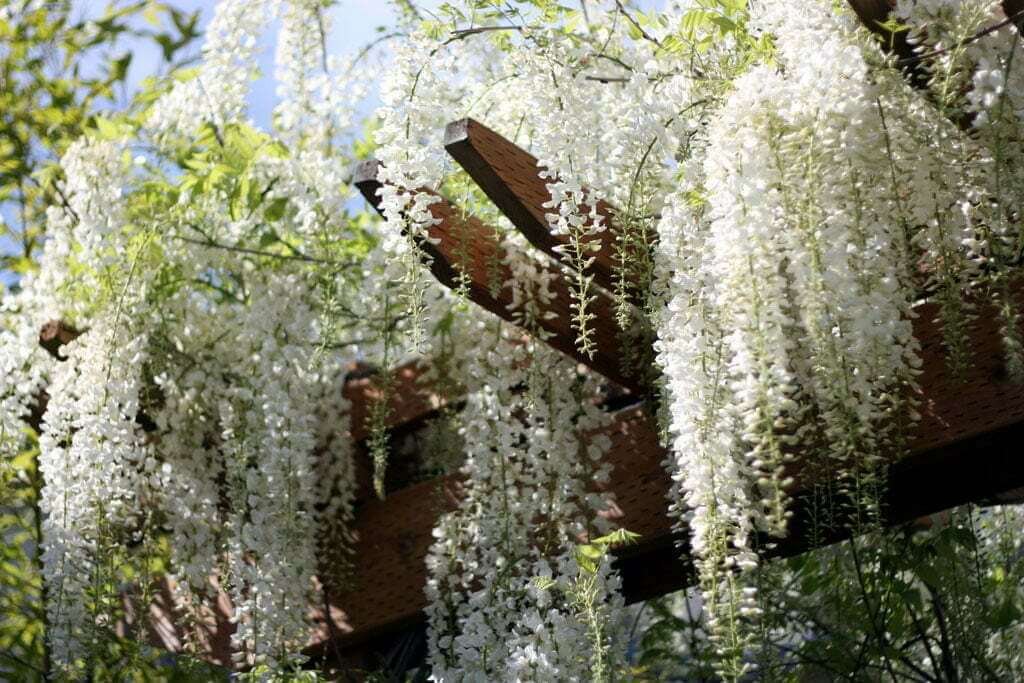
But I’ll warn you, we named this wisteria plant “The Monster” because its tendrils started shooting out like crazy each spring, looking for something to grab onto, and took a lot of pruning to keep back. (“Back! Back!” That’s my Lion Tamer/Pruning the Wisteria impression. That’s probably how I sounded to Matt.)
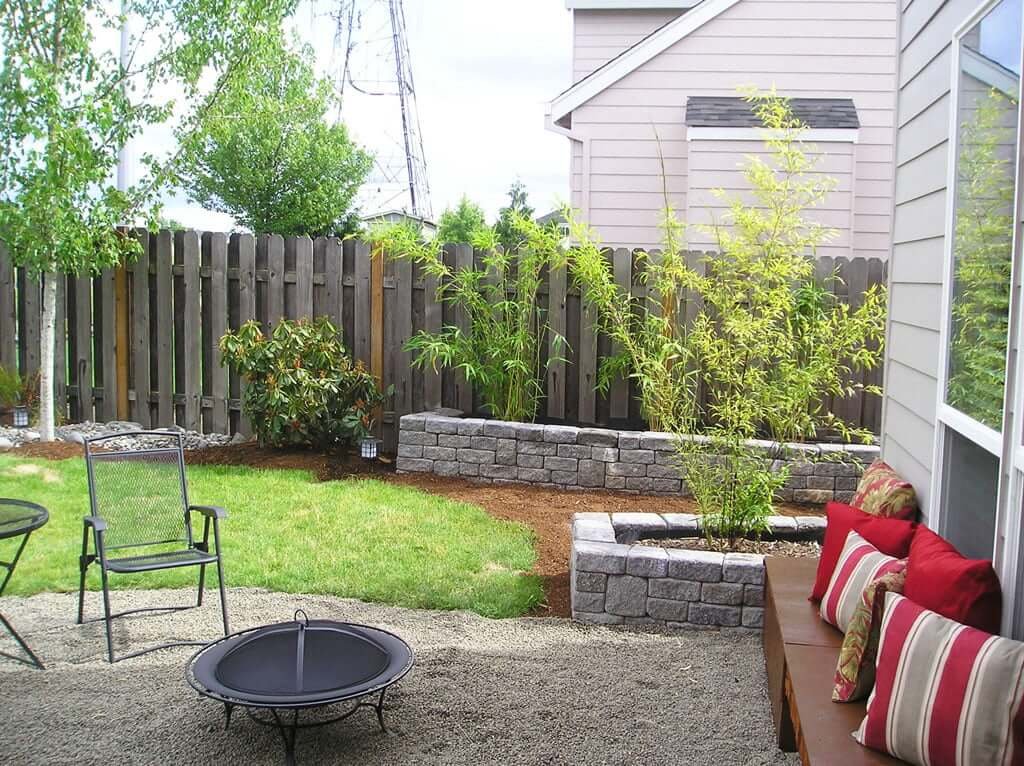
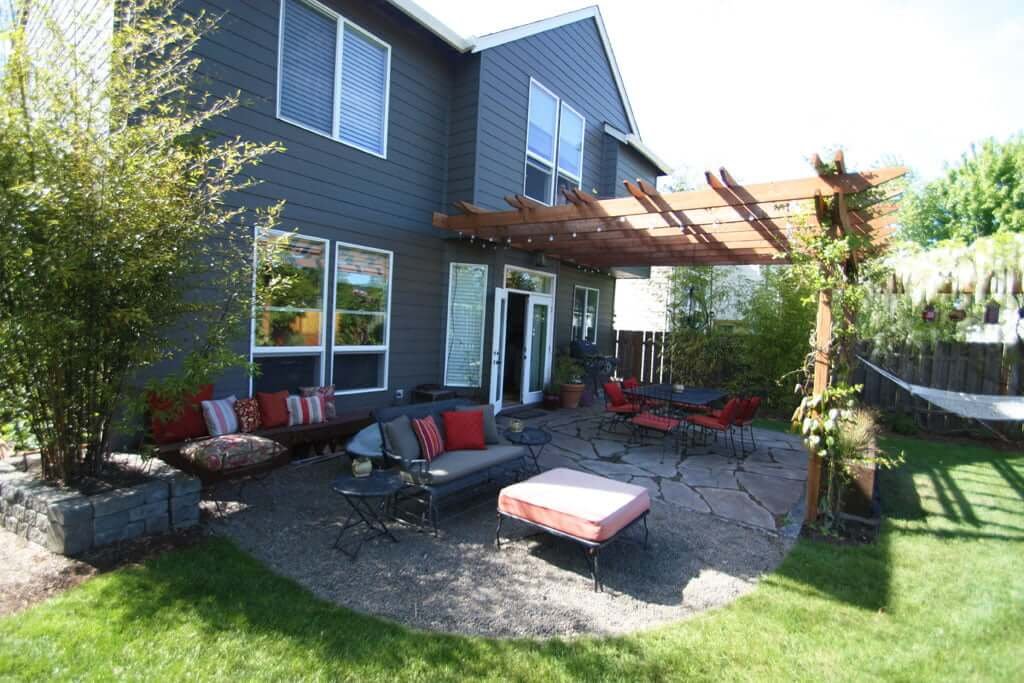
Backyard Renovation
PHASE 3: The Firepit
We then created a firepit area to the side of the new patio:
Those of you with eagle eyes have probably already spotted in this photo that we hadn’t completely finished the flagstone patio yet—we realized we needed to come up with a way to edge it. (We hadn’t set the flagstone in cement because I wanted to be able to grow some groundcover between each of the stones to give it a more aged look.) In later photos you can see how we did that with some dark concrete and black pebbles, an idea sparked by something similar in my grandmother’s gorgeous California patio.
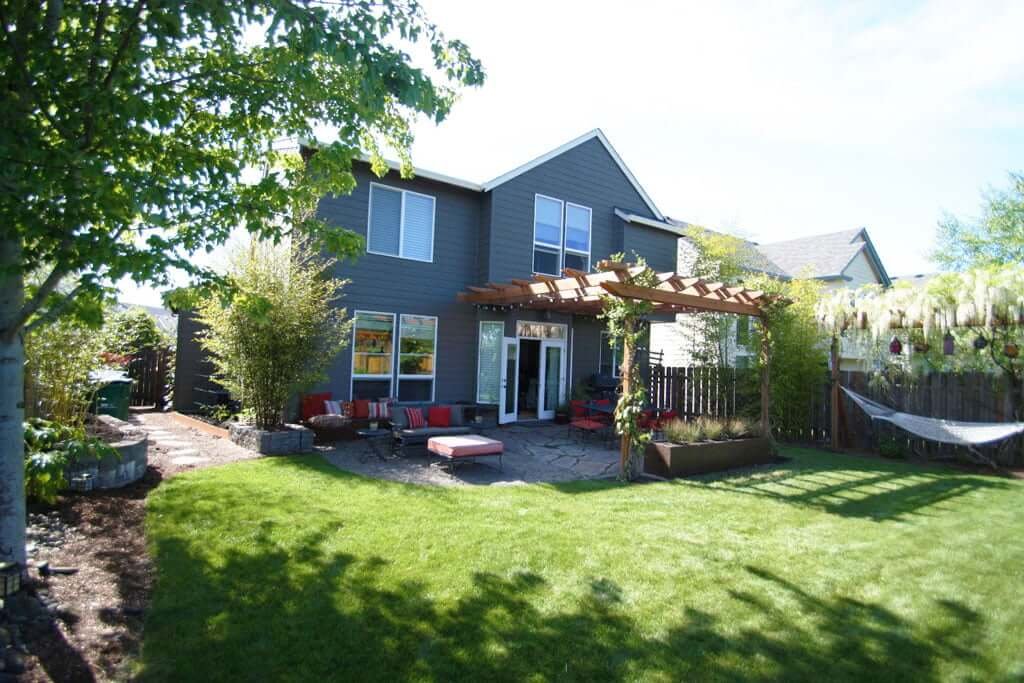
BACKYARD RENOVATION
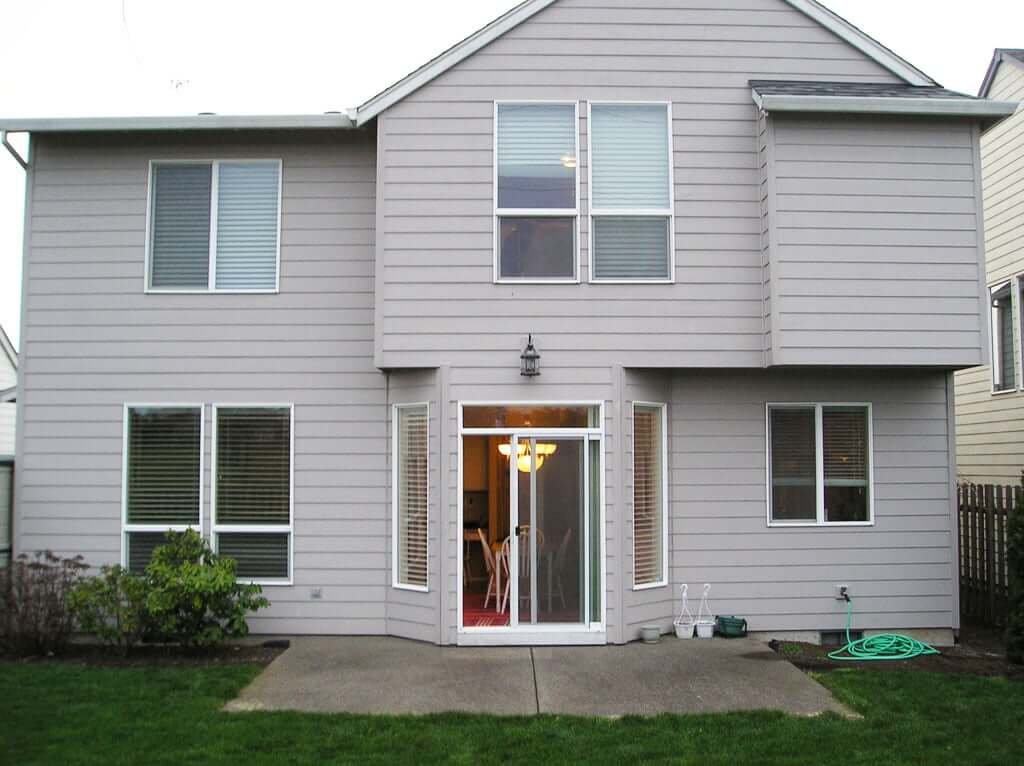
BEFORE & AFTER: View From the Back Door
BACKYARD RENOVATION
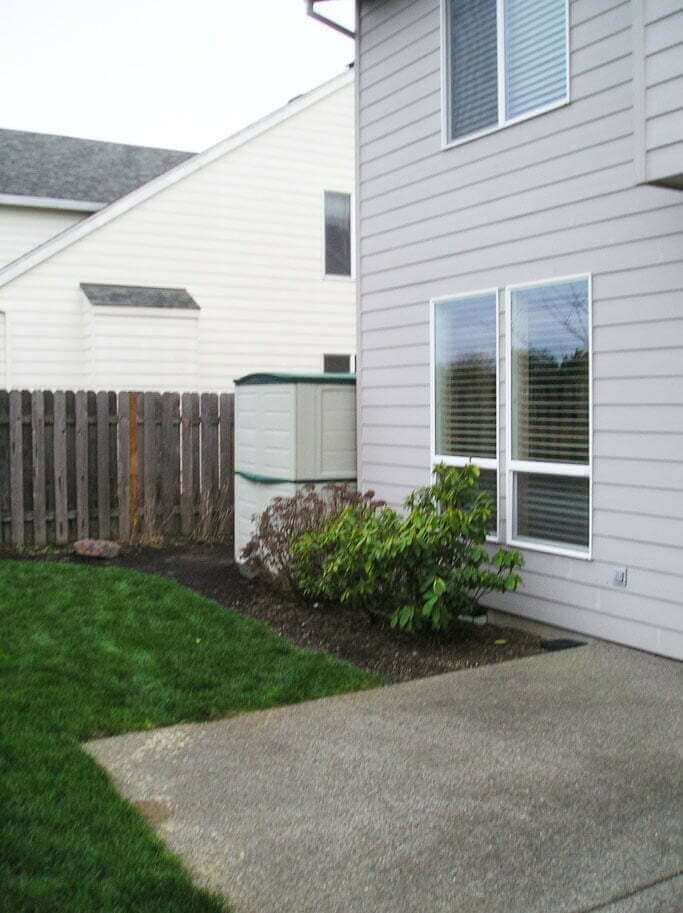
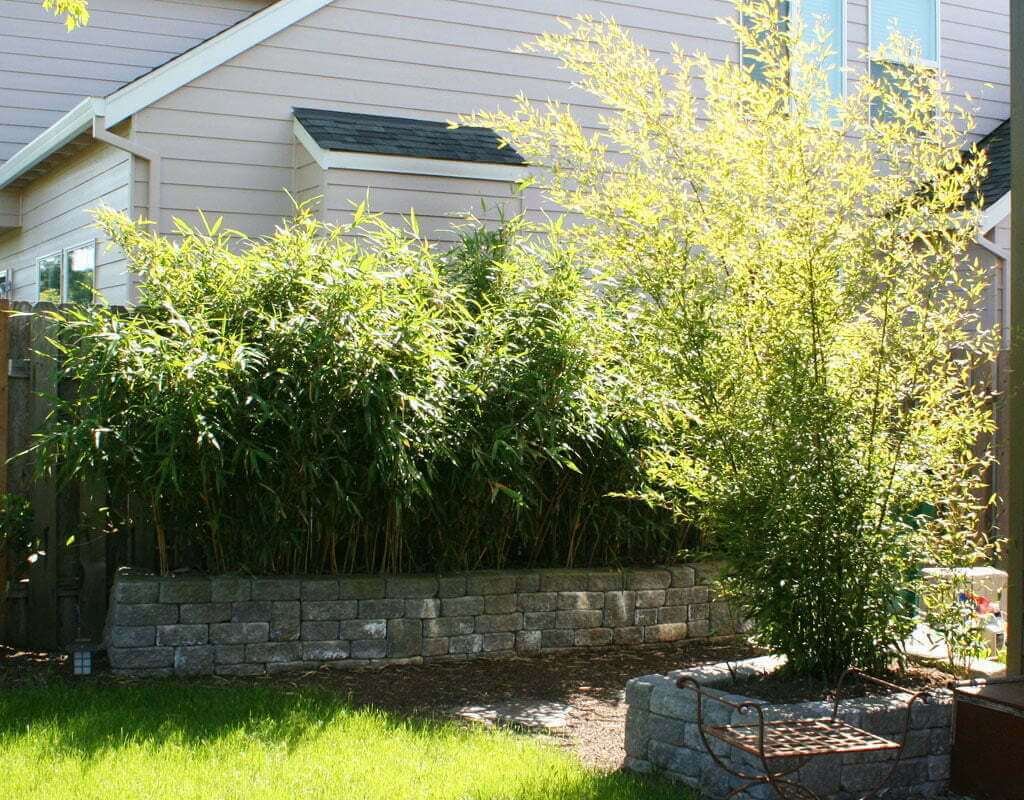
PHASE 4: Creating Privacy
You may have noticed the raised planters we made using retaining wall blocks from Home Depot.
We had decided that the fastest way to get the privacy we needed from the second story windows of the adjoining houses was to use bamboo. It was fast-growing, extra tall, wouldn’t get too wide, and we could confine it with the planters (while buying ourselves an extra foot or two of height blockage while waiting for it to grow in).

This is how it looked the first year we planted it. (The one in the foreground is a really cool Black Bamboo, and it was so pretty up close.)
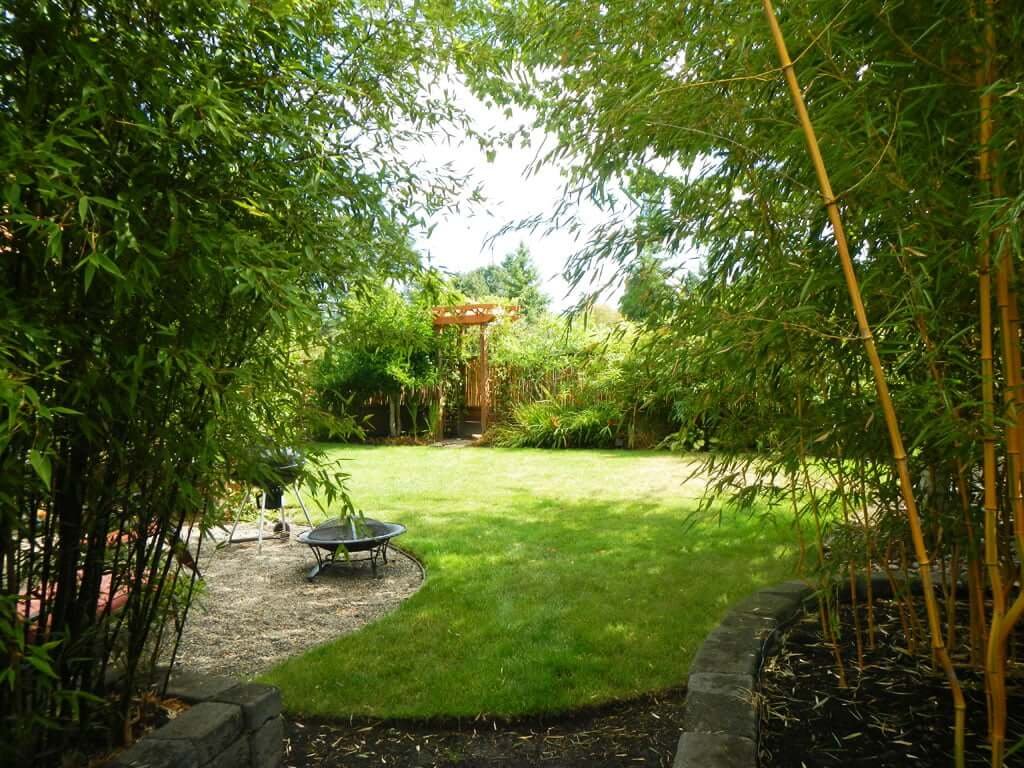
Just in two years, you can see how much it grew in:
Another view is coming down the new “bamboo tunnel.” Check out the black bamboo to the left, and the yellow bamboo to the right. We had found a guy in Portland who specialized in bamboo and had so many different varieties to choose from based on the height, growth rate, and look we wanted. It was fun to try different ones! (Says the plant-lovin’ lady.)
BACKYARD RENOVATION
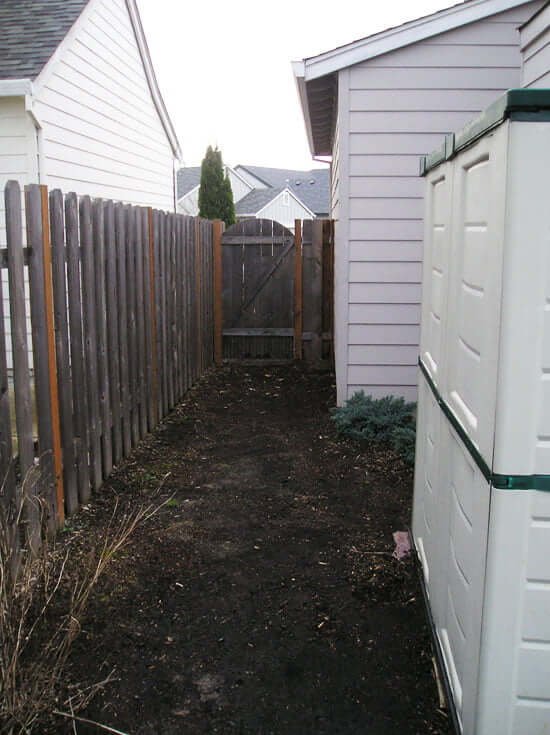
PHASE 5: Adding a Side Yard Garden
Here’s how our side yard looked before:
And after…

We used some of our leftover flagstone to create a little path down the side yard to our gate to the front.
And I know this is possibly the TINIEST garden you may have ever seen, but I really wanted a way to at least grow some fresh tomatoes and Hood strawberries. So we found a way to fit it in:
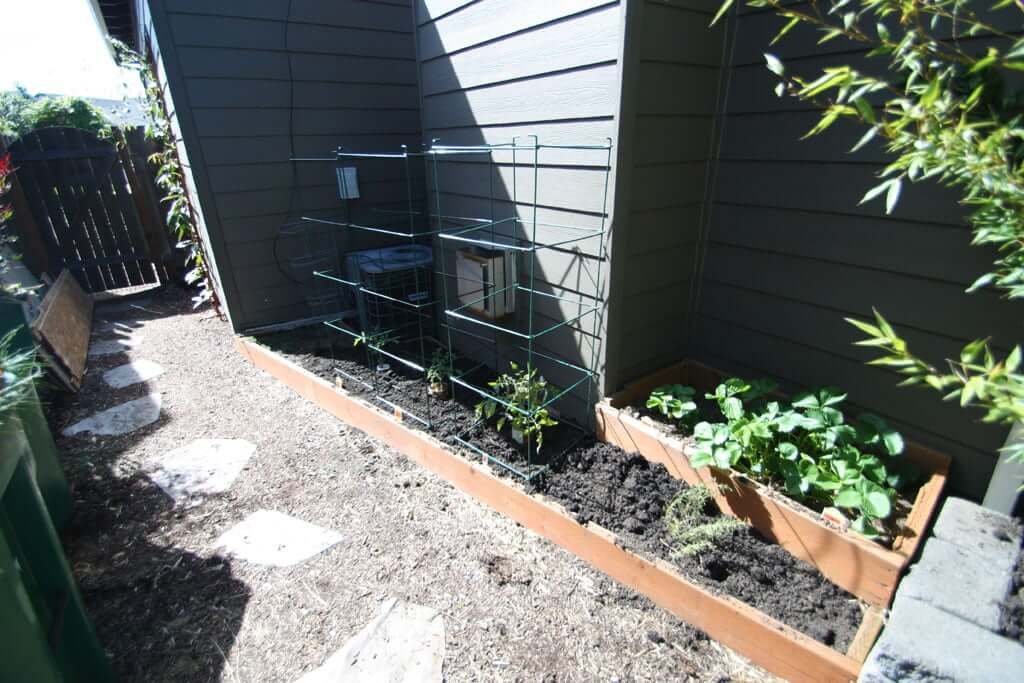
I was excited to have managed what we did, and tomatoes always taste SO much better when you’ve picked them off your own plant.
BACKYARD RENOVATION
PHASE 6: Pouring a Concrete Planter
This was shortly before we moved to New Zealand, but I’d really been wanting to grow some horsetail. Thus, we designed this concrete planter to hold it. (It wants to stay wet and marshy-like, so this was my way to make that happen for it.) I’d seen it in so many planters while visiting my grandma in California, and I liked the look. And, as you’ll find out sooner or later, I have little to no self control when it comes to plants.

- Matt built the form for the concrete.
- Concrete was poured. (Yep, Matt also did this. Not Jess.)
- After it dried and the form was removed, I painted the whole thing with a concrete stain. It turned out so well and only cost about $40 to make (between the concrete and the stain).
- Matt ran sprinklers to it to feed those thirsty horsetail plants and voila! It was all ready to go…right before we found out we’d be moving and renting out this house!
BACKYARD RENOVATION
Before & Afters

Goodbye, lovely backyard! We hope everyone who lives in that house from now on enjoys you. You were sure fun to work on!
I’ve been teaching my daughters that sometimes we have to let go of something we love—even if it seems good or desirable—to get something we’ll love even more. Something even better and more desirable.
We let go of this outdoor space we loved creating, the outdoor space we got to enjoy on so many summer evenings and weekends with friends…
…and we found new adventures and outdoor space projects and creating cozy living areas inside and outside to enjoy with the people we love.
Call me corny, but it’s true. As we let the old go, we’ve found things we love even more.
Next…
…I’m showing you the before and after of our California house backyard!
You’ll also love…
- How to Save Big Money On Your Backyard!
- Do you know the pros & cons of patios vs decks?
- See our outdoor kitchen at our California house!
PS: To browse all our house renovations, click HERE!
PPS: If you’d like our help on your own home spaces, book a Design Consultation with us or check out our Design Guides & Plans!
*This post contains affiliate links


Great work. A real staple piece of the whole home!
Thanks William! It turned out being an amazing area not only for our family but for entertaining and enjoying all together.
Cheers,
Matt and Jess
Wow! What a transformation! Your backyard renovation is absolutely stunning. I love how you’ve created a cohesive and inviting space that perfectly complements your existing home. The flagstone patio extension and pergola are especially impressive, providing a great area for entertaining or relaxing outdoors.
The fairy lights strung around the pergola add such a charming touch, and I can imagine enjoying warm summer evenings under the stars. Did you consider adding any outdoor furniture or seating to the new patio area? I’d be curious to see how you’ve styled the space for functionality and comfort.
This is a great blog post! We are starting to plan our yard project. We are hoping to get started soon. We are debating on if we can take truckloads of bushes, dirt, rocks, etc. to the dump by the truckload or if we need a dumpster rental? What do you think?
This article beautifully documents the transformation of your backyard, highlighting the hard work and creativity that went into the renovation. Inspiring and well-done!
What an inspiring backyard remodeling journey! Your article beautifully captures the transformation process, offering valuable insights for anyone considering a backyard renovation. It’s evident how meticulous planning, creativity, and hard work resulted in a stunning outdoor oasis. The incorporation of sustainable features is a commendable choice. From the initial design to the final touches, your attention to detail shines through. Your “before and after” photos speak volumes about the incredible makeover. This article serves as a great reference for those embarking on their own backyard remodeling projects, reminding us all of the incredible potential our outdoor spaces hold.