Why did we DIY our bathroom vanity instead of buying one? We 100% recommend all our clients do this! (And why did we go with a wood vanity instead of a painted one?)
How on EARTH do you design your own vanity that does exactly what you want it to? Where do you start? Why not just buy a premade one?
We’re big believers in customizing your own home as much as possible (including your bathroom vanity which gets use how many times a day for how many days each year?!?), and so we’ve broken this vanity post down into 5 steps.
Designing Our Dark Wood Vanity
Taking the Rest of the Bathroom into Account
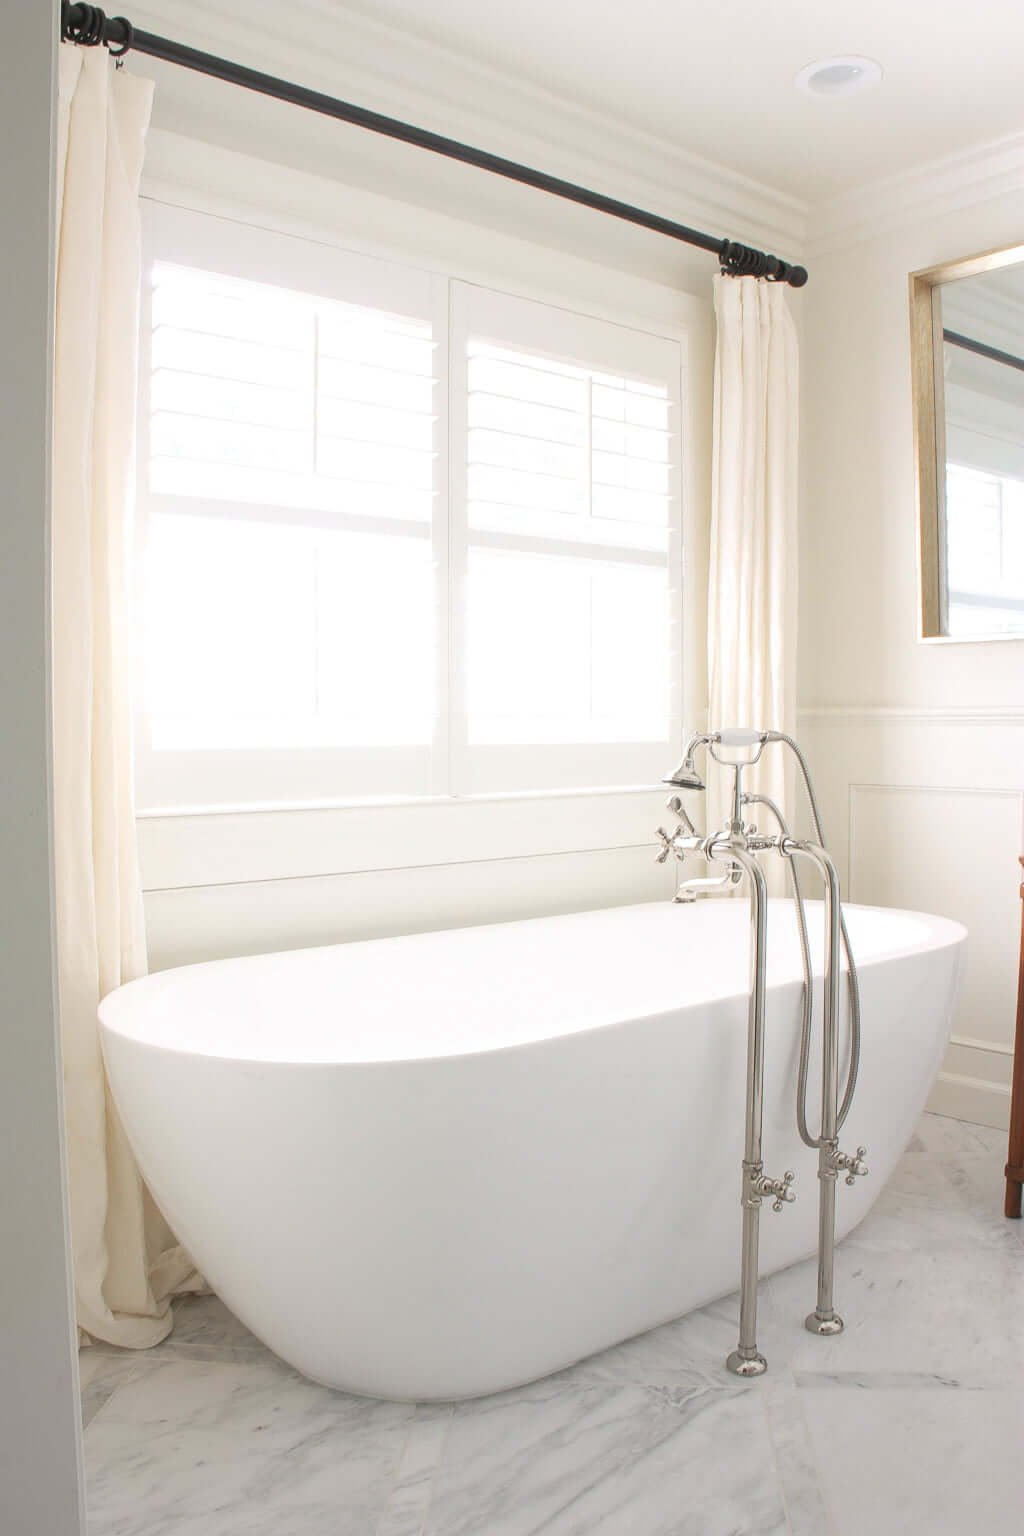
Because the rest of the bathroom would be mostly light grey and white, such as in our bathtub area…
…and our double shower area…
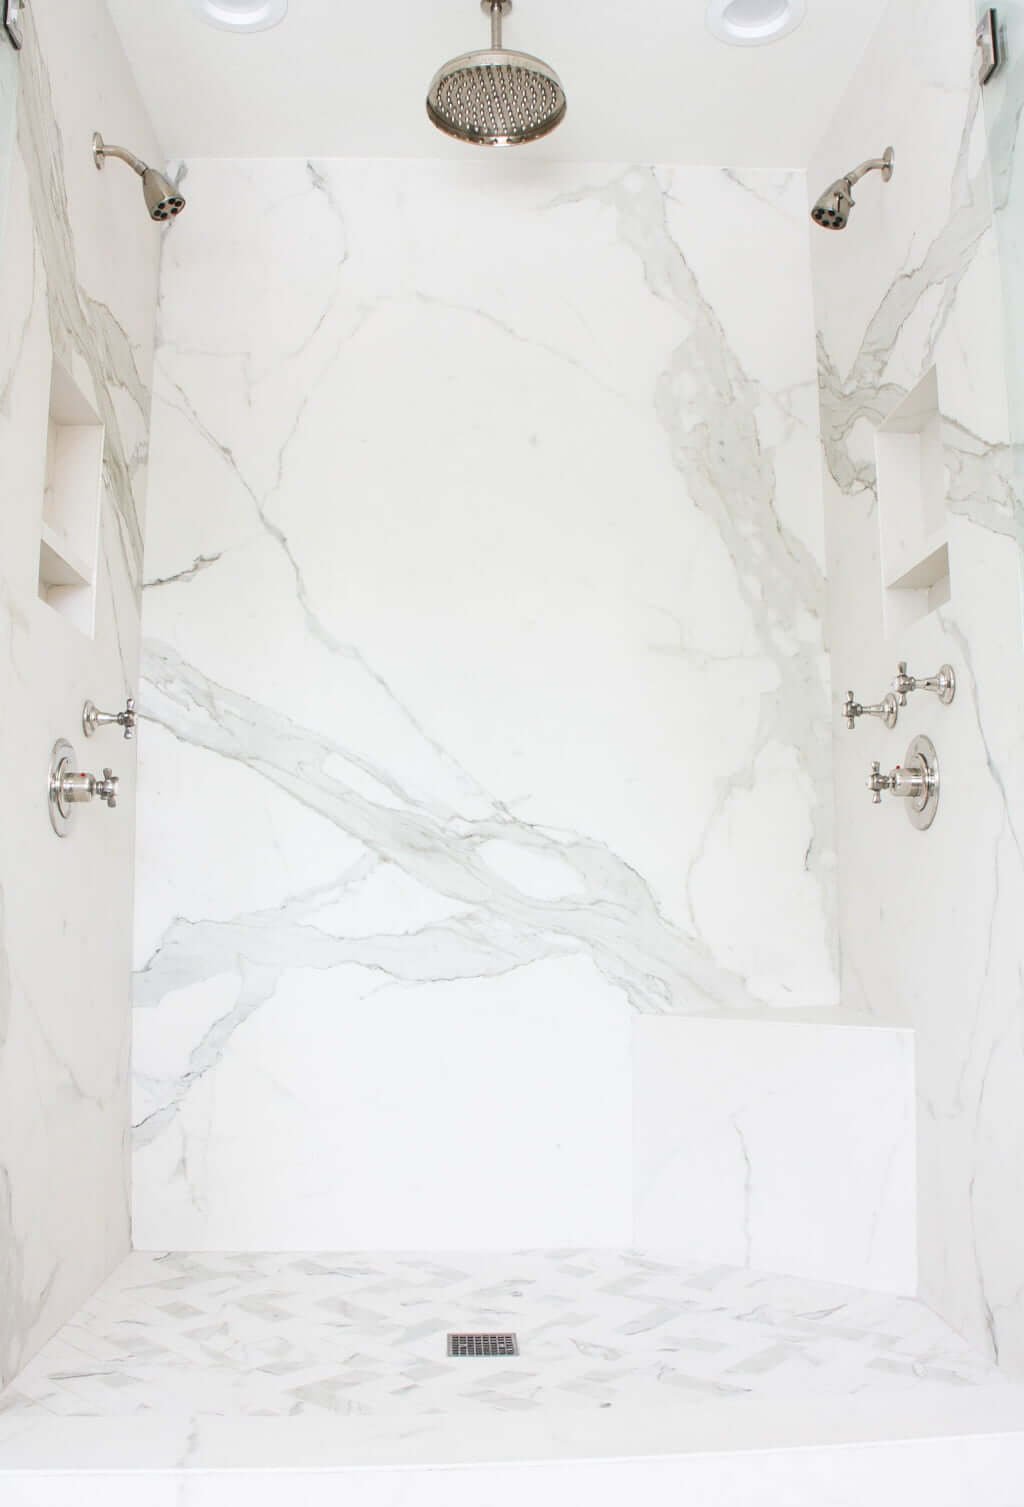
…we decided we wanted to go with a stained wood vanity and not paint it any shade of white.
At the time, I felt like going white was definitely safer—but the rest of our bathroom materials were going to have so much lightness going on (like our shower, tub, floor tile pattern, & wall treatment) that I wanted to warm it up with some wood.
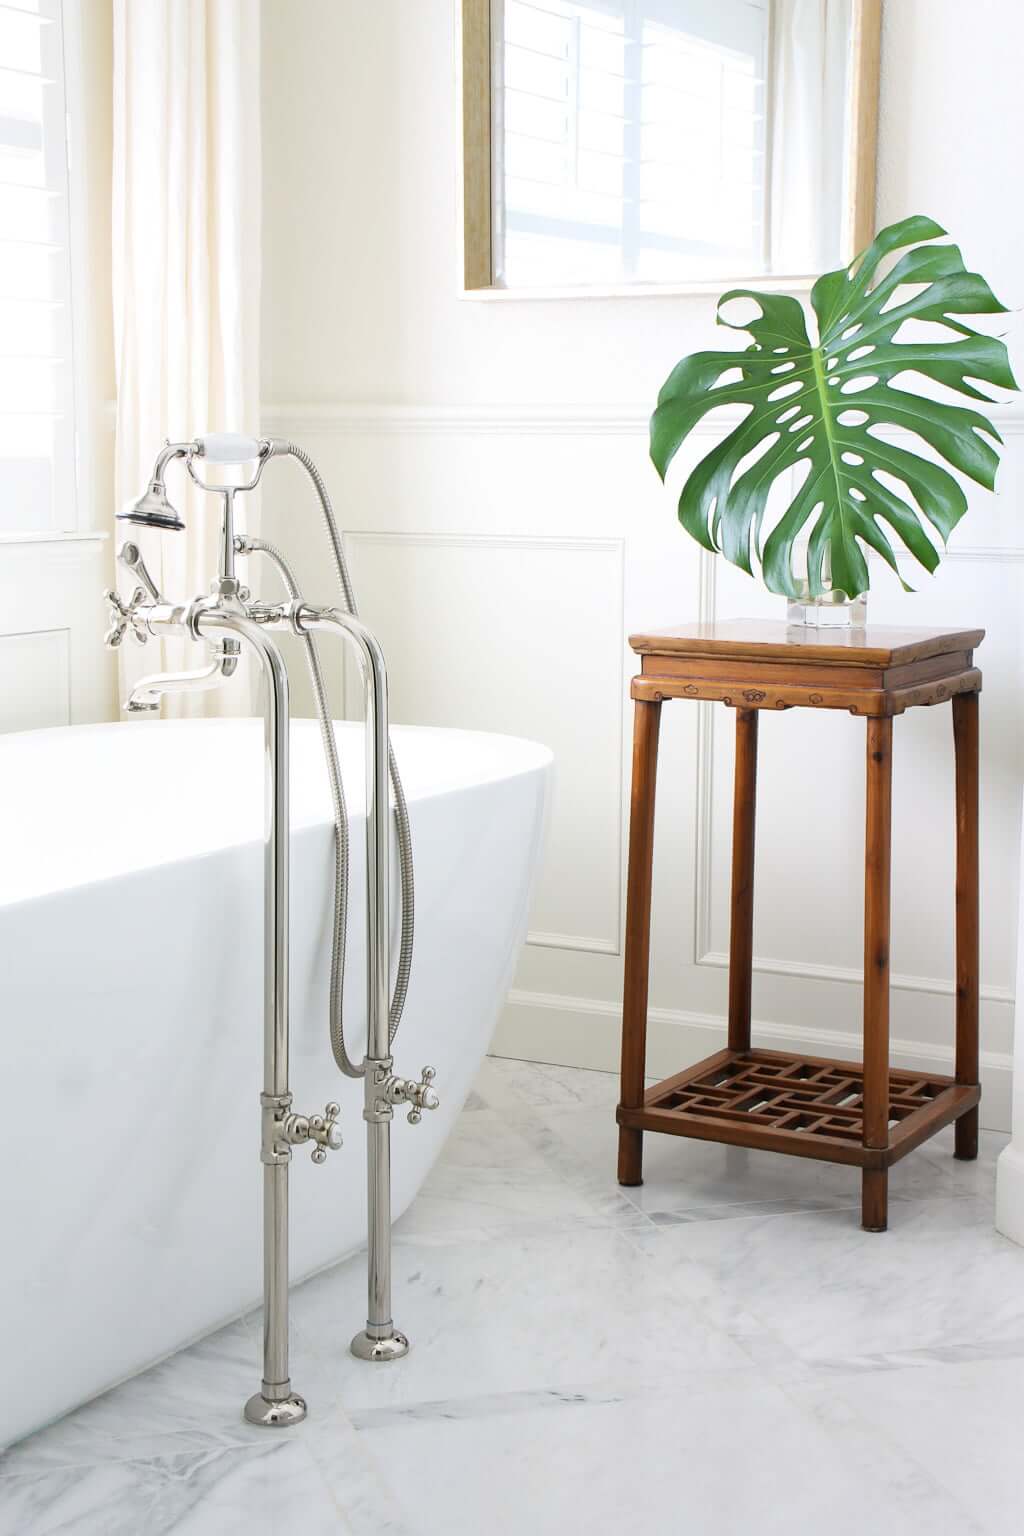
And while we did have this vintage plant stand in the bathroom, I didn’t want to match the color of that stain exactly. I wanted to go with a dark wood vanity that would be a strong contrast against the lighter colors.
I also wanted it to not look like a standard vanity you’d buy (not that any of those would have fit our space anyway)!
I’d started dreaming up how to make it look like an old bureau or chest of drawers that had been converted into a vanity. Something to add more character and warmth to our bathroom…
PS: See the 5 reasons drawers are better than cabinets in your bathroom!
DESIGNING OUR DARK WOOD VANITY WITH MIRROR
Customizing The Bathroom Vanity to Look Like a Piece of Furniture!
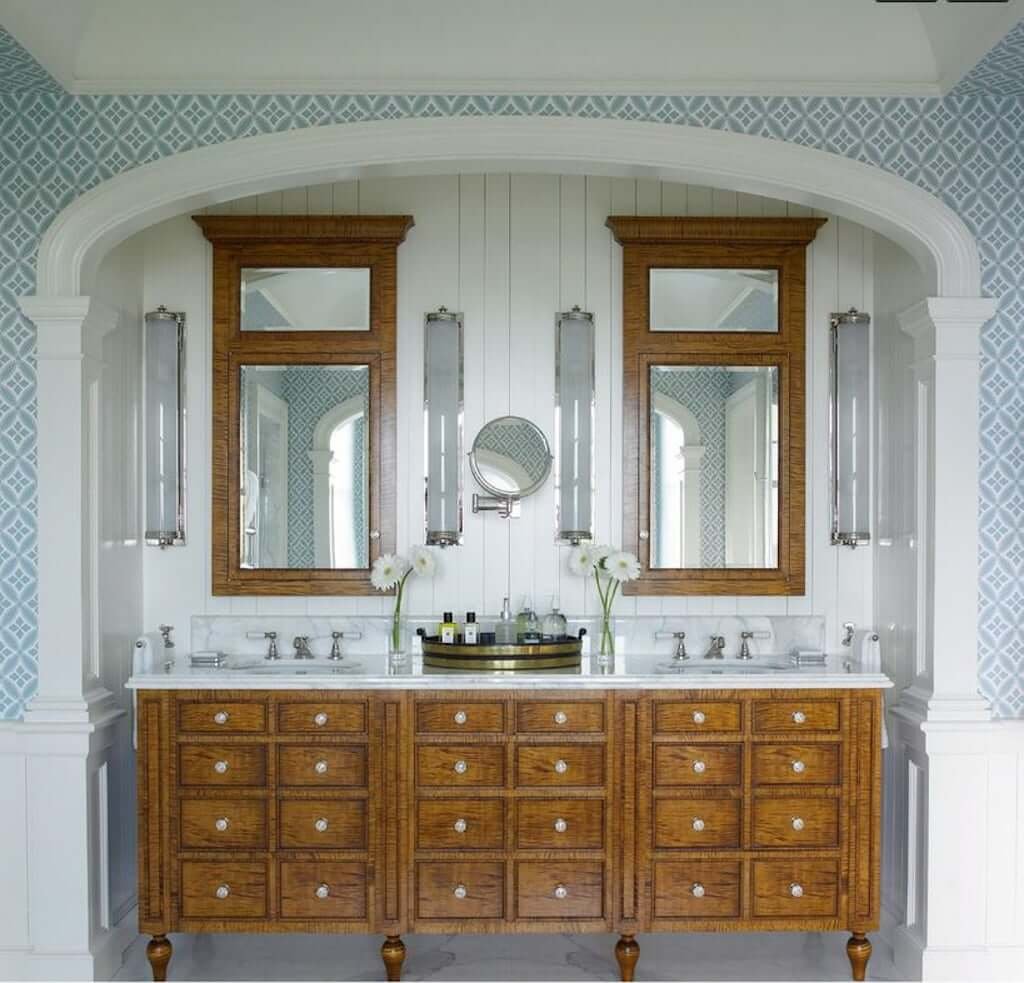
One example I saw of a bathroom vanity that looked like a converted bureau was this one below.
While I didn’t like that it didn’t go all the way to the edges of the wall (hellooooooo 1800 things falling off my countertop and onto the floor back there!), it was one of the few photos I found at the time that at least gave Matt an idea of what I liked so that he’d be on board. 😉
DESIGNING OUR DARK WOOD VANITY WITH LIGHTS
Steps #1-2: Determining the Exact Dimensions!
This can actually be quite a complicated step depending on the space you have available, as well as the look you want. We couldn’t just draw up where we wanted drawers and call it good; we had to consider things like
- sink size
- sink location
- drawer sizes
- thickness of our countertop material
- height of vanity legs
- location of our faucets (which would be wall-mounted but I’ll talk about that in another post because it is MUY EXCITING)
- distance of our faucets from the wall to the specific sink we were getting
- final counter height we wanted when it was all finished (not just the wood vanity height)
DARK WOOD VANITY
Step #1: Initial Design!
First, I came up with a rough sketch of what I was thinking to show Matt:
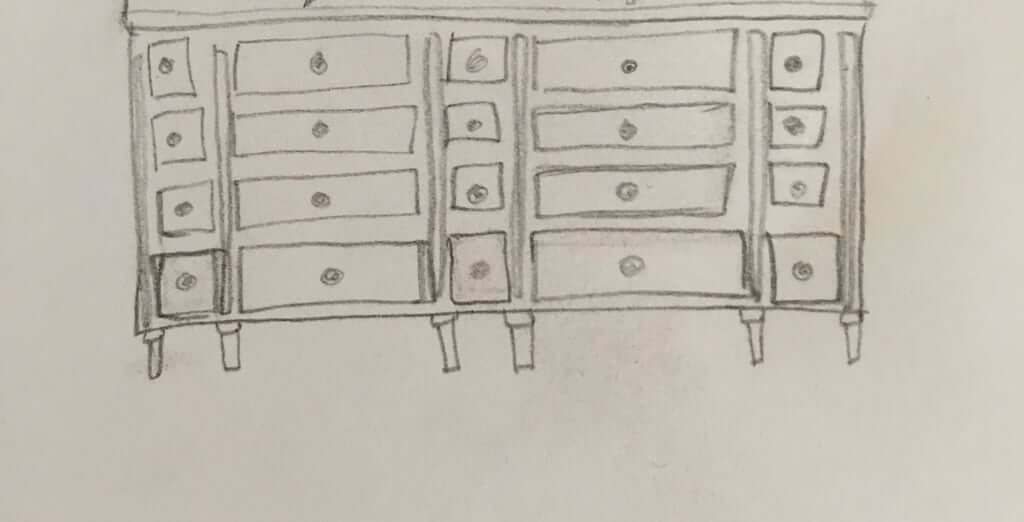
With the inspiration vanity pic I showed you earlier, you’ll notice their double sinks had to be scooted way over to the right and the left in order to line up with the sections of drawers below. They basically had three vertical sections of two drawers across.
I knew I wanted our sinks to NOT be so far over to the right and to the left; I wanted a generous amount of counter space on each side of the sinks. So when I drew up my rough sketch, I started with a section of wide drawers below each sink, which left space for three vertical “sets” of more square-sized drawers.
Step #2a: Figuring out exact drawer widths!
If you’re designing your own custom vanity, you want to max out your drawer space, right? So if you want to take advantage of the full amount of space available, you see how much space you have for drawers and all the supports and spacers and then take the max width you can for each drawer.
We share our exact dimensions and how exactly to maximize every millimeter you have HERE!
Step #2b: Figuring out exact drawer heights!
Same with height. We determined our final size, including our countertop material, and went from there to determine the height of our drawers.
Because we’re both tall, we wanted to make sure it was a little taller than the standard vanities so that it was comfortable for us. (We discuss more about pain-free countertop height in this post!)
Do we worry about resale to people who aren’t tall? The short answer is: nope! We love that this is useful for us in the here and now. Seriously, it has been SO comfortable to use; we almost feel spoiled. And it’s not like it’s abnormally tall and looks like it was built for giants; it’s just a little higher than normal. (And who’s to say the buyers in future won’t also be a little taller, like us, and will LOVE finding a beautiful home that will fit their bodies better too? Ya never know!)
We share our vanity plans HERE.
DESIGNING OUR DARK WOOD VANITY
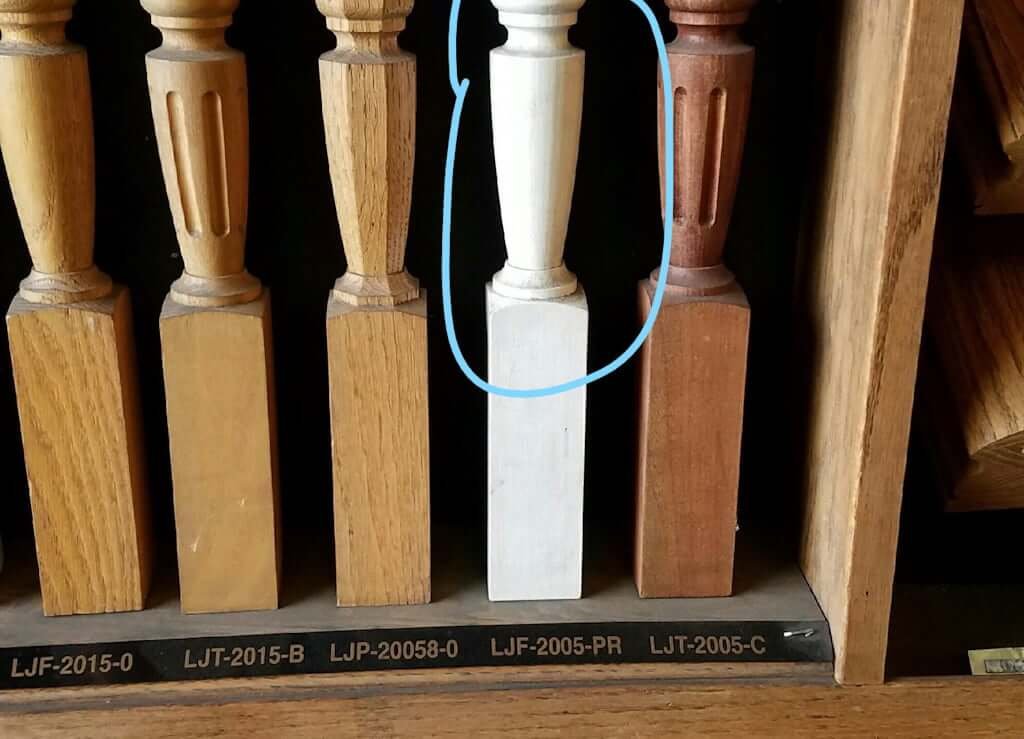
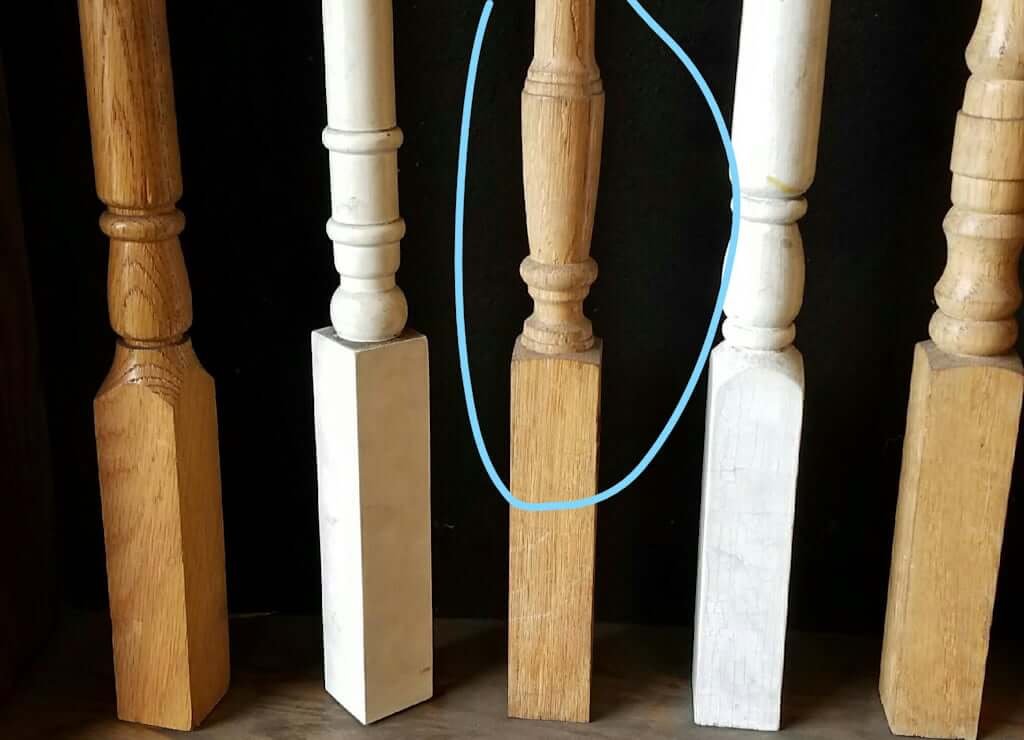
Step #3: Choosing the “Feet”
To me, part of what would make or break the look of this vanity actually looking like a piece of furniture would be its having feet at the bottom.
As much as I know Matt would have LOVED to build this vanity himself, since we were up to our necks in other renovation projects at the time, we hired a local guy (who builds the most beautiful furniture and was so nice to work with!) to build this vanity and all the drawers for us. (Because you know if Jess is on the project, it’s going to have a lot of drawers.) He had all the right materials and contacts to getting specialty drawer hardware and all the things we couldn’t handle researching how to get ourselves at the time.
We especially loved that he not only understood how exacting we were, but he also actually APPRECIATED our attention to the design details. He wasn’t annoyed at all with our exacting requirements! (I’m grinning.) Really, to say he was a pleasure to work with is an understatement. We both really felt like he was on our team and cared (almost) as much as we did about making this vanity turn out right.
We talked to him about what we wanted for the feet and he sent us pics of some options he could get. I circled two of my favorites and we ended up choosing one of them later on.
DESIGNING OUR DARK WOOD VANITY
Step #4: Choosing the Drawer Hardware!
Now, to some people, drawer hardware might be an easy part. For me, it’s one of the hardest because I AM SO PICKY ABOUT HARDWARE. I love looking for it, yet I’m a choosy lady. I don’t know how to explain it, and my rules for ideal hardware change based on where the hardware is going and what it’s being used for and what look I have in my mind.
When I found the inspiration photo below, I thing my heart actually sang. I was like “THIS is what mama wants.” I loved the round pull style that really does make it look like these are pieces of furniture converted into dark wood vanities. (I mean, even the look of the wood they used was almost exactly what we were going for with ours.)

What I didn’t love is how you can tell that the bottom two drawers can be opened, and the two top “drawers” are fake (to leave room for the sink and its plumbing)…but THAT I will also address in my next post because Matt and I have what I think are brilliant ways to avoid that AND max out storage. Just you wait. It’s SO bloomin’ awesome!
Back to the hardware…I had to do quite a bit of searching, but I finally found what I was looking for (because I also don’t like to spend an arm and a leg and I’m always convinced I can find something for a reasonable price). I can’t wait to show you how good it looks on the finished vanity.
DESIGNING OUR DARK WOOD VANITY
Step #5: Customizing the Drawers
You guys, the level to which we customized these drawers deserves its own post, and it’s included in my above “bloomin’ awesome” statement about the drawers, but for now I’ll just mention a couple things we did to whet your appetite:
- We included a custom double-tall drawer for a trash can (because if you’ve read our mudroom posts or seen our mudroom video, you know how I like to hide trash bins—a necessary but often unattractive part of life, even when they try to make them pretty…ain’t nobody foolin’ nobody there…). See it here.
- We designed a custom double-tall drawer on each side for Matt and I to store items away from the counter (with electrical power built in for our toothbrushes, waterpiks, hair tools…), and we measured everything so it would all fit perfectly…but when you close it, these double-tall drawer pullouts still look like two single drawers from the front!
Every single drawer is 100% unique! (See the organization HERE!)

Isn’t it beautiful? See our final vanity completed HERE and how you can both build and/or organize your own vanity to its fullest potential!
Here’s a quick video clip we made about the drawers:
Next…
Get our bathroom vanity’s 1) exact dimensions and 2) storage + organization HERE!
Missed seeing a step on our bathroom remodel? Below you can see
- How we determined how to change our floor plan.
- What we used to DIY our floor tile for (almost) free!
- Where we installed our wainscoting!
- How our tub made our bathroom feel bigger.
- Why we created our shower’s grout-free walls!
- What we used for our non-slip shower floor tile.
- Our completed vanity!
BONUS: Don’t leave without learning the 5 reasons drawers are better than cabinets in your bathroom!
➜ Our complete list of every single home project is viewable here!


I LOVE your blog & am considering which guides I need to make a plan for our new retirement (aka downsized) life in a spacious, but poorly planned 2br/2ba condo w/ basic builder (aka almost NO) storage space!
Thanks, Jess!
PS – I was surprised that we have so much in common! We lived in Old Leawood for 28 years (& before that in the Ward Parkway area near Brookside for 15) and had dear neighbors who moved out to the Lake Life at Lottawana and never looked back! At the time, I was intrigued by the idea of it, but our kids were very small & my husband was “spooked” by the drowning danger and very spoiled with a less than 10-minute commute that he didn’t want to give up.
Where did you end up ordering the designed vanity from?
Hi Megan, no pre-made vanity would perfectly fit this space so we custom-designed it and you can read the details in this post as well as this one! 🙂
– Jess
Very informative. Thanks for the writing. I too have been trying to decide between the rectangular mirror and a circular one for the past few days now, but never know, how the circular design could be used to break up some harsh edges.
The tips shared in the article helps. And definitely gonna help in my bathroom design ideas.
Yes, circular mirrors in the bathroom can be a great choice in the right situations! Glad our tips helped you, Remer. 🙂
Jess & Matt
Hi! Can you tell me how wide the vanity is and also where you found the hardware? It’s beautiful!
Thank you, Annslee! Our vanity is 95 3/8″ wide. We provide all the sources we used on this post HERE: https://thebrainandthebrawn.com/double-sink-bathroom-vanity. Our source links are usually under each photo! 🙂
Pingback: Guest Bathroom Refresh - How to Paint Cabinets & Frame Mirror -