*This post contains affiliate links.
This gives away (almost) all our secrets as to how Matt and I max out the function of our rooms, step-by-step! 😉
(And how we got all our mudroom ideas sorted out before implementing them to make our high-function mudroom!)
I’ve not shared these steps with anyone before. It’s a FAST 3-step insight into how we think things through.
And in today’s story, when it comes to a tiny mudroom entryway that’s only 35 sq ft but you want 100 sq ft of functionality packed in there, you GOTTA spend time thinking it through!
ENTRYWAY & MUDROOM IDEAS
How to Solve the “Room Function Puzzle”!
I don’t like complicated jigsaw puzzles. You know the ones you spread out on a table and they take days? No thanks.
However, I love what I call “room puzzles.” A room you’re trying to improve in almost any capacity. This room is like a 3D puzzle (or maybe it’s 4D or 5D because you have other “dimensions” like functionality, aesthetics, light, etc).
I ENJOY figuring out a room puzzle that has so many different dimensions. It’s incredibly satisfying when it all comes together and you have all the important factors—most importantly, the functionality, but also the beauty.
How to solve the room function puzzle? Here we share our tried-and-true steps to organizing a well-functioning mudroom.
MUDROOM IDEAS
Step #1: Dream time! Make a list of what you want.
Yes, just make a list of what you want in your mudroom. All of your ideas get to come out here. Don’t worry about what you do or don’t have. (Yet.)
I find this step helps me start to think outside the box. You want space for 40 pairs of shoes but don’t have the room? Don’t worry about it for now; just write it down. Sometimes you’ll be surprised at what you can come up with as the process unfolds.
This is dream time. Inspiration time. Imagine you have a blank mudroom and what you would do with it.
Me? When I started, I had a hard time finding any pictures out there that I liked for our mudroom. (What else is new?)
There are many beautiful mudrooms out there, but I wanted FUNCTION most of all! I love beautiful spaces, but I want to nail down the function first. What use is a beautiful room if it’s missing 3 things that would make your everyday life SO MUCH EASIER?
➥TIP FOR ROOM PLANNING:
Before everything, focus on how you want your room to function. You can still have a beautiful room; just nail down the function first! Download our Room Design + Layout Guide to get step-by-step help on your space!
In the pic below, I did like the board-and-batten, but I was pretty sure we could fit more storage into our mudroom AND I WAS DETERMINED TO EEK OUT EVERY LAST INCH OF SPACE IN OURS.
My mudroom ideas list included wishes like:
- I want a spot for my keys so I never lose them again.
- We’d love a place where multiple people could be sitting down at once.
- We want to be able to grab shoes easily.
- I don’t want any doors opening into the mudroom; I want it light and open and easy breezy.
- I want a designated spot for every single item we use, so it can be stored away and unseen every time we walk by the mudroom.
MUDROOM IDEAS
Step #2: Make a list of what annoys you in the current space!
I find this an IMPERATIVE step.
I make a list of any and all problems I would like to solve. It’s kinda like the Dreaming Phase, but even more specific.
The reason I like to do this is because this step is usually what makes the room I’m rethinking become almost magically functional. People can get so focused on the aesthetics or all the wish list items, that they don’t think about all the things that annoy them with their current setup.
And if you don’t think about those problems, how can you solve them?
Sure, some might happen to get fixed, but it wasn’t on purpose. Why not guarantee you will never have to deal with that issue again?
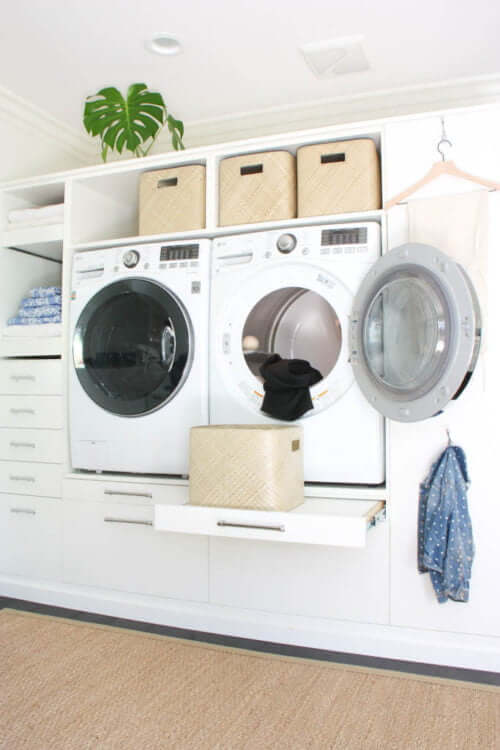
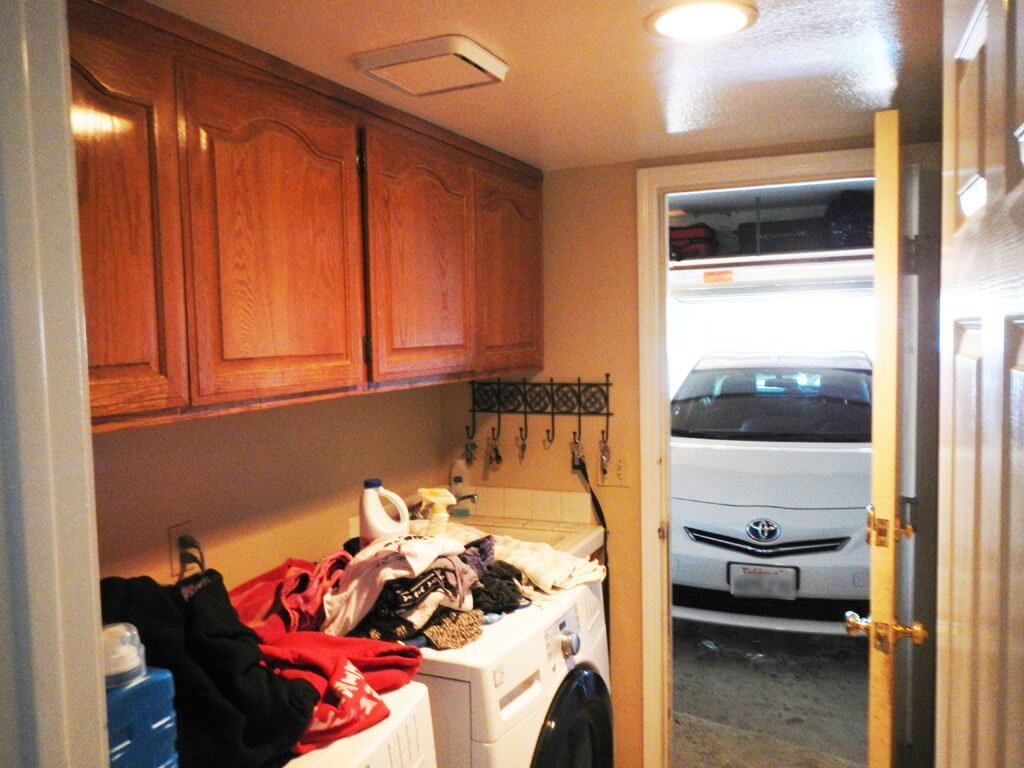
For example, my biggest issue with the mudroom organization WAS ALL THE DOORS OPENING INTO IT. Nine of them. (11 if you count the frontloading washer and dryer doors too!)
So when I made my list of mudroom ideas and all the things that annoyed me, that was right at the top.
And you bet your britches I solved that problem when we redesigned the mudroom.
There is now just ONE single door opening into this space, and that’s the garage entry door (which kinda had to stay there).
From eleven doors to one. And it is ooooooooooooooooopen in there!
MUDROOM IDEAS
Step #3: Combine + sketch out your best layout ideas!
This is where I take all my mudroom ideas from Step 1, all my problems to be solved from Step 2 (with the best solutions I’ve come up with for them), and combine them into my master list of what I want/need.
I then take the space I have and try to figure out where everything can go. (This is where it’s like a fun 5D puzzle.)
For example, in my mudroom ideas list I had things like:
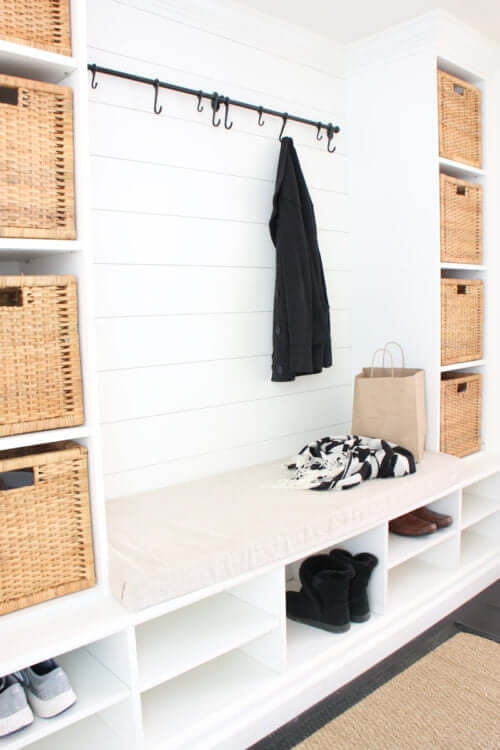
- Have a drop zone right by the door.
- Put hooks on the wall with seating below.
- All the little stuff where the old cabinet in the wall used to be.
Once I come up with my best guesses on how to use the space, I move into Step 4…
ENTRYWAY & MUDROOM IDEAS
Bonus Step #4: Implement the “Real-Life” phases of testing!
Let’s be frank. Our mudroom space isn’t as big as some of those that exist out there. You know, the mudrooms that are the size of entire bedrooms.
No, ours is still a very small space. Therefore we needed to be smart (I’m squinting my eyes slightly and tapping my head for extra emphasis) about how we used the space.
Amazing big-time inspiration photos are great to copy straight-up—IF you have the same layout and space to work with. They can be nice for seeing “all that could be—IF I had another 100-150 square feet.”
We only had about 35 square feet to work with, so this is where I started implementing my “phases” of mudroom ideas testing (also mentioned while organizing our laundry room).
Basically, I like to do some “test runs” living and working in a space before we do the major planning and undertake all the actual work. Sometimes you can really figure out a brilliant solution by this simple step! Just takes a few extra days or weeks, if you have them.
For example:
- You want a place to sit down when tying your shoes. Great! But how on earth do you know the perfect size to make it? Do you make it large enough for one person? Two? Five? How does your household end up using it? (Sometimes you might be surprised one way or the other.) Do you make it large enough for adults only, or make it lower so kids can sit down too? You might discover during the test phase that your kids sit on the ground anyways, so make it high enough for the adults.
- You want a drop zone for things like groceries and mail. Great! But how do you know if that’s the only thing you actually need to “drop” in real-life scenarios? Maybe you need it wider/deeper/higher/lower than the standard. So often we forget the random things we tend to set in places, especially when we’re coming in from errands or a car trip. We might actually need more/higher/lower/shallower/deeper surface spaces than we originally thought.
- You want a place to keep hats. But what works best for you: hats hanging on hooks? Hats on a shelf? Hats in a drawer or basket?
MUDROOM IDEAS
Test Phase 1: Remove what you can from the room.
In the case of our old laundry room, that meant us removing
- the door opening into the room from the rest of the house
- the upper cabinets
- the large cabinet doors behind the entry door
We also flipped the washer and dryer to the other side of the wall (to test out our laundry room).
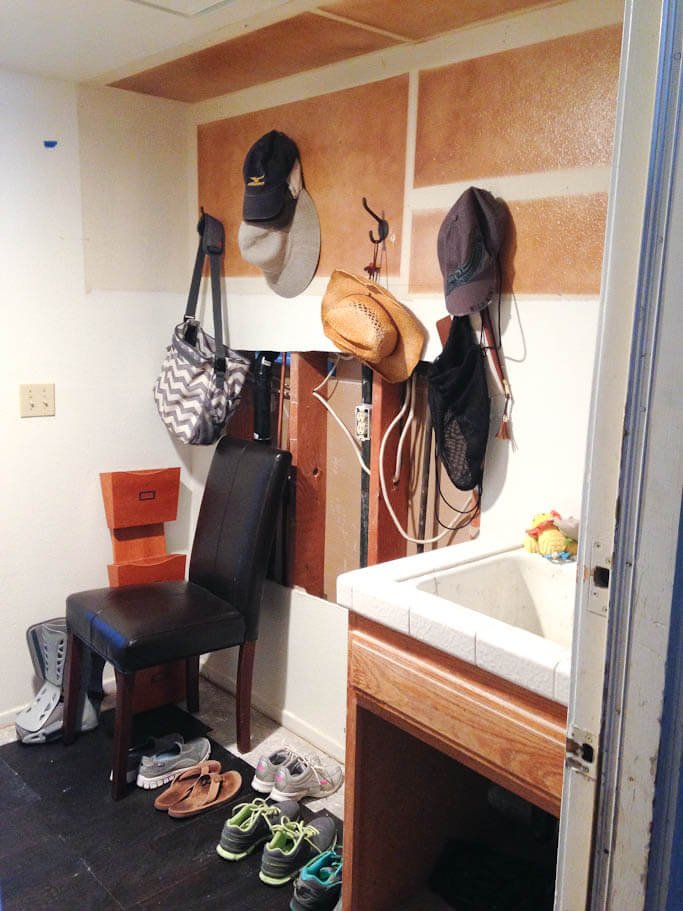
In the below photo (taken from the garage entry door) you can see
- that we removed the white door opening into the space from the rest of the house.
- what the behind-the-door cabinet looked like with the two large oak doors removed, plus two of the interior shelves removed.
I did that because one of my mudroom ideas was having a drop space. I wanted to see what it would be like to have a “countertop” in there, and leaving one of the shelves like that would provide a good testing ground.
PS: See the awful plastic garbage can down there? Yep, that’s one of my mudroom idea “problems” that gets solved later! Watch for it!
MUDROOM IDEAS
Test Phase #2: Live in the space.
Just live with it for a little. This is where you really get to test your mudroom ideas out in real life.
I know it’s ugly, but it won’t be forever. What it WILL be is extra awesome because we took the time to do these extra steps.
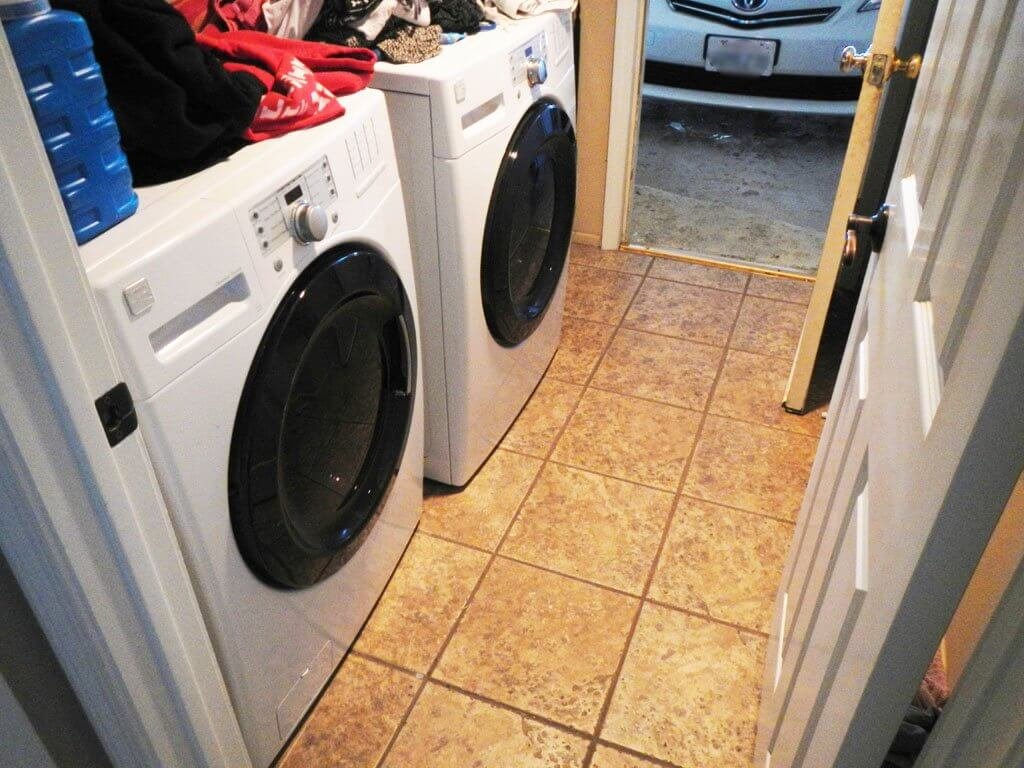
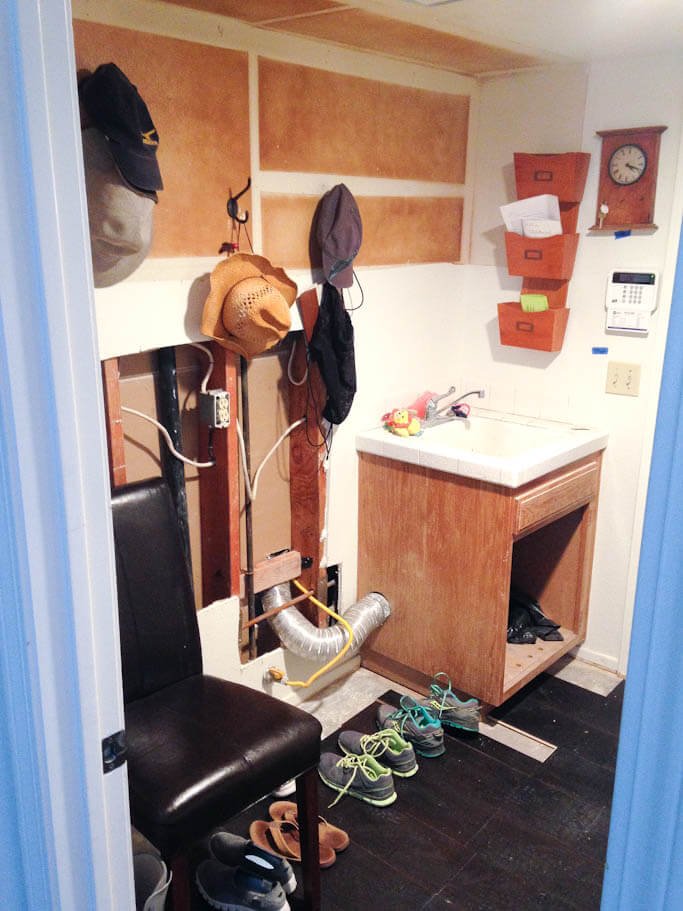
Here’s a view from the garage door:
You can see some of our mudroom idea “tests” in action in that photo, such as
1. Sink:
We left the sink there. I was not convinced I wanted a sink in here, but a friend had said how imperative hers was for her with kids, so I left it to see if I really indeed used the sink so much that it’d become a “must keep.”
➥TIP FOR ROOM PLANNING:
Sometimes, what’s a “need” for one person may not actually be a need for you! Don’t thoughtlessly copy. Don’t assume because X has Z feature, you need it too. Here’s where you get to be original!
2. Hooks:
Hooks were added so we could answer this questions in real life use: How many would we want? How high/low would we want them? How did we want to space them? All in a line or offset? Did we really like having hats hang there as well as coats?
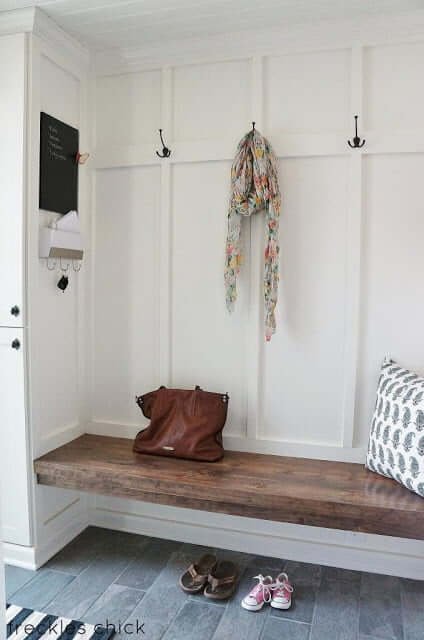
3. Chair:
Did we like having a place to sit down? Did we want more places for more people to be able to sit simultaneously?
4. Mail sorter:
We had a set of old wood bins from our first house that hung on the wall. We were going to donate them, but then thought maybe these would be helpful for mudroom organization. Maybe we’d use these as a place for incoming/outgoing mail? We gave them one last chance to prove their usefulness.
5. Shoes:
How many pairs of shoes did we expect to hold in this mudroom? What types/heights/widths would we need? Did we like having them down low or would we like them raised at all?
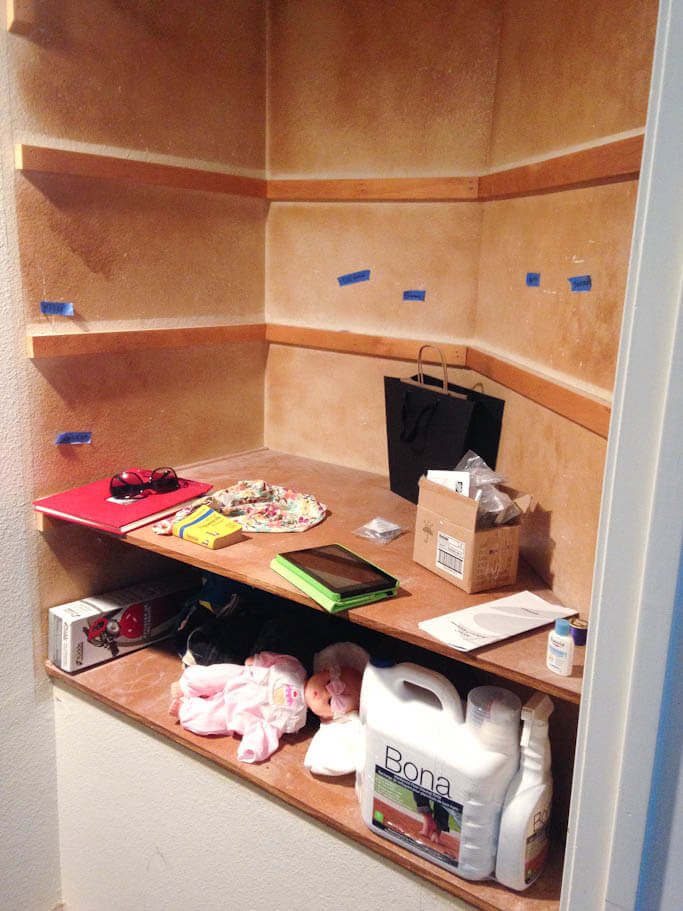
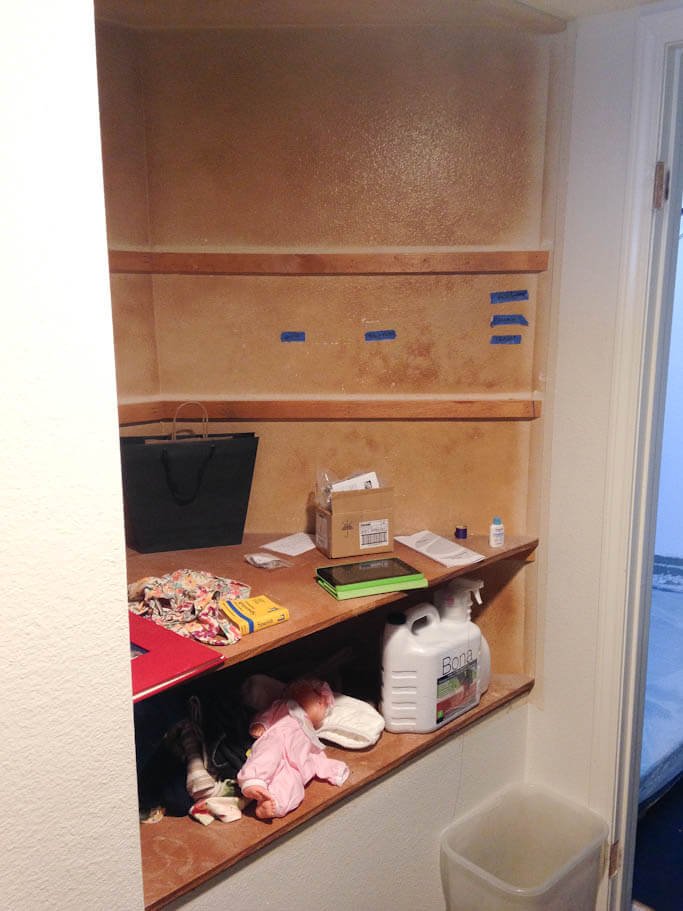
Back on the cabinet replacement side, we were testing out the following ideas for our mudroom:
1. Counter space (for a “drop zone”).
You can see how there used to be four shelves in this cabinet. We removed two of them so we could figure out if we liked having counter space here instead.
2. No upper shelves.
Here’s where I struggled with a good “mudroom idea.” I wasn’t sure what we’d want in the now-empty space where the shelves used to be, but I was 99% sure I didn’t want those same big, deep shelves there. (I have a love-hate—which is mostly-hate—relationship with deep shelves.)
What I didn’t know was what we’d want there instead. A cork board? More storage? A secret window into Narnia where a talking animal would tell me what to do in my mudroom? One could only find out by removing the shelves and living with it like that.
Note: All the blue tape are my little ways of marking and remembering real-time things I thought we needed places for there. Things like “keys,” “sunglasses,” “wallet.” Just how I did it.
➥TIP FOR ROOM PLANNING:
Feel free to mark things up! Pin notes up on the wall, use painters tape to mark out lines, or just plain draw on your walls (if you’re going to be covering them up later) to mark out things as you notice them. (i.e. “Where X should go.” “Where I want Y.” “Z would look good here.”)
3. Lower shelf.
We left the lower shelf to see if we’d like having it there. (I was pretty confident I would NOT like that deep shelf, as aforementioned, but I was giving it one last shot to prove itself. You can’t say I don’t give things a chance before ripping them out.)
Here’s a view from the inside hallway. You can see
- more of my blue painter tape-on-wall method.
- us trying out the mail holders. (Spoiler alert: they didn’t make the cut and we donated them.)
- something connected to the dryer going out to the garage. (Ask Matt; I know not of such things.)
MUDROOM IDEAS
Test Phase #3: Make your decisions.
Now that you’ve lived with everything, you get to decide what worked from your mudroom ideas list. What didn’t work. What stays. What goes. What was missing. What was unnecessary.
Below you can see a preview of what’s coming in our particular mudroom organization scenario:
- No sink. (It didn’t make the cut. If we had 150 sq ft to work with, sure; I’d love a mudroom. But with only 35 sq feet, we had much bigger fish to fry.)
- No pipes and vents and doohickies sticking out of the wall. (Matt moved all those and started patching the drywall.)
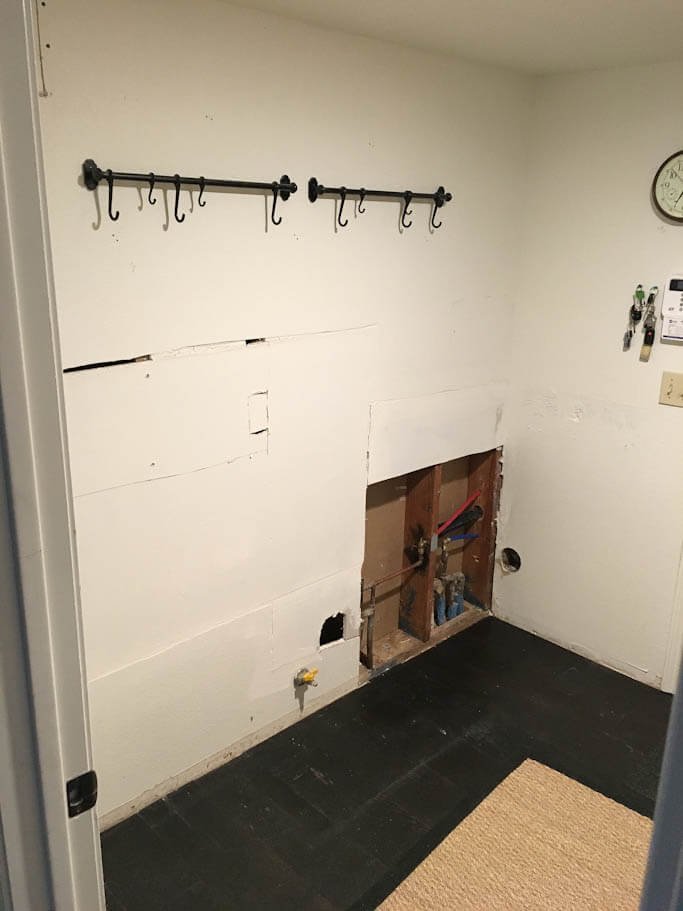
I have nothing to say because all I can focus on in this picture is the yellowed light switch from 1985. It needs to disappear into the night.
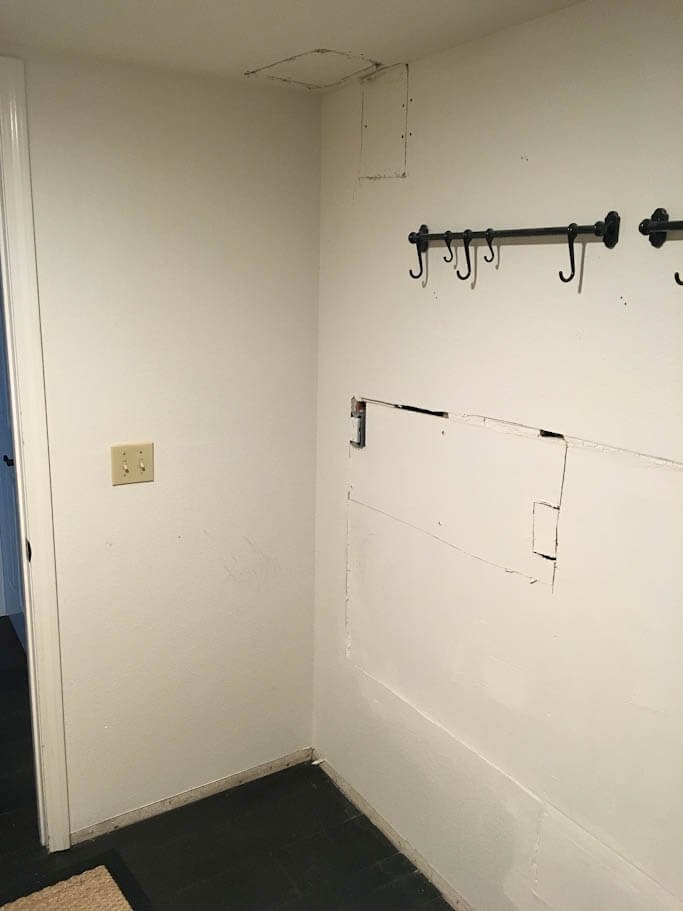
(I’d like Matt to write or video a How To for you guys on switching out old light switches/covers one day. It helps make an older house look so much more updated.)
We also cleaned up that old cabinet area to prep it for the work that’s coming.
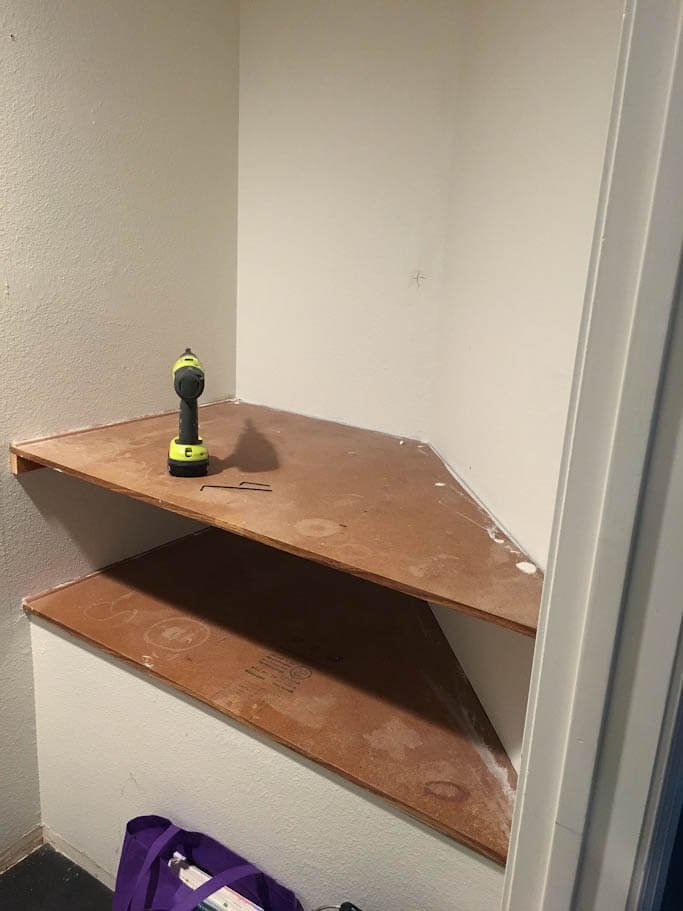
See the completed mudroom! (Or if you missed it, check out what this room used to be before we ripped it out.)
➜ You can browse our home room by room HERE!