Avoid designing your master bedroom closet layout only to have to redo it again one day! Today we’re sharing how to nail your master closet layout the FIRST time you do it—and love that layout forever! 🙌🥰🥳
If you’ve read our first post about how we got extra space in our closet (without stealing a single inch of square footage from any rooms!), you’ll be up to speed and ready to hit the ground running on this one!
(But if you’re new, you’ll want to check out that post first!)
So now that we had our new master walk-in closet’s square footage figured out, we now needed to figure out a design.
BONUS: We’ll also answer your popular questions such as:
- “What size should a master closet be?”
- “How do you build a master closet?”
- “Is 5 feet wide enough for walk-in closet?”
- “How deep should a master closet be?”
- “What goes in a master closet?”
- “What is the average size of a master bedroom closet?”
- “How do you layout a walk-in closet?”
- “Does a walk-in closet add value?”
- “How do I organize my master closet?”
MASTER CLOSET LAYOUT
Tip #7: Sometimes we have to let go of our ideal closet layout.
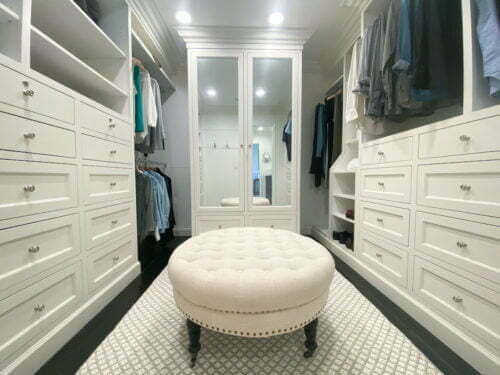
Originally, I loved the idea of a perfectly symmetrical, U-shaped master closet layout similar to this one I found while looking for master walk-in closet ideas:

However, as in so many real-world renovations, your ideals are not often possible. And in this case, our initial “ideal” vision wasn’t going to happen because of three reasons:
- The closet door (from our bathroom) doesn’t enter symmetrically.
- Therefore the available wall space within the walk-in closet wasn’t symmetrical.
- And if that wasn’t enough (and even if we wanted to move the doorway), there was a small attic access door off to the left (which could not be moved).
MASTER BEDROOM CLOSET LAYOUT
Tip #6: Let’s Be Real: Closet #@*& Happens.
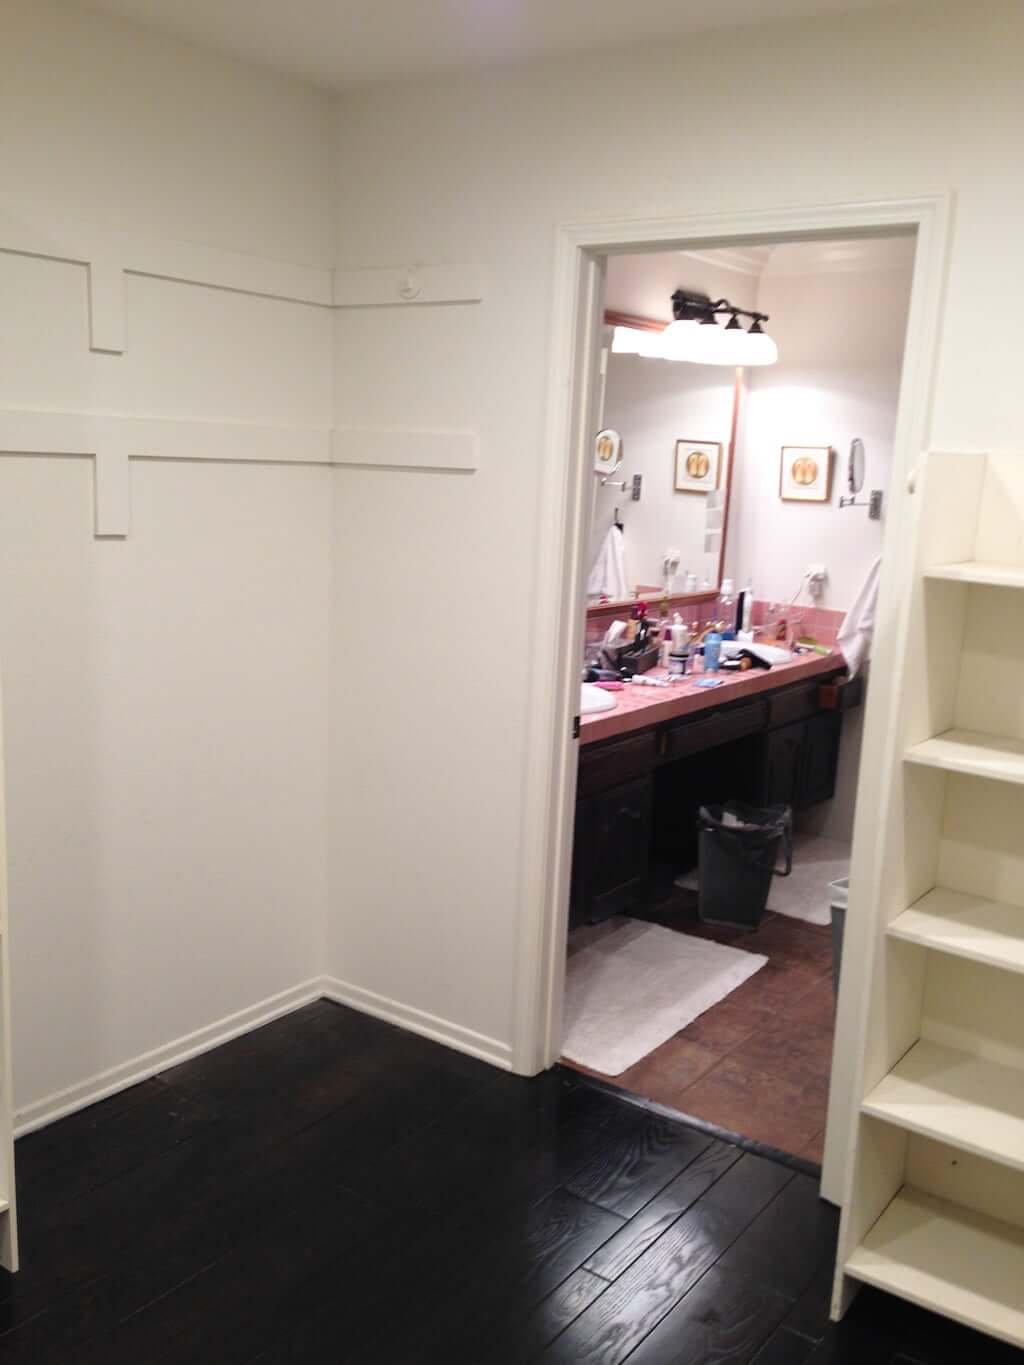
Let me draw your attention to that aforementioned attic access door putting a kink in all my master closet layout dreams.
See it down there?

It’s not even a nice, neat-looking squared off door. They made it angled and it didn’t need to be. The door guy was feeling extra “creative” with his door openings that day, I guess.
PS: I may consider changing the name of this post to “Real Closet #@*& Happens.” So tempting. Leave your vote below. 😂
MASTER BEDROOM CLOSET LAYOUT
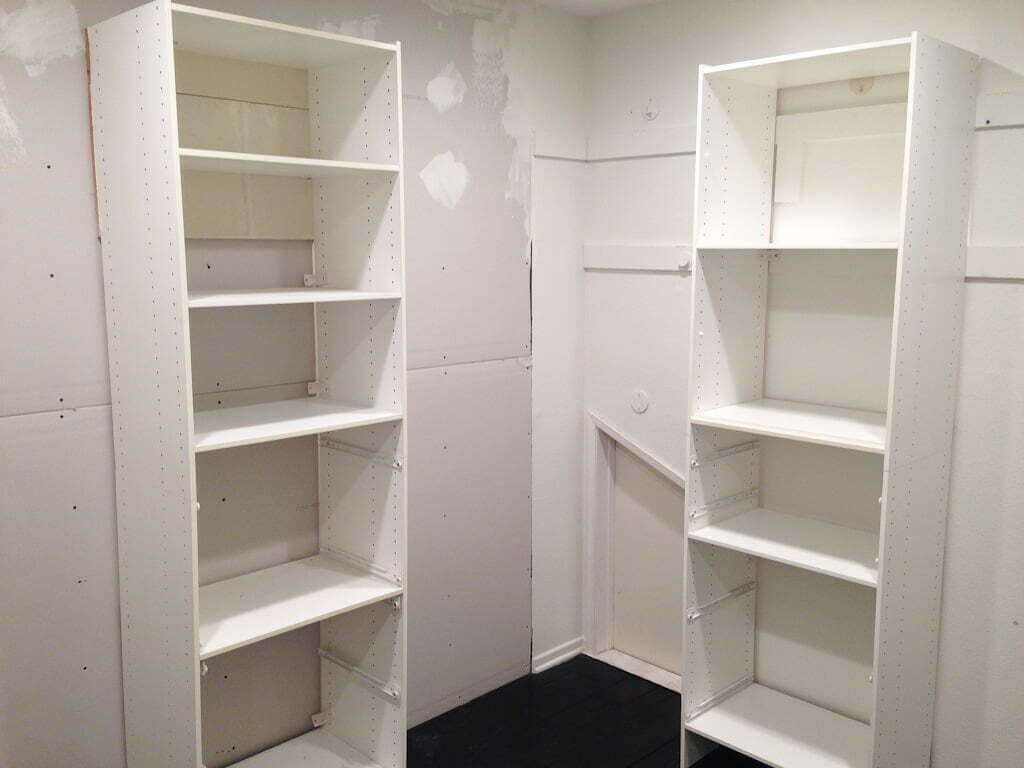
Tip #5: Test Your Closet Layout First!
If you can, test out some of your ideal heights before finalizing your design.
Here you can see our makeshift closet during our “Testing Phase” of design (to see all about how I insist on this phase before embarking on any major projects, see here!).
For this temporary testing phase, we used the old closet storage the prior owners had left.
(Psssst: We help you through these steps in closet design if you need it!)
That attic storage door was really the biggest problem. I’m sure we could have fudged something without perfectly symmetrical walls, and you wouldn’t have noticed it, but the fact that we had to allow access for this attic door meant muchos problemos, amigos.
Why?
- We couldn’t put drawers there. (Cue The Drawer Lady sobbing herself to sleep for two weeks! 😂 Ha! Not exactly, but still entertaining to picture such grief over not having 45 drawers in our closet.)
- We couldn’t put shoe shelves there.
- We’d have to leave it open and accessible (if we wanted to use the attic space, which we did, because we do like to park in our garage!😆).
This meant I needed to design something there that wasn’t in the way and yet provided us with maxed-out storage.
Hmmmmm…there’s always a way!
MASTER CLOSET LAYOUT
Tip #4: Be aware of your corners (and what to avoid!)
See our upcoming post on closet corner solutions (as well as the commonly-made mistakes to avoid!).
MASTER BEDROOM CLOSET LAYOUT
Tip #3: Grab a pencil & do a quick sketch for yourself!
After grieving, accepting, and then embracing the fact that our master walk-in closet would not be perfectly symmetrical, I found our solution.
I decided that the easiest (a.k.a. least annoying) solution would be to incorporate a hanging rod in this space that wouldn’t intrude on the attic access door. This would mean that the most work we’d need to do to get into the space would be to slide the clothes to one end of the hanging rod. No big deal, right? (And infinitely better than just leaving the space blank and losing that closet storage space!)

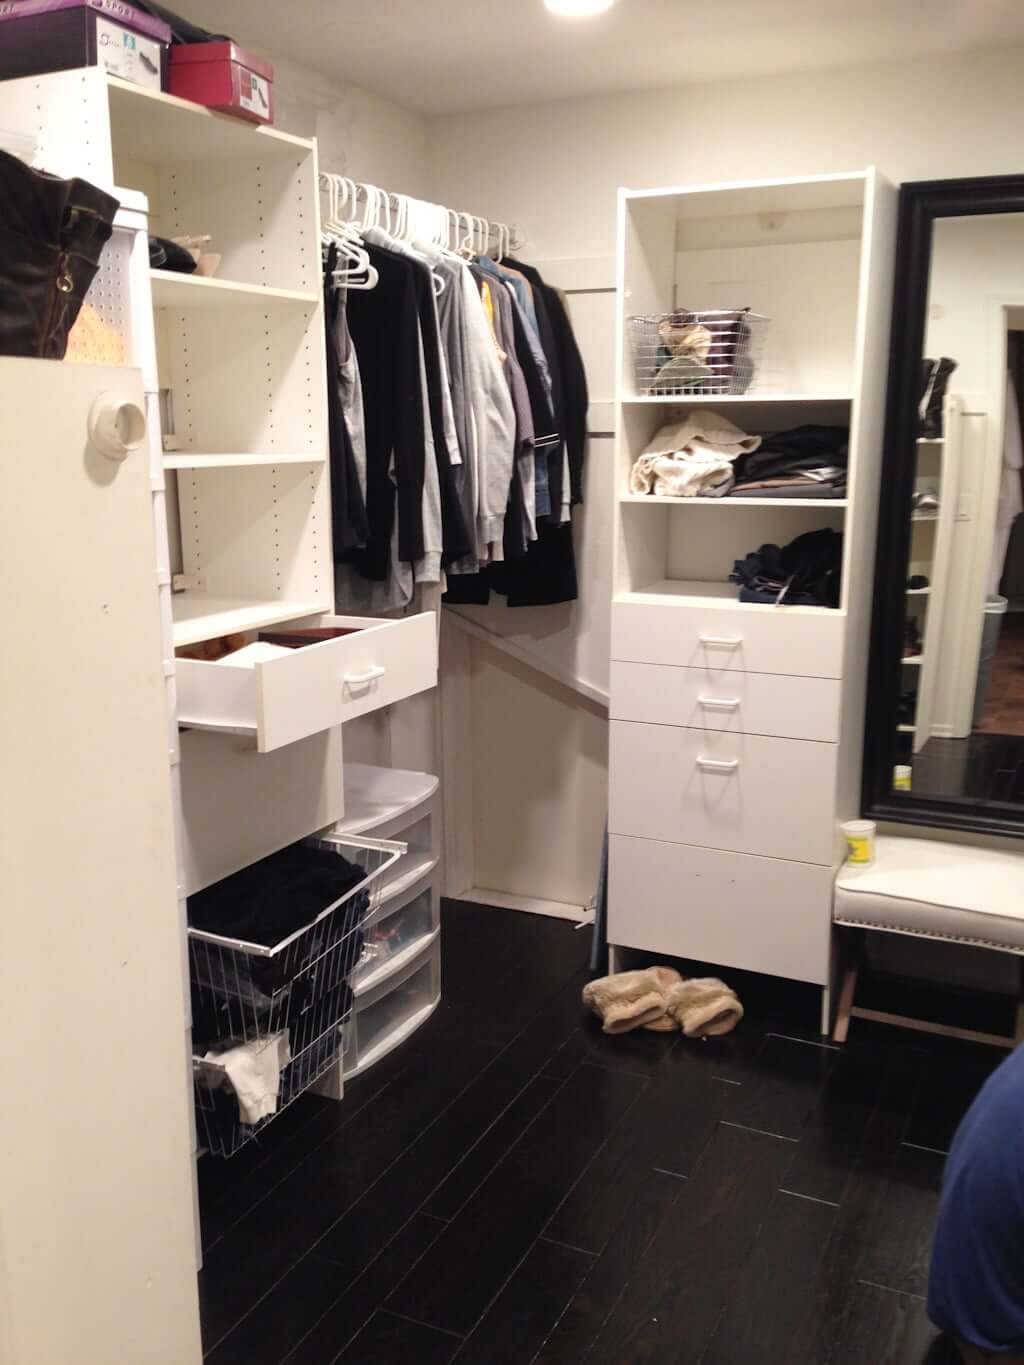
So the left wall upon entering our master walk-in closet would be drawers, shoe shelves (to be discussed in detail in our “11 Closet Must-haves!” post), and the hanging rods to accommodate access to that attic.
Lemonade out of lemons, people.
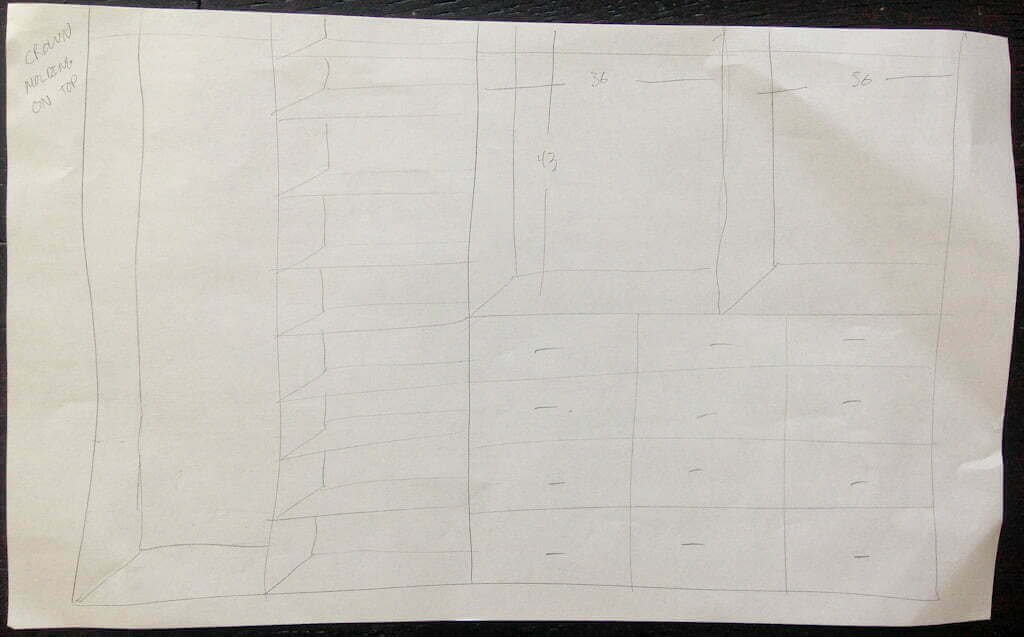
Above is our original sketch of the right closet wall, discussed in detail HERE.
MASTER CLOSET LAYOUT
Tip #2: Consider incorporating these 11 closet must-haves!
Of course, I would not allow my Quest for Symmetry to be a failure. We still found a way to incorporate symmetry in our master walk-in closet via the sets of His & Hers drawers on each side, and the built-in armoire-looking creation I’ll talk about in our post “Master Closet Ideas: Don’t Forget These 11 Must-haves!“
MASTER BEDROOM CLOSET LAYOUT
Tip #1: Ask yourself: “What don’t I like?”
Sometimes it’s not just important to know what you do like; it can be equally as important to know what you don’t like. (Another reason I recommend a Testing Phase.)
For example, we moved one of the old shelving units into this space next to the doorway (it goes directly into the master bathroom we remodeled after this photo was taken). I’d played with the idea of something here when you first walked in—something built off the wall. Maybe it could have been shelves, maybe it could have been drawers—I didn’t know yet, but I wanted to see if it would be annoying to have something coming off the wall right as you entered.
Yes, it was annoying. It didn’t feel as open when you first walked in. I never would have known that hadn’t I done a testing phase of our master closet layout. So I then knew for sure that in our final closet design plans (found here!), I wanted to leave this space open in my layout.
I also wanted to incorporate an island for extra storage but it was too tight—see what I did in our next post!
MASTER WALK IN CLOSET LAYOUT
BONUS TIPS: Nail Your Master Closet Bedroom Layout the First Time!

Read our post about the “3 Strategies to Work With What You Have in Your Closet!” for more details on how to nail your closet layout from Day 1!
MASTER WALK IN CLOSET LAYOUT
Sizing Questions!
And now for the questions like, “What size should a master closet be?” “Is 5 feet wide enough for walk-in closet?” and “How deep should a master closet be?”
The minimum width you should go on a master closet is about 4′, and you can do the same for the depth. If you can push it to 6 feet, you’ll have room for hanging rods, drawers, or other storage on each wall.
Some sources will say 10′ should sufficiently allow you to add an inner island for bonus storage, but our closet was just under 10′ and still I thought it was far too tight to add something in the center! Check out what we did with our walk-in closet dimensions HERE.
So really, from both real-life experience and my professional opinion, I say 11-12′ minimum would be your best bet if you wanted that nice, substantial-looking interior closet island!
Next…
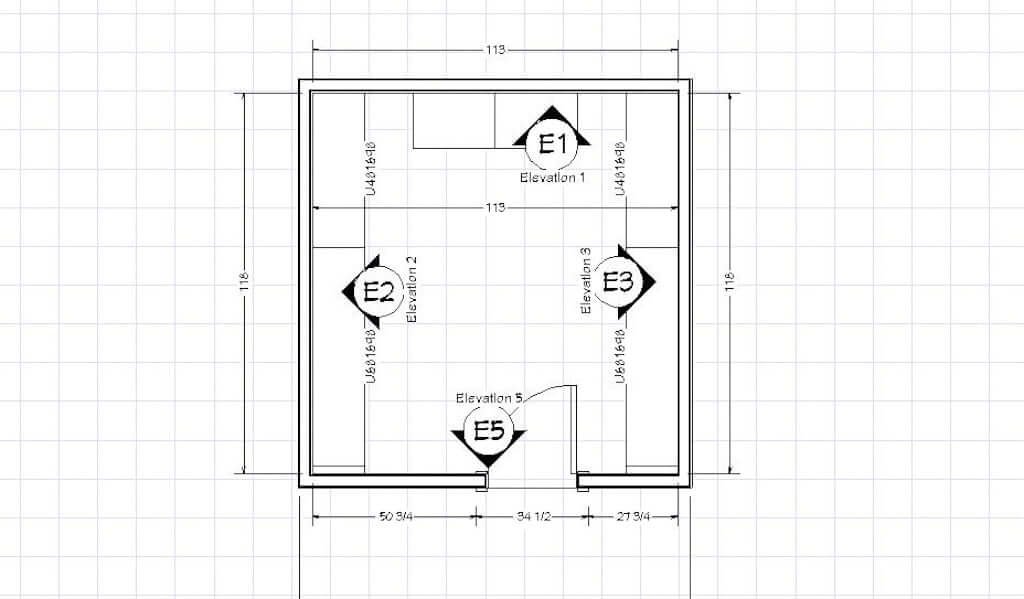
See our “official” computer-drawn-up master bedroom walk in closet layout!
To save yourself time (and avoid having to hire us full time–instead you can Design-It-Yourself!–we’ve created our Closet Design Guide for your individual use. Enjoy!
- 3 tips to AVOID closet mistakes!
- Find Extra Space: walk-in closet floor plans & dimensions.
- Don’t forget these 11 Closet Must-haves! (we did all of them!)
- 3 strategies to maximize what you already have in your own closet!
- Why you should avoid buying these 5 items pre-made!
If you missed our original post on how we got the extra closet space for “free”, you’ll want to check that out. Our next post will include our top tips on how to give a small closet a luxury feel.
PS: See every single one of our house projects HERE!


It’s very nice. I must admit I didn’t read word for word. I was trying to figure out if you built your own drawers or if they were assembled from a storage system like from IKEA.
Hi Aureliana, they were all custom built for this space.
Thanks!
– Matt & Jess
PS: We show you exactly how to do it HERE!
https://thebrainandthebrawn.com/product/closet-design-guide-plans/