originally published 2014
Small kitchens need islands. Even if it has to be a kitchen island cart (as it did for us as renters)!
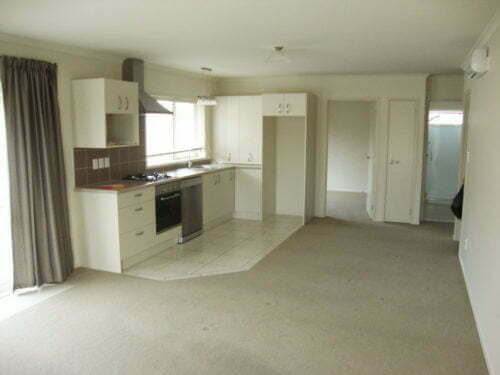
You’ll have seen in this tour of our favorite flat in New Zealand that the kitchen was on the small side.
That photo shows the whole living space. All of it. The “dining area” is on the right wall next to the door to the garage, and you’re standing at the edge of the lounge.
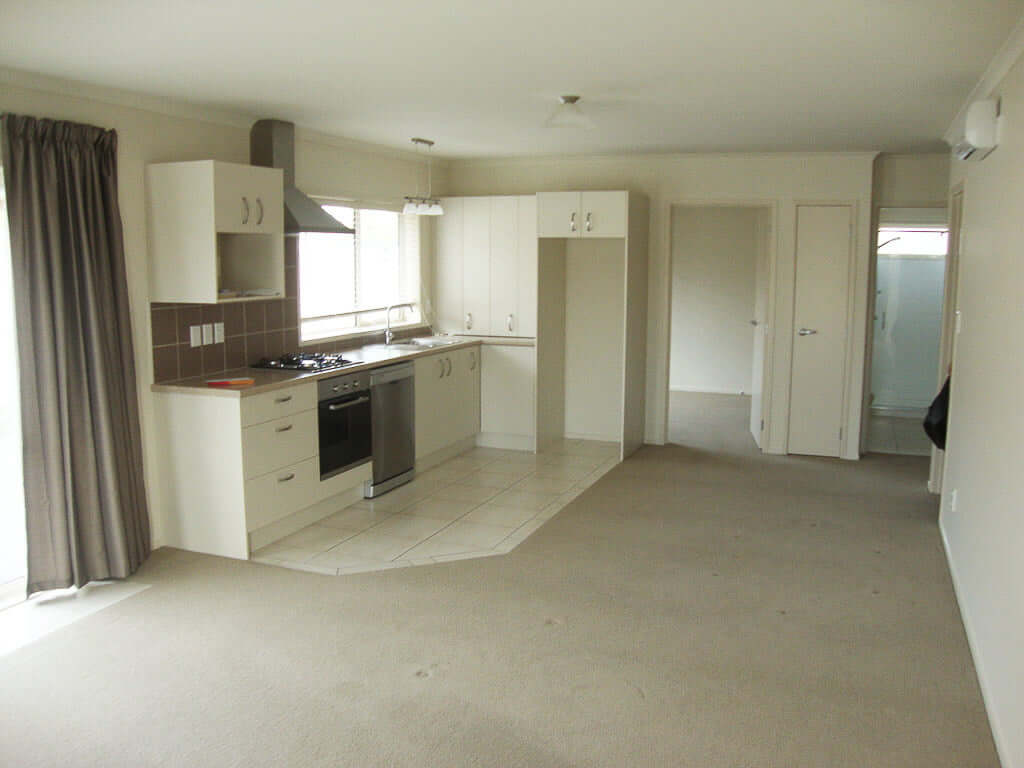
Let’s get a little closer so you can really see our kitchen situation.

THE AVAILABLE COUNTER SPACE WAS NEXT TO NIL.
The only truly usable cooking/prep space is above the dishwasher. That’s it. Not exactly conducive for cooking more elaborate meals as sometimes happens in our lives, and especially not conducive for a couple cooking together.
There IS some counter space (or “bench space”, as they call it in New Zealand) to the left of the stove, but it’s awkward to work in because of the cabinet above, so that’s where we fit my espresso machine.
(I say “my” because Matt doesn’t drink coffee. Don’t hold it against him. I try not to. He’s really quite nice otherwise.)
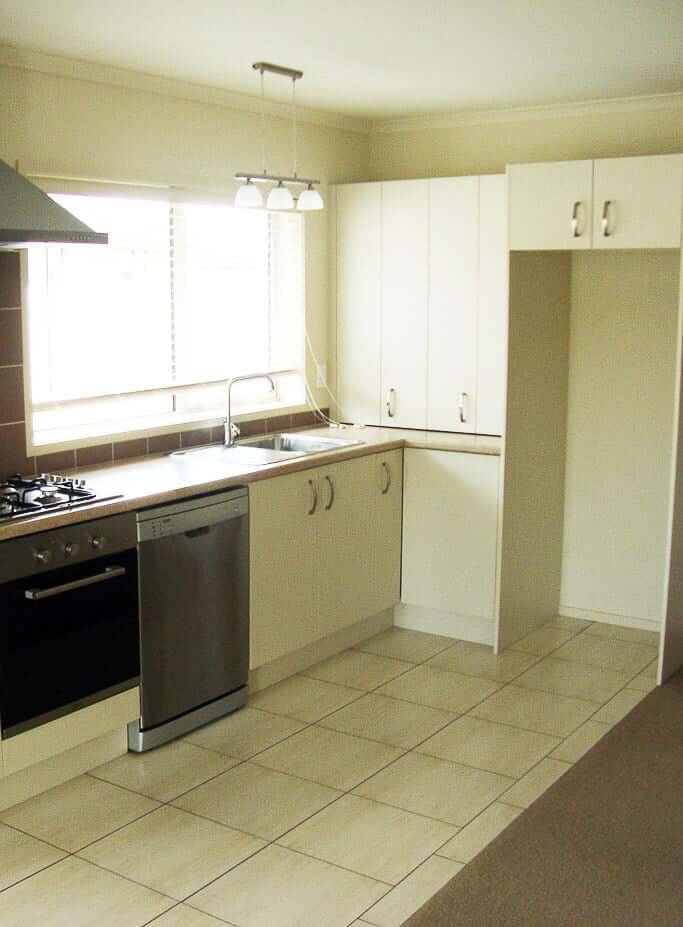
There IS also some faux counter space to the right of the sink, but it’s a trick. It’s all a sham. You can’t set anything on it. See those bifold doors? That’s “the pantry.” And those pantry doors open up right into that narrow sliver of faux counter space, rendering it useless.
THE DISCUSSION BEGINS.
On Day 1, we started talking about how to create more counter space. I’m so thankful I’m married to someone with whom I can talk about those kind of things and actually EXPECT that we will do something about it.
Because something had to be done.
A new kitchen island cart idea was born. At first, I was thinking quick and functional. I just needed something with a HUGE surface space we could really spread stuff out on while cooking.
KITCHEN ISLAND CART PROJECT
Attempt #1:
First, I looked for an old, used, cheap table. Because buying actual new wood in New Zealand was expensive for us, I was trying to get creative.
I figured an old table would already be beat up and we wouldn’t mind it getting knife marks or other bludgeon marks that may occur while preparing food.
(I just said that last part so I could use the word bludgeon for the first time in my life. And I’m done.)
I found and bought this table for $15. Much less than wood would cost.
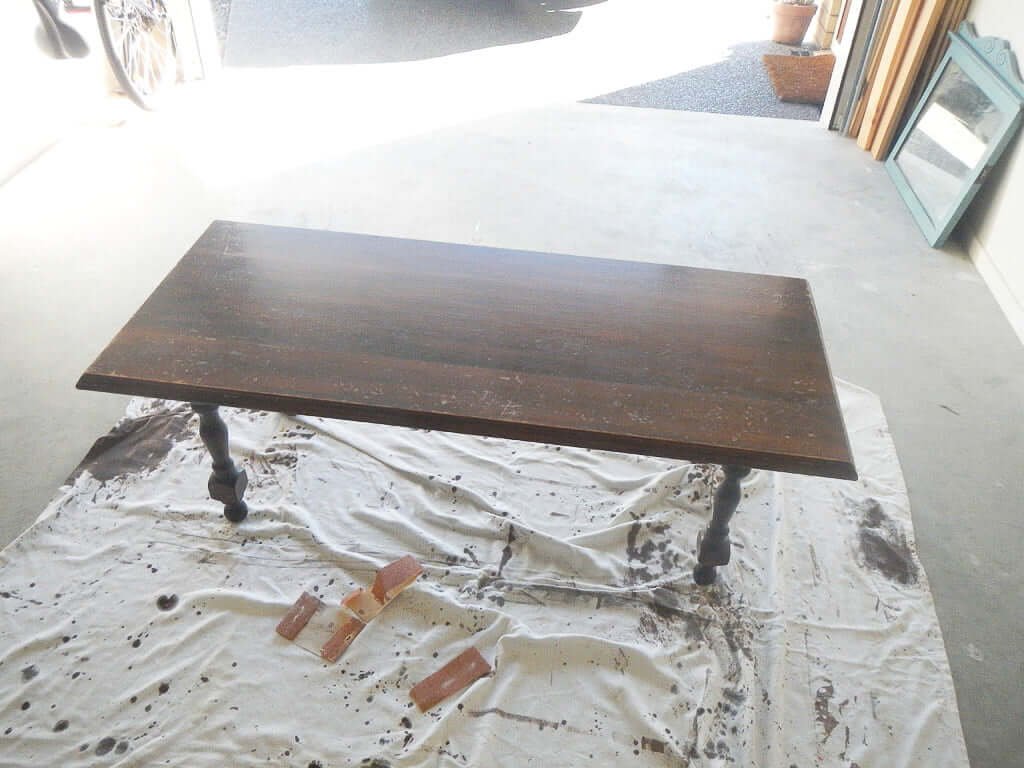
I figured we could rip the top off and use it as our kitchen island top, just building a simple base below. It was so beat up and dented, I didn’t even care. Perfect for bludgeoning our food. (Oh my goodness. It didn’t stop. It happened again. Word fun may be getting out of control.)
At some point, Matt stepped in and explained to me how this quick and dirty plan may not be the best course of action. I don’t remember exactly why, but something about “quality” and being able to better customize the size came to mind.
KITCHEN ISLAND CART PROJECT
Attempt #2:
I was convinced. We decided to buy wood. (And no—shockingly enough!—it was not pallet wood. We like to keep you on your toes.)
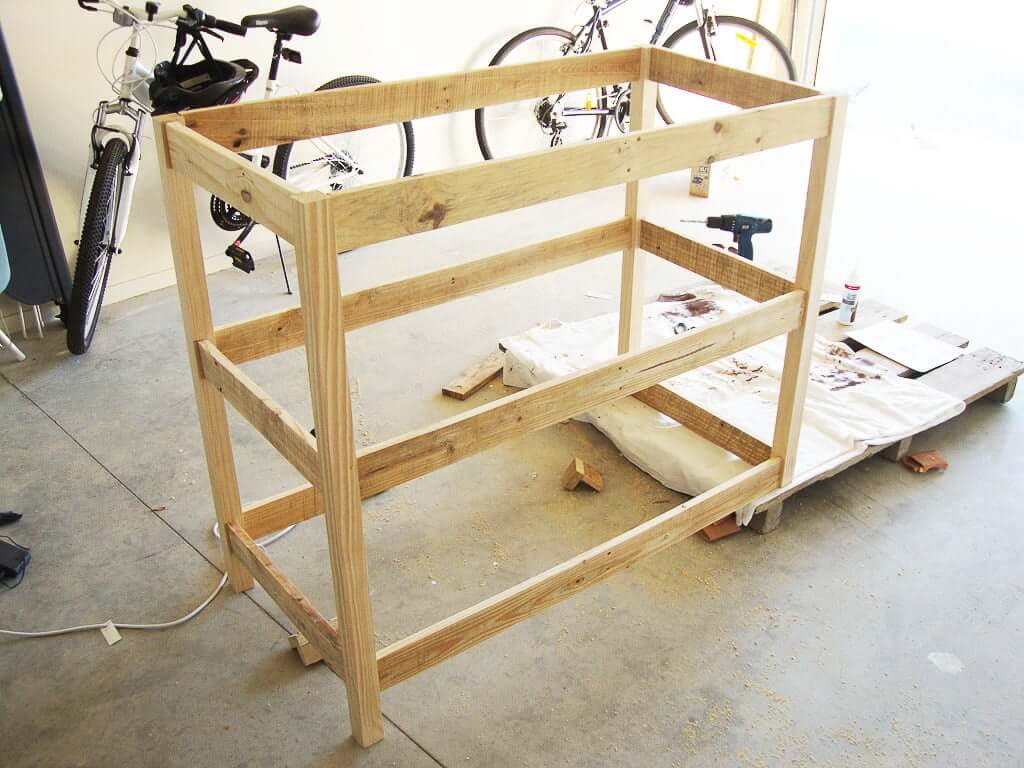
Matt whipped this little baby up with some less expensive wood (because I planned to paint it white, and you can use cheap wood for that), then he made a top for it with some nicer wood (which you want if you’re gonna stain it, which we did).
We tested it out in the kitchen for placement and spacing.
Really, pictures can’t show you HOW TIGHT this space was in here.
It’s the main walkway between the lounge and bedrooms/toilet, and the garage door opens into here.
We also were hoping to fit in a dining table around this area because we were OVER eating on the couch in our previous flat.

You may also have noticed the wheels. Ah yes, the castors. I’d already fallen in love with them on our best coffee table in the universe.
Matt put wheels on two of the kitchen island cart legs, then built the other two legs extra long so that they’d lay flat for stability (you can see this in the pic above).
Make sense? Yes!

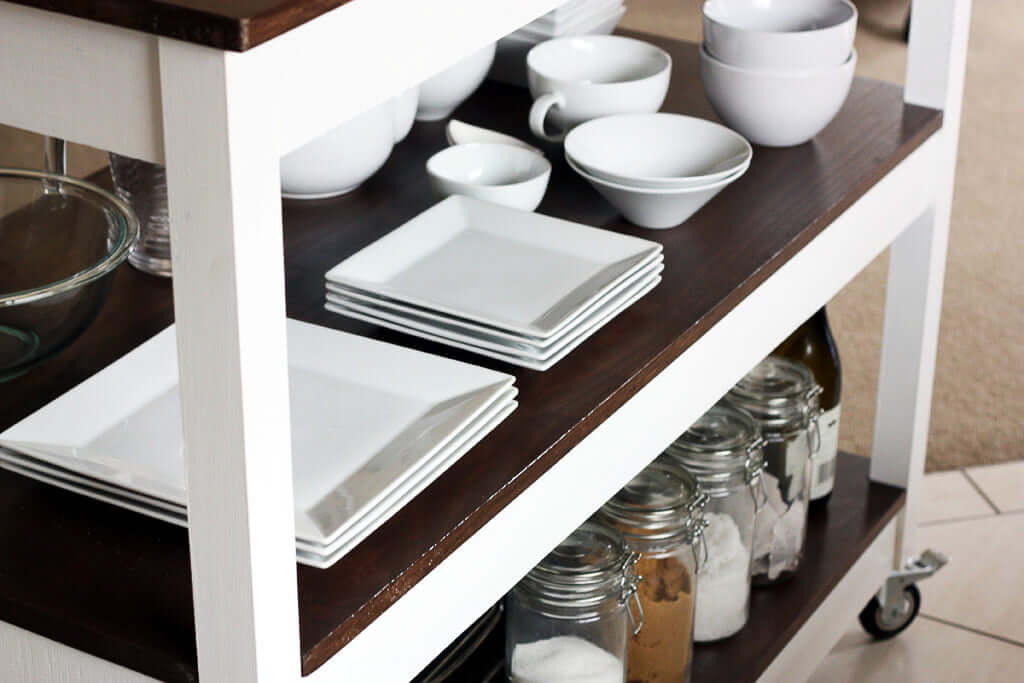
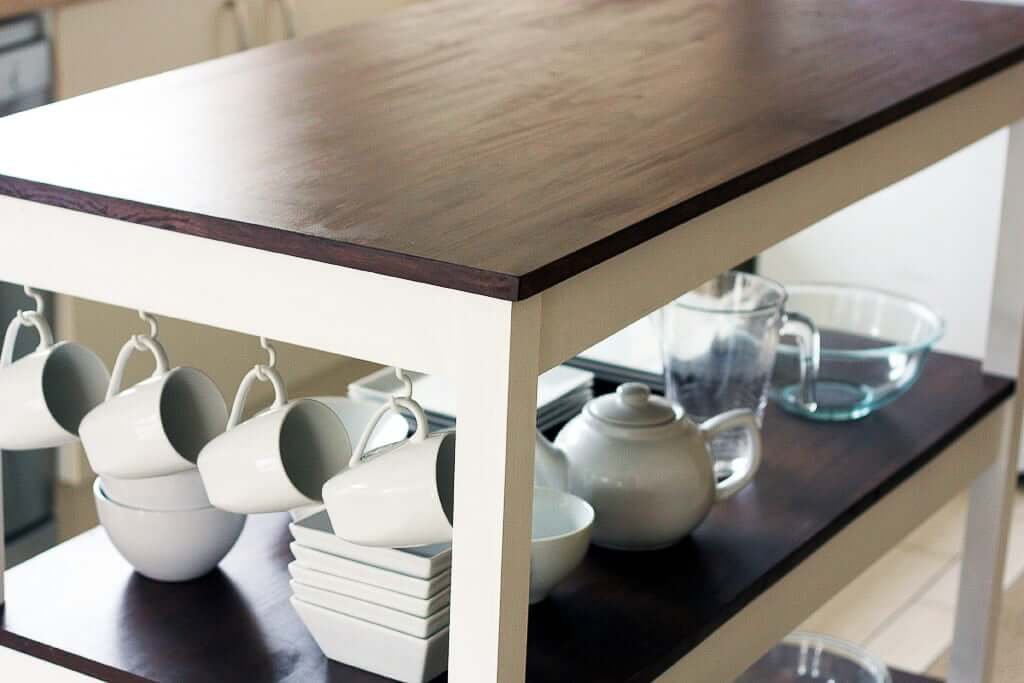
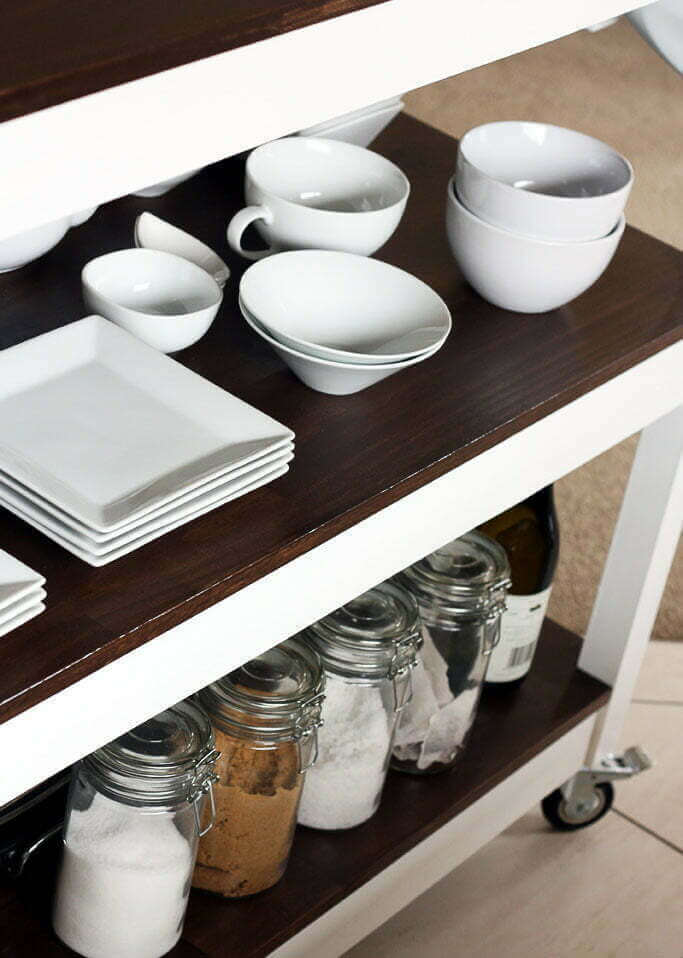
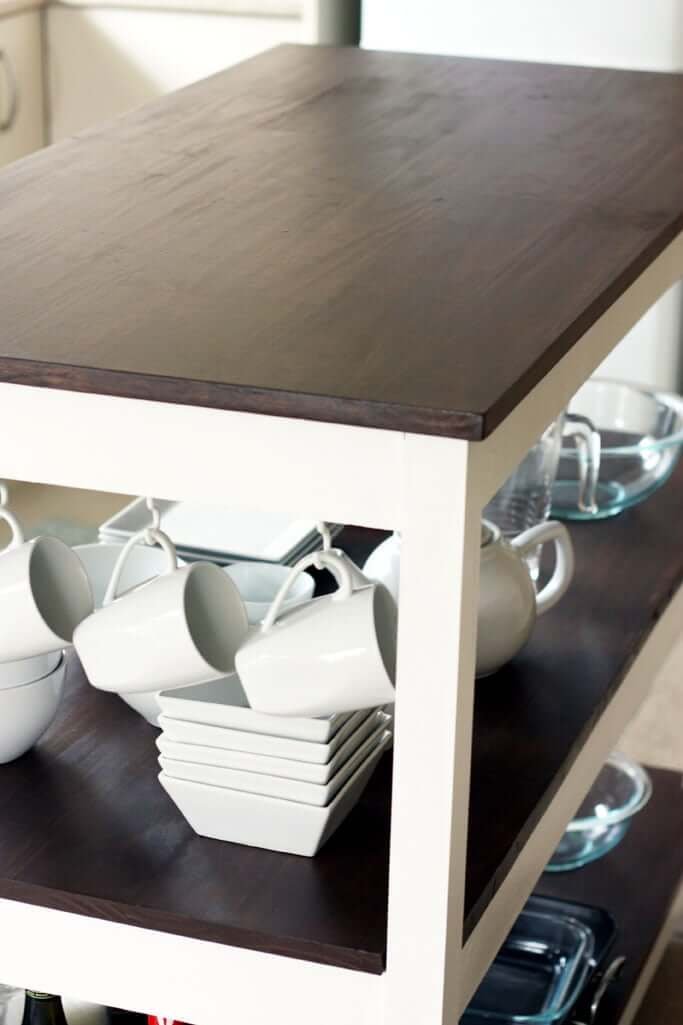
Adding storage.
You may also have noticed that we added storage shelves below the focus of all our endeavors: the counter space.
Why not? Even though this kitchen was still better than our prior one, we missed having that open shelving we’d had.
So this was one way of getting that function again for some of our most-grabbed items.
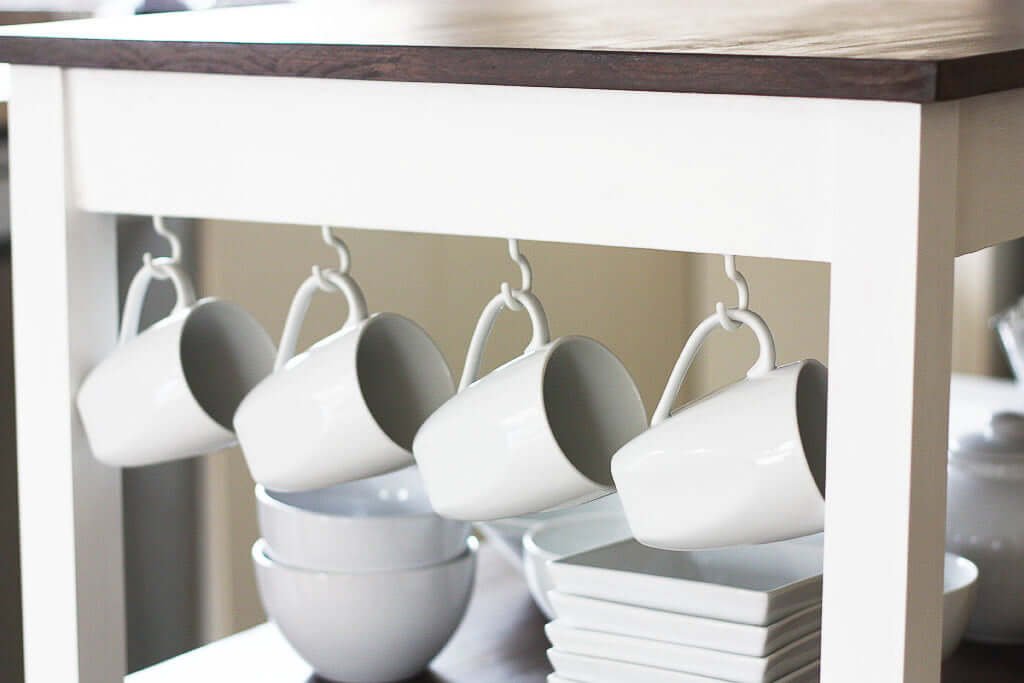
We had so enjoyed having those hooks for our mugs in our last flat too, so they made a reappearance.
There she is in all her glory, presiding over the kitchen like a queen who knows it.
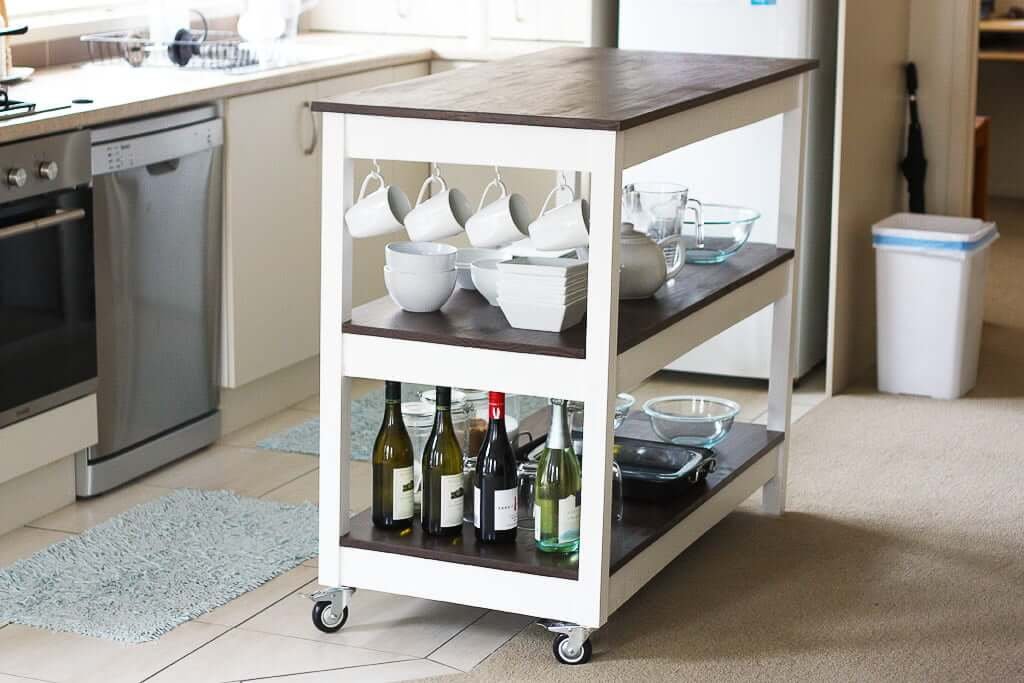
This kitchen island cart became the #1 commented-on item in our flat from then on. It completely changed not only the functionality but the look of the space!
(I say that at the same time I ask you to ignore the unattractive trash bin photo-bomb on the right. That was really the only place we could fit it, and at some point we just stopped caring. There’s some real life for ya.)
I mean, she’s just gorgeous! Even now, I want to stroke her and purr.

Look at all that added counter space!
It’s like a whole new kitchen.
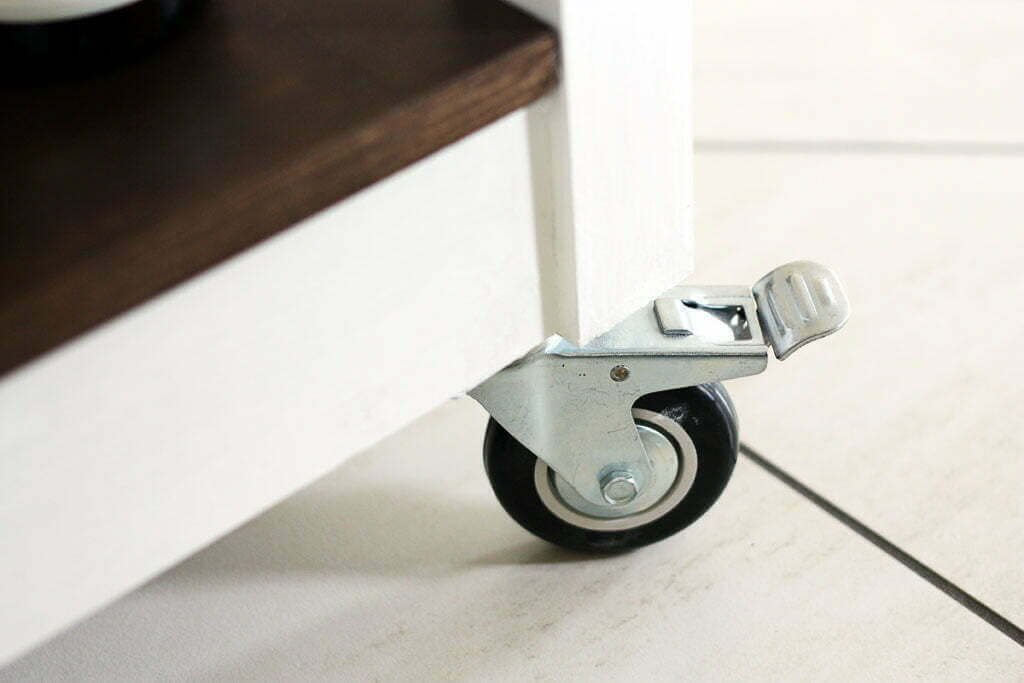
The castors were brilliant. We did actually use them to move this kitchen island cart around when needed.
(You wonder sometimes how much you’re actually going to want to move something once you find the perfect usual spot for it, but I think we all like having options.)
Tell me, why is having extra counter space so sweet?
Why could I—even now—just stare at pictures of all that beautiful openness for hours?
I can’t explain it. Maybe you can.
(Please, explain it to me.)
We never wanted to say goodbye.
We were soooooooooooooooo sad to say goodbye to her when we left New Zealand and moved to California. It would just have been far too expensive to ship her back with us…
…besides, we had some sweet friends from South Africa who had recently moved into a new flat with a kitchen similar to ours (e.g. little counter space).
So we knew our little kitchen island cart would be going to a good home, and that’s all we ever wanted for her.

Take the full tour of this flat, or check out the rest of our DIY projects from New Zealand!
Find all of our kitchen tips here!