Have you ever thought about adding an art studio shed in your backyard? They can be spendy when bought pre-made, so it’s definitely more cost-effective to build your own. But what’s involved in building your own art studio shed? Is it easy? Difficult? What’s involved?

I (Jess) had little idea of what would be involved as we planned to build our own art studio shed, and I knew others would find it interesting to learn as well! So instead of an intense “How to Build Your Own Art Studio Shed, Step-by-Step” post, I thought it would be fun to break down into what it’s like. What to expect in building your own shed—in layman’s terms. Instead of lengthy step-by-step explanations, I’ll just give you the idea of what’s involved so you can see exactly what you’d be in for should you choose to build your own!
And if there’s no way you ever would build your own, then at least this will be a fun, educational look at the process for those of us who don’t know how easy or fast the process of building a shed would be! (Myself included, until now.)
If you read our inspiration post, you’ll know all about our plans for this outdoor “art studio shed” space!
ART STUDIO SHED
Step 1: Design & Materials Selection
- We finalized the design (since the space isn’t a perfect square, so we’d had to get creative) and took final measurements.
- Matt got his materials from our local Home Depot, as well as placed orders with them for the doors and windows.
I’ll leave out a detailed explanation of alllllll the time we spent trying to find used doors and windows that would work and still look nice. In the end, we decided to buy new for our art studio. Let’s move on to the fun shed building part!
ART STUDIO SHED
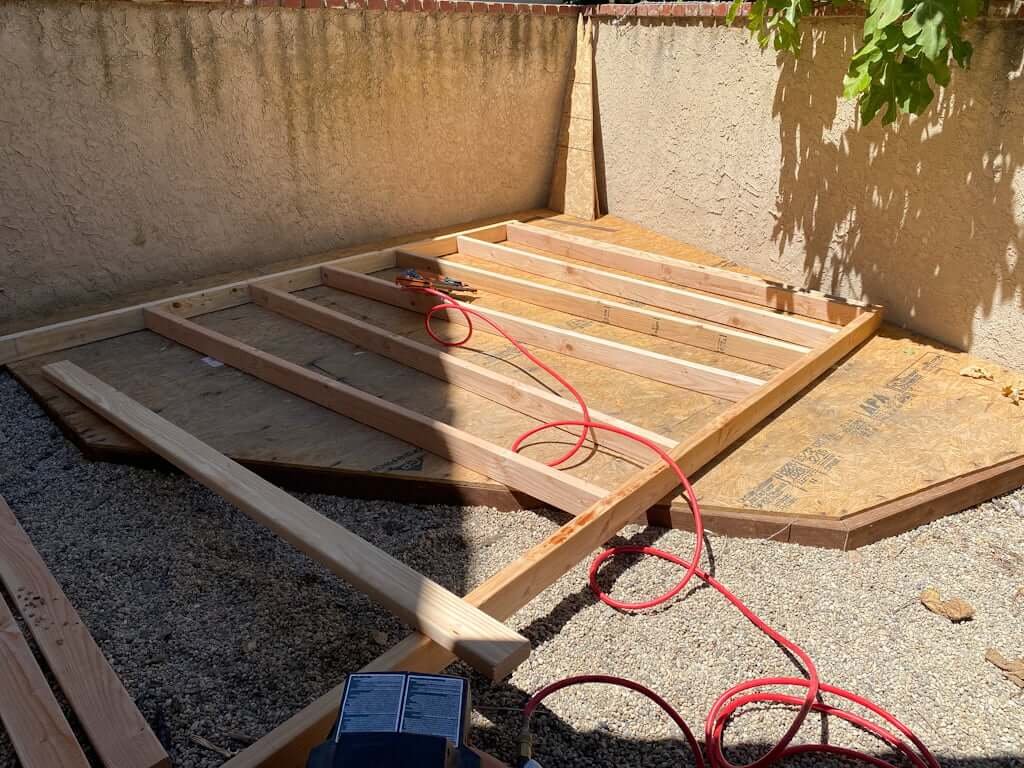
Step 2: Foundation
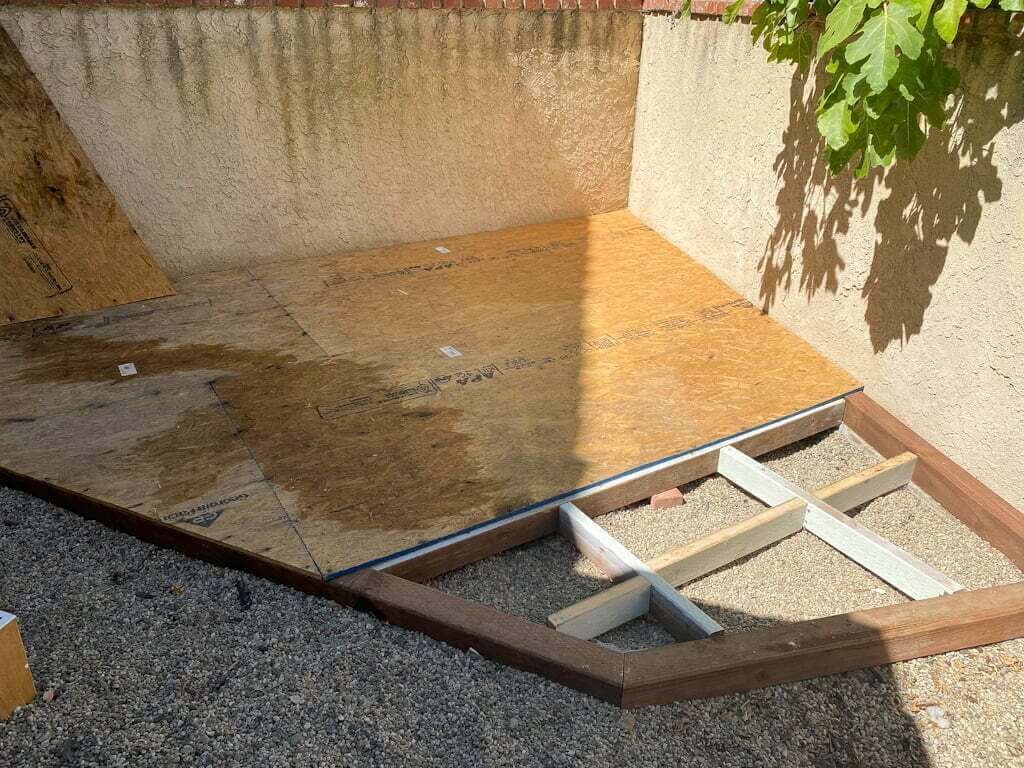
To prep and build the foundation for our art studio shed, Matt did the following:
- Leveled the gravel. (Because that’s what’s underneath our space for this shed.) We didn’t get rid of it because it provides good drainage in case of rain.
- Matt added cement blocks underneath for support. (And, as you can see, he added a couple extra bricks we had laying around just because we had them and why not? Extra support is always good!)
- He built the outside frame (those thicker-looking wood pieces…told you I wasn’t going to be technical).
- Then he built the inside frame and joists. (Matt had to give me that last word. I’d never have called them that. I would have said “the thinner wood pieces.”)
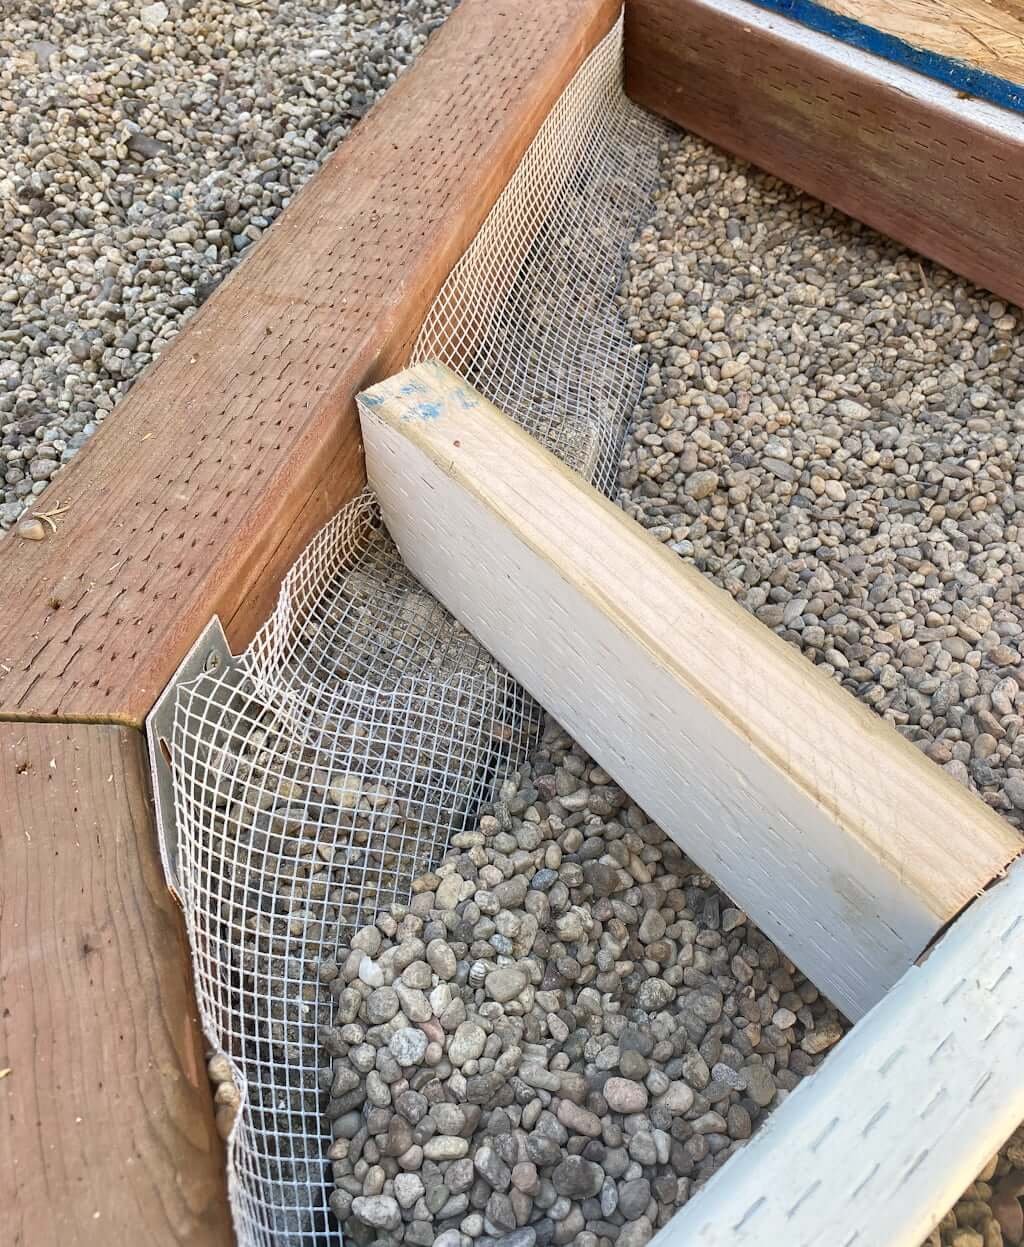
- To prevent anything from taking up residence below our art studio shed, we added a wire mesh. (We did the same thing below our new deck in our backyard makeover.)
- Matt laid the floorboards. (I can’t tell you what those are technically called, but my girls will tell you that the whole thing was exactly like a stage. And it was. They’ve performed several singing and dancing shows for us on it already. Which got my wheels turning and asking Matt, “So where could we build them a stage…?” I’m unstoppable.)
ART STUDIO SHED
Step 3: Prepping the Siding
Now this part made total sense to me. It was smart, and I recognize smart.
Before putting the back shed walls up, Matt primed and painted the exterior siding that would be going back there ahead of time. We wouldn’t have easy access to it later.
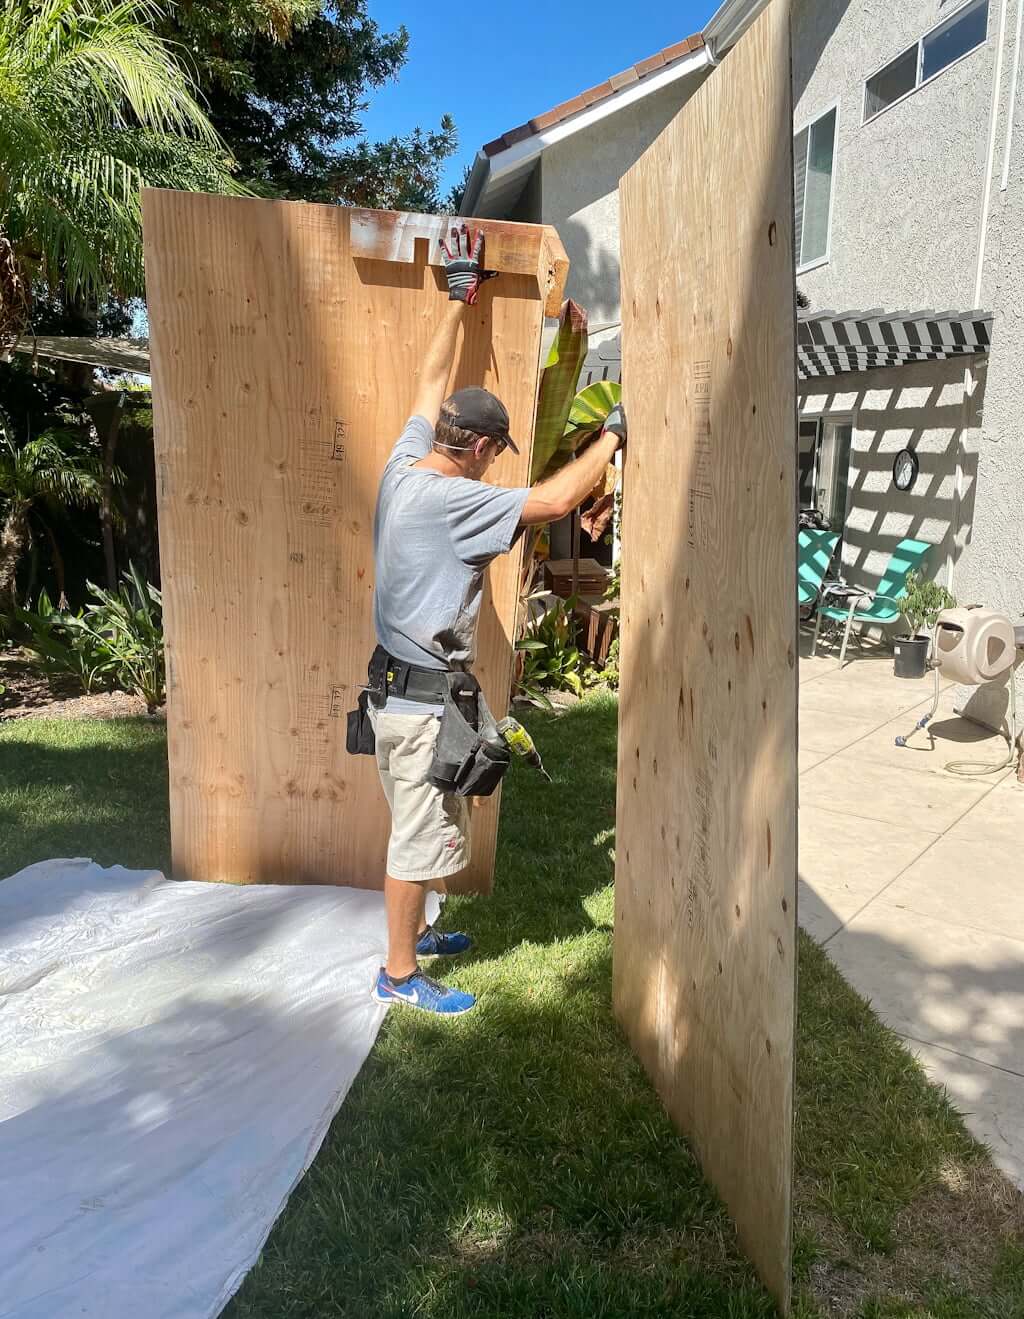
The second smart part was the way in which Matt set up the siding to get completely painted in a matter of minutes. To avoid having to roll each piece (HELLO time-consuming! I know that much because I have painted a LOT with rollers in my day), he was going to use his sprayer.
Sidenote: Matt’s paint sprayer is one of the best investments he said he ever made.
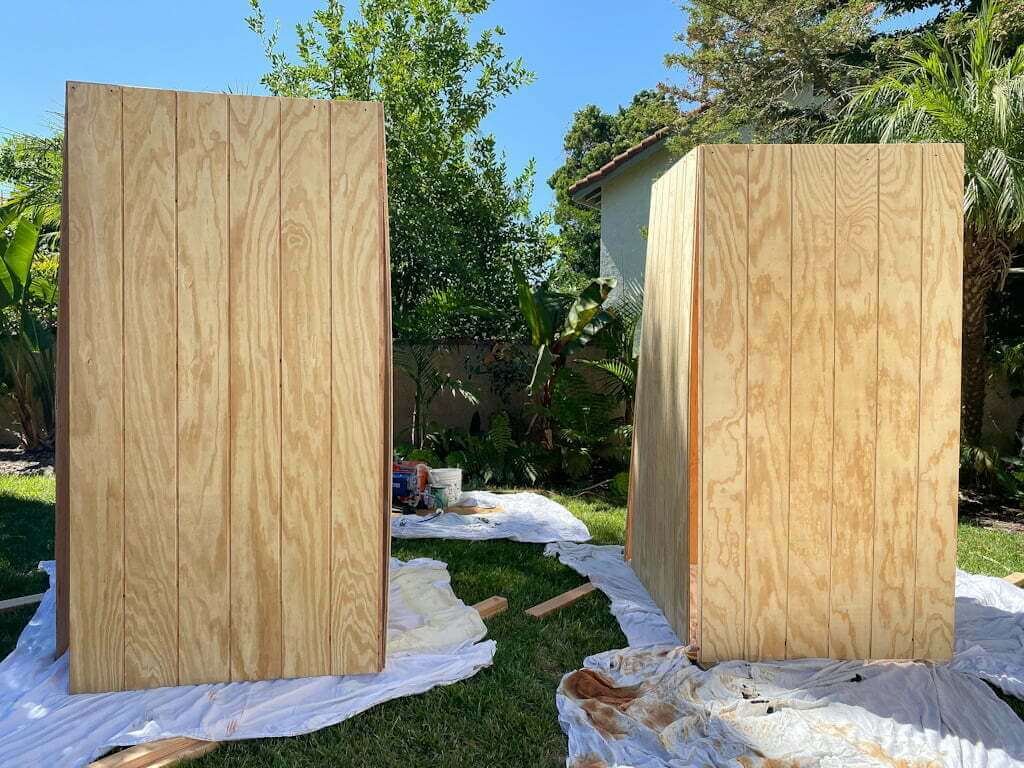
And instead of laying 8 pieces of siding out on our lawn (which wouldn’t fit so you’d have to do them in groups), he attached each of the large siding pieces to each other–upright. He did them in groups of 4, so there were two of these groups standing up, ready for him to paint.
The girls and I got out of the way, and he was done with the art studio shed walls in minutes. While they dried, he got to work on the next step.
ART STUDIO SHED
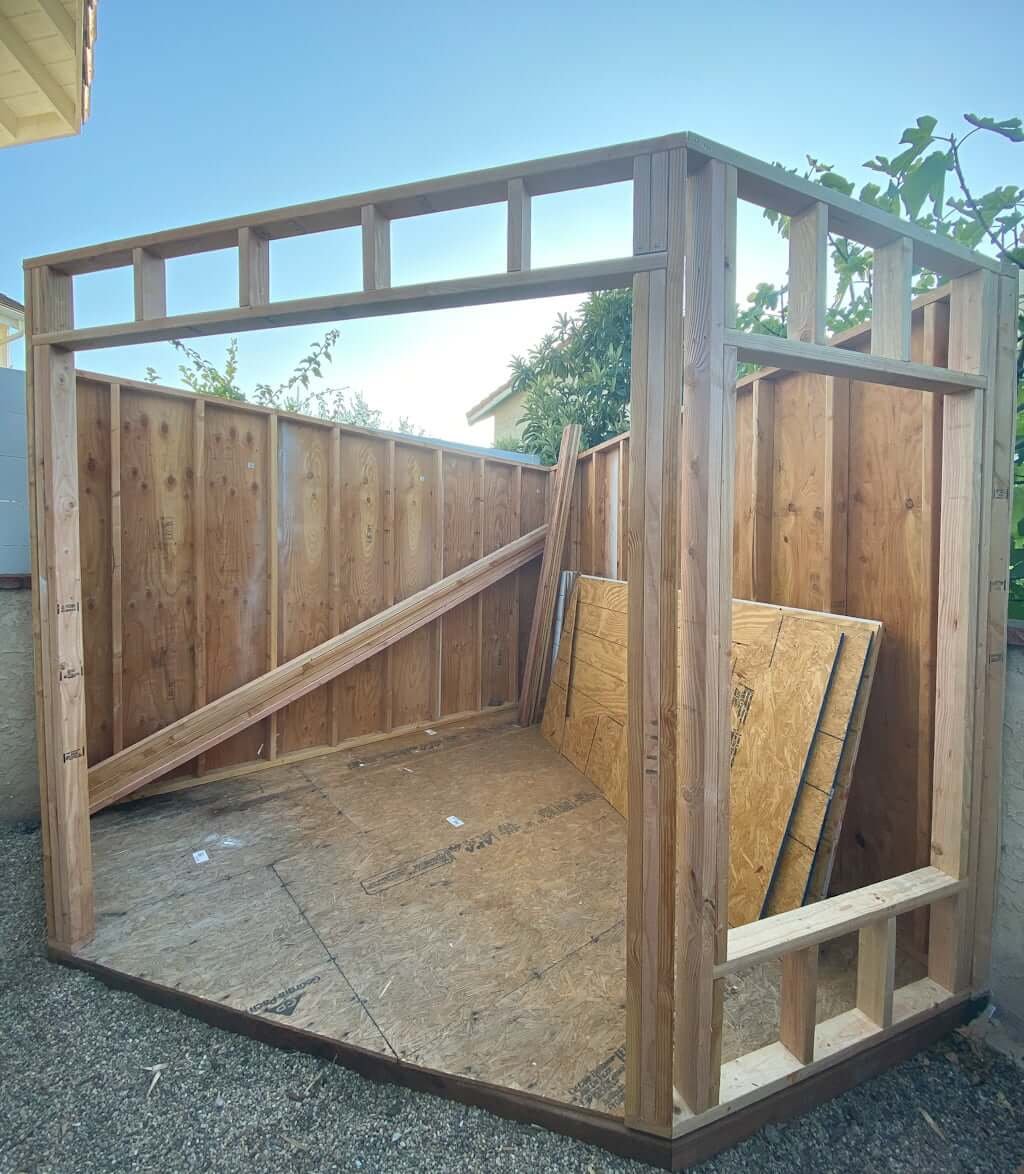
Step 4: Building the Back Walls
air compressor | framing nailer
This looks pretty self-explanatory to me. Matt clearly nailed a lot of long, thin pieces of wood together in an organized fashion, and below you can see that he’s going to check that it’s level.
(I should be a Professional Construction Commentator. Would you watch my show? Good! Thank you. Not a technical word will be spoken the entire time, and it will be marvelous.)
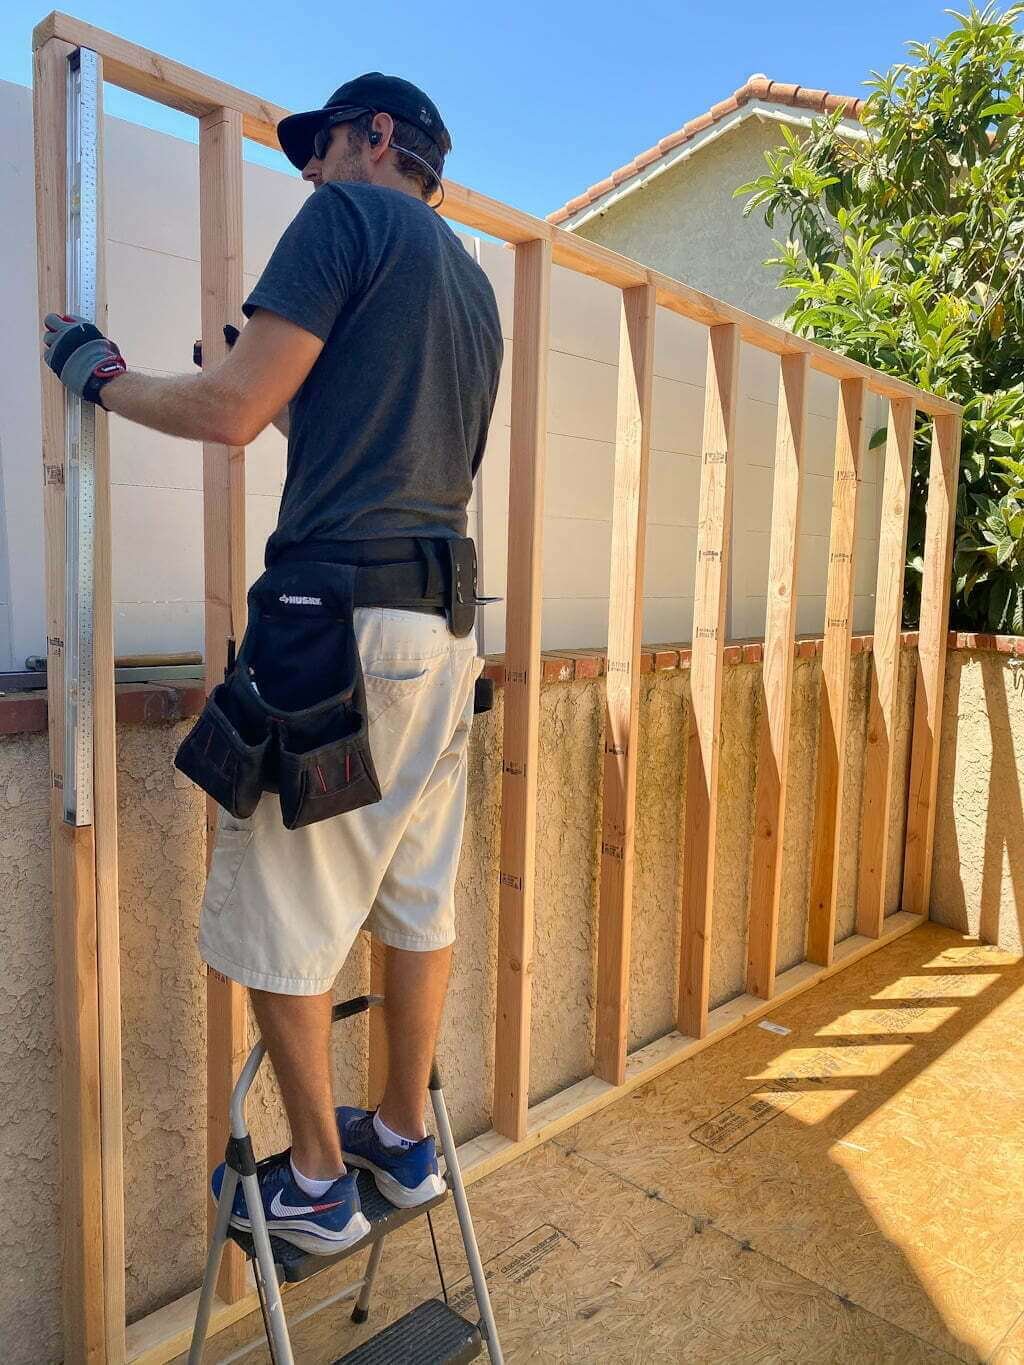
level| tool belt | step ladder
Before he puts up those back walls, though, he needs to attach that siding he painted earlier. You know, so we don’t have to figure out how to paint it behind later, and it’s all sealed and protected.
Below is what it looks like when Matt attached the siding to the walls before putting into place. SECRET: this is not actually the final siding color we’ll have on the front, but since these are the back walls and we’ll never see them, we just used up some of our extra exterior house paint from our massive exterior painting project. Maybe we’ll use this as the final color on the studio; maybe not. Time will tell, my friend. (I don’t even know my final color at this point. I’m unusually chillaxed about this project.)

ART STUDIO SHED
Step 5: Building the Front Walls
Next, the walls for the two windows and the front doors need to be built. We’re doing French doors because we want as much light to get into this studio-playhouse-shed as possible! With the two back walls unable to have windows (well, we could add windows there, but they’d look at nothing pretty), we’re maxing out the natural light “The Studio” gets.
Is it looking good, OR IS IT LOOKING GOOD?!?
I really want to pause for a moment and remember what this outdoor space used to look like…
ART STUDIO SHED
Step 6: Starting the Roof
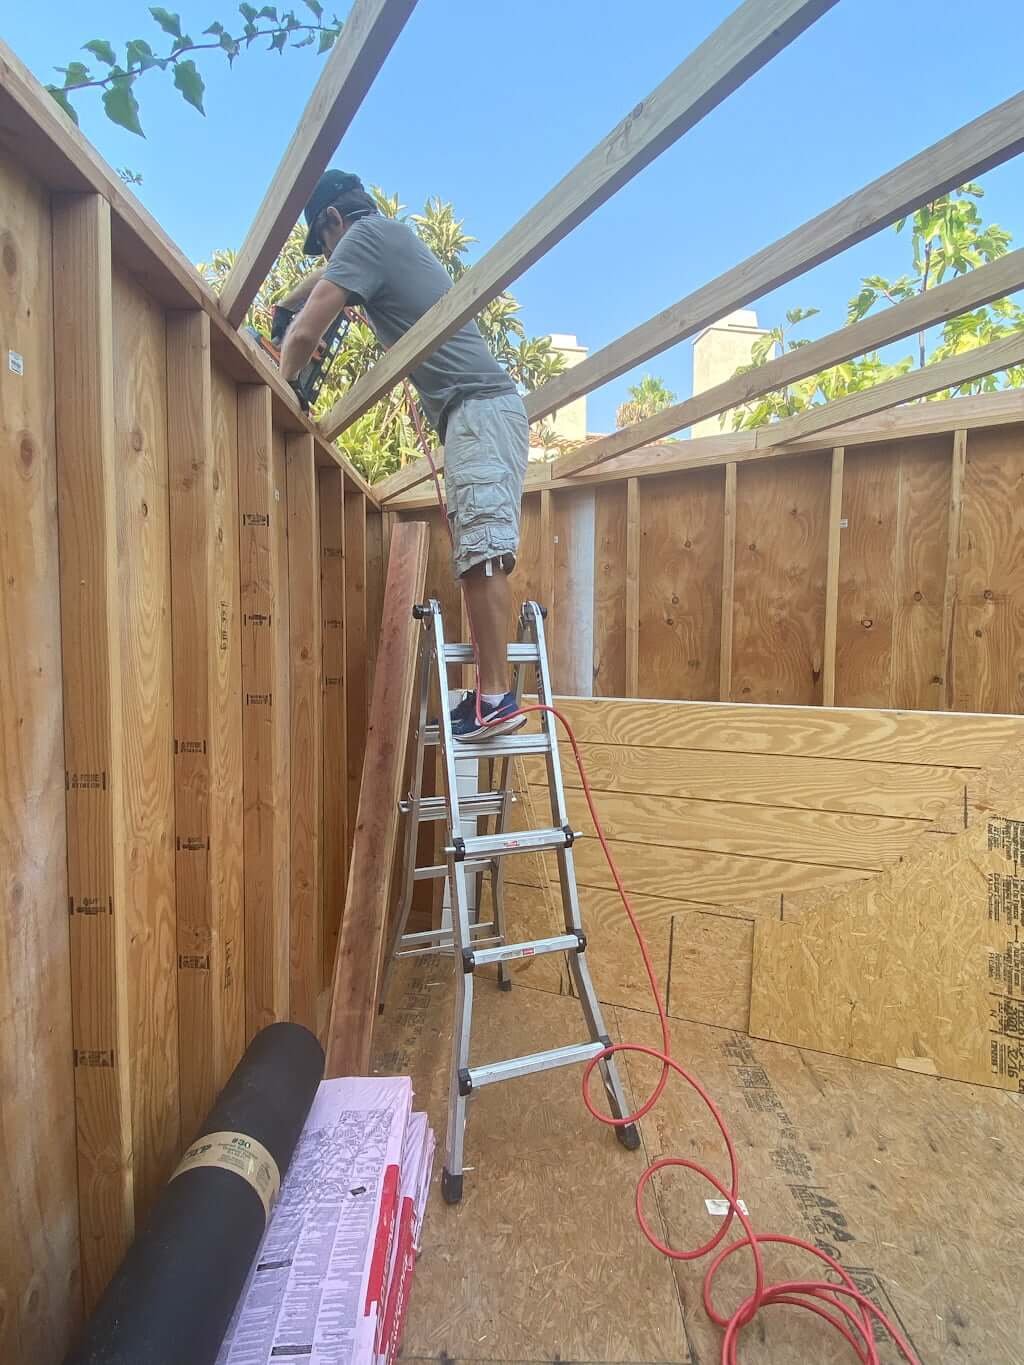
air compressor | framing nailer | ladder
Matt tells me that the first step in putting up a roof is to put up beams/supports. Personally, I’ve never actually constructed a roof from scratch myself, but what he says makes sense. I believe him. Supports sound good!
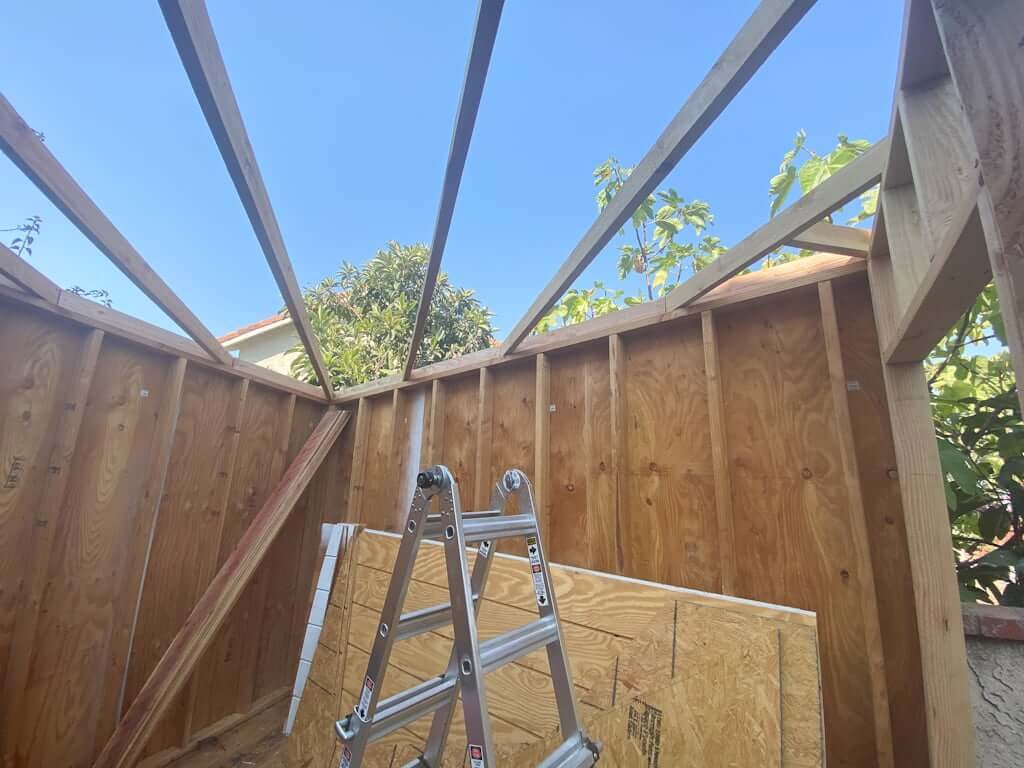
The beams look cool, too! I actually kinda like it open like this (you know me, Claustrophobe + Lover of Light), but I know once the rain comes (all two days we’ll get here in SoCal), I’ll be happy it has a full roof.
Here he is, folks. The Brawn for my Brain. It’s a good thing we got married.
air compressor | framing nailer | ladder
Part 2 coming soon! A roof, doors, windows, and more is allllll in the works over here!
➜ See our inspiration for our art studio shed by clicking here!
➜ To see the rest of our backyard, click to see our “Backyard Makeover: Outdoor Seating, BBQ, & Pool, Oh My!“
➜ All our house updates + renovations are on Our Current House page.


Neat, thank you for posting this! How much did this cost?